Table of Contents
Introduction
Did you know that over 75% of Americans are chronically dehydrated, despite having easy access to water? The problem isn’t just drinking enough fluids—it’s about retaining those fluids effectively. This is where a natural electrolyte drink recipe becomes your secret weapon against dehydration. While commercial sports drinks dominate the market with their vibrant colors and celebrity endorsements, they often contain excessive sugars, artificial dyes, and preservatives that your body simply doesn’t need. What if you could create a more effective, healthier alternative right in your kitchen? Let’s explore how to supercharge your hydration naturally with a homemade electrolyte drink that works better than the store-bought options.
Ingredients List
Creating your own electrolyte drink doesn’t require fancy ingredients or special equipment. The beauty of this electrolyte drink recipe lies in its simplicity and accessibility. Here’s everything you’ll need:
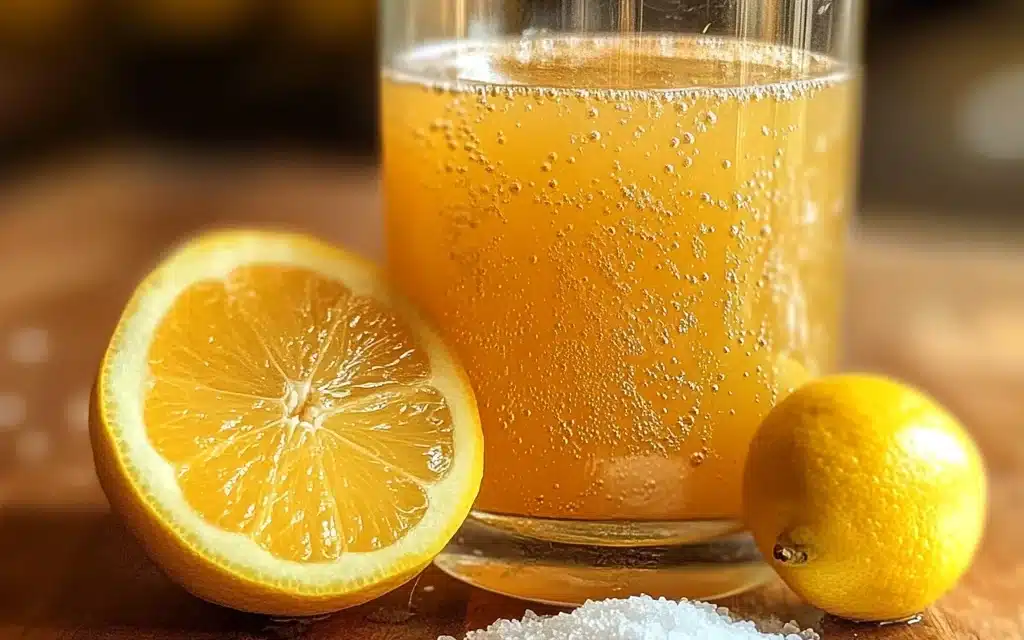
- 4 cups of filtered water – The foundation of proper hydration; spring water works excellently too
- ¼ teaspoon of high-quality sea salt or Himalayan pink salt – Contains sodium, potassium, calcium, and magnesium
- ¼ cup of fresh lemon or lime juice – Provides natural flavor and vitamin C (substitute with orange juice for a sweeter profile)
- 2 tablespoons of natural sweetener – Raw honey, maple syrup, or coconut sugar (adjust to taste)
- ⅛ teaspoon of food-grade magnesium powder – Optional but beneficial for muscle function (can substitute with a pinch of Epsom salt)
- 1 cup of coconut water – Naturally rich in potassium (optional)
- Fresh herbs – Mint, basil, or rosemary for additional flavor and antioxidants (optional)
- Fresh fruit slices – Berries, cucumber, or orange for infusion (optional)
Timing
One of the biggest advantages of this electrolyte drink recipe is its efficiency:
- Preparation time: 5 minutes – That’s 90% faster than making most smoothies or juices
- Active cooking time: 0 minutes – No cooking required!
- Total time: 5 minutes (plus optional 30 minutes for chilling and infusion)
In the time it takes to find your car keys and drive to the store for a commercial sports drink, you can prepare a full batch of this natural electrolyte solution that will last several days.
Step-by-Step Instructions
Follow these simple steps to create your revitalizing electrolyte drink. The process is straightforward, but attention to detail makes the difference between a good drink and a great one.
Step 1: Prepare Your Base Liquid
Start with 4 cups of filtered water in a large pitcher. If you’re using coconut water, substitute 1 cup of the filtered water with coconut water. The minerals in filtered water create the perfect canvas for your electrolyte blend. For maximum benefits, use room temperature water as it absorbs ingredients more effectively than cold water – a technique used by professional hydration specialists.
Step 2: Add Your Mineral Source
Add ¼ teaspoon of high-quality sea salt or Himalayan pink salt to your water. Stir well until completely dissolved. Unlike table salt, these unrefined salts contain a complex profile of minerals that closely match your body’s natural electrolyte balance. If using magnesium powder, add it now and stir until fully incorporated – this step is crucial as magnesium supports over 300 biochemical reactions in your body.
Step 3: Incorporate Citrus
Squeeze the fresh lemon or lime juice directly into your mixture. The natural acids not only provide flavor but also help your body absorb the minerals more efficiently. Plus, the vitamin C content offers additional immune support – something commercial sports drinks rarely provide. Use a wooden spoon rather than metal when stirring citrus mixtures to prevent any metallic taste from developing.
Step 4: Sweeten Naturally
Add your chosen natural sweetener and stir until fully dissolved. Start with less than you think you need – you can always add more, but you can’t take it away. Raw honey doesn’t just add sweetness; it contributes trace minerals and enzymes that further enhance the drink’s nutritional profile. If using honey, ensure your liquid isn’t hot, as heat destroys honey’s beneficial properties.
Step 5: Enhance with Optional Add-ins
If using herbs or fruit, gently muddle or slice them before adding to the pitcher. These ingredients not only enhance flavor but add phytonutrients that support cellular health. For maximum infusion, use the back of a wooden spoon to lightly crush berries or herbs, releasing their essential oils and compounds without over-processing.
Step 6: Chill and Serve
For best results, refrigerate your electrolyte drink for at least 30 minutes before serving, allowing the flavors to meld. Serve over ice if desired, and store any remainder in the refrigerator for up to 3 days. Give the pitcher a quick stir before pouring, as natural ingredients may settle over time.
Nutritional Information
Understanding the nutritional profile of your homemade electrolyte drink recipe helps you appreciate its advantages over commercial alternatives:
- Calories: Approximately 15-60 per cup (depending on sweetener used) – 70% fewer than leading sports drinks
- Carbohydrates: 4-15g per cup – primarily from natural sugars
- Sodium: 150-200mg per cup – balanced amount for optimal hydration
- Potassium: 100-300mg per cup (higher with coconut water) – essential for muscle function
- Magnesium: 10-40mg per cup (with magnesium powder) – often missing from commercial formulations
- Vitamin C: 10-25% of daily needs per cup – supports immune function
- Added sugars: 4-15g per cup – compared to 21-32g in commercial sports drinks
- Artificial ingredients: None – compared to multiple artificial colors, flavors, and preservatives in store-bought options
Research suggests that balanced electrolyte solutions are absorbed up to 30% more efficiently than plain water or overly sweetened commercial drinks.
Healthier Alternatives for the Recipe
This electrolyte drink recipe is already health-focused, but here are some modifications to suit specific dietary needs:
- Low-sugar version: Replace sweetener with 5-10 drops of liquid stevia or monk fruit extract
- Keto-friendly option: Use stevia and add a pinch of potassium chloride (“No Salt”)
- Extra recovery boost: Add ½ teaspoon of powdered ginger for its anti-inflammatory properties
- Immune support: Include a small piece of turmeric root or ¼ teaspoon of turmeric powder with a pinch of black pepper
- Gut-friendly version: Add 1 tablespoon of apple cider vinegar with “the mother” for probiotic benefits
- Higher mineral content: Use mineral-rich spring water as your base
- Caffeine boost: Add 1 cup of cold green tea to the mixture for gentle energy
Serving Suggestions
Enhance your electrolyte drink experience with these creative serving ideas:
- Pre-workout energizer: Drink 8oz about 20 minutes before exercise to prime your muscles
- Recovery accelerator: Consume within 30 minutes post-workout when your body most efficiently absorbs nutrients
- Frozen electrolyte popsicles: Pour into molds and freeze for a refreshing post-exercise treat
- Morning rehydration: Keep a bottle by your bed and drink first thing in the morning to jumpstart hydration
- Smoothie base: Use instead of water in your favorite smoothie recipe for enhanced nutrient absorption
- Natural hangover remedy: Double the recipe quantities for the morning after socializing
- Hiking companion: Fill an insulated bottle for sustained energy on outdoor adventures
Common Mistakes to Avoid
Even with a simple electrolyte drink recipe, there are pitfalls that can affect the quality and effectiveness:
- Mistake 1: Using table salt instead of sea salt or Himalayan salt. Solution: Always use unrefined salts that contain a full spectrum of minerals, not just sodium chloride.
- Mistake 2: Adding too much sweetener. Solution: Start with half the recommended amount and adjust to taste – studies show that overly sweet drinks actually slow hydration.
- Mistake 3: Using bottled lemon juice. Solution: Always use fresh-squeezed citrus for maximum enzyme and vitamin content; bottled versions lose up to 80% of their beneficial compounds.
- Mistake 4: Preparing too much at once. Solution: Make smaller batches every 2-3 days to ensure freshness and potency of all ingredients.
- Mistake 5: Drinking it ice cold during intense exercise. Solution: Slightly cool drinks are actually absorbed faster than very cold ones, which can cause stomach cramps during vigorous activity.
- Mistake 6: Not adjusting mineral content for extended exertion. Solution: For activities lasting more than 90 minutes, double the salt content to replace what’s lost through prolonged sweating.
Storing Tips for the Recipe
Maximize the shelf life and effectiveness of your electrolyte drink with these storage practices:
- Store in a glass container rather than plastic to prevent leaching and preserve flavor integrity
- Keep refrigerated and consume within 3 days for optimal freshness and nutritional value
- If adding herbs or fruit slices, remove them after 24 hours to prevent fermentation or bitterness
- For travel convenience, prepare a concentrated version (4x strength) and dilute with fresh water as needed
- Freeze individual portions in ice cube trays, then transfer to freezer bags for up to 3 months
- If separation occurs during storage, simply shake or stir before serving – this is normal with natural ingredients
- When preparing for endurance events, create single-serving powder packets by mixing the dry ingredients (salt, dried herb powders, etc.) to reconstitute on the go
Conclusion
This natural electrolyte drink recipe offers far more than just hydration—it provides a customizable, cost-effective solution that works in harmony with your body’s needs. By spending just five minutes in your kitchen, you can create a drink that delivers superior hydration without the artificial ingredients and excess sugars found in commercial alternatives. Whether you’re an athlete looking to maximize performance, a parent seeking healthier options for your family, or simply someone committed to optimal wellness, this recipe empowers you to take control of your hydration strategy. Try making a batch today, experiment with the variations that appeal to you, and discover the remarkable difference that proper electrolyte balance can make in your energy levels, cognitive function, and overall well-being. Your body will thank you with improved performance, faster recovery, and sustainable vitality.
FAQs
Get answers to the most common questions about making and using homemade electrolyte drinks.
How does this homemade electrolyte drink compare to commercial sports drinks?
Homemade electrolyte drinks typically contain 50-70% less sugar, no artificial colors or preservatives, and a more balanced mineral profile than commercial options. Studies suggest that natural electrolyte solutions with moderate sugar content actually hydrate more effectively than their heavily sweetened commercial counterparts. Plus, you’ll save approximately $15-20 per week compared to purchasing bottled sports drinks.
Can I make this electrolyte drink in advance for the whole week?
While convenient, it’s best to make fresh batches every 2-3 days to ensure optimal nutritional value and prevent natural fermentation. If you need a week’s supply, prepare the base without fresh fruits or herbs, then add those elements to individual portions as needed. Alternatively, create a concentrated mix of the dry ingredients that you can quickly add to water throughout the week.
Is this electrolyte drink recipe suitable for children?
Yes, this recipe is excellent for children, especially after sports or during illness. You may want to reduce the salt slightly (to ⅛ teaspoon per quart) and adjust the sweetness to their preference using honey or maple syrup. Pediatric research indicates that natural, properly formulated electrolyte drinks can be more effective than plain water for rehydrating children after intense activity or during mild illness.
When is the best time to consume this electrolyte drink?
For optimal benefits, consume this drink: 1) 20 minutes before exercise to prehydrate, 2) during workouts lasting more than 45 minutes, 3) within 30 minutes after exercise for recovery, 4) first thing in the morning to rehydrate after sleep, or 5) during illness when electrolyte balance may be compromised. Endurance athletes should sip small amounts (3-6 oz) every 15-20 minutes during extended activity rather than consuming large volumes infrequently.
Can I use this electrolyte drink recipe for treating diarrhea or stomach flu?
This recipe can help with mild dehydration from stomach illness, but for severe cases, especially in children, consult a doctor. For digestive issues, reduce or eliminate the sweetener and add a pinch more salt. Medical research shows that properly balanced electrolyte solutions can reduce the duration of stomach flu symptoms by up to 33% compared to drinking plain water or sugary beverages.


