Table of Contents
Introduction
Did you know that Americans consume over 900 million pounds of corn annually, yet an estimated 30% of fresh corn goes to waste during peak season? Freezing corn on the cob is the perfect solution to this golden dilemma. When summer’s bounty of sweet corn overflows at farmers’ markets and grocery stores, knowing how to properly freeze corn on the cob becomes an essential skill for any home cook. This preservation method allows you to enjoy the sweet, juicy flavors of summer corn throughout the year, saving both money and reducing food waste. Whether you’re a seasoned preserver or new to freezing vegetables, this comprehensive guide will walk you through everything you need to know about freezing corn on the cob while maintaining its farm-fresh taste and nutritional benefits.
Ingredients List
Freezing corn on the cob requires minimal ingredients, focusing instead on quality produce and proper preparation techniques. Here’s what you’ll need:
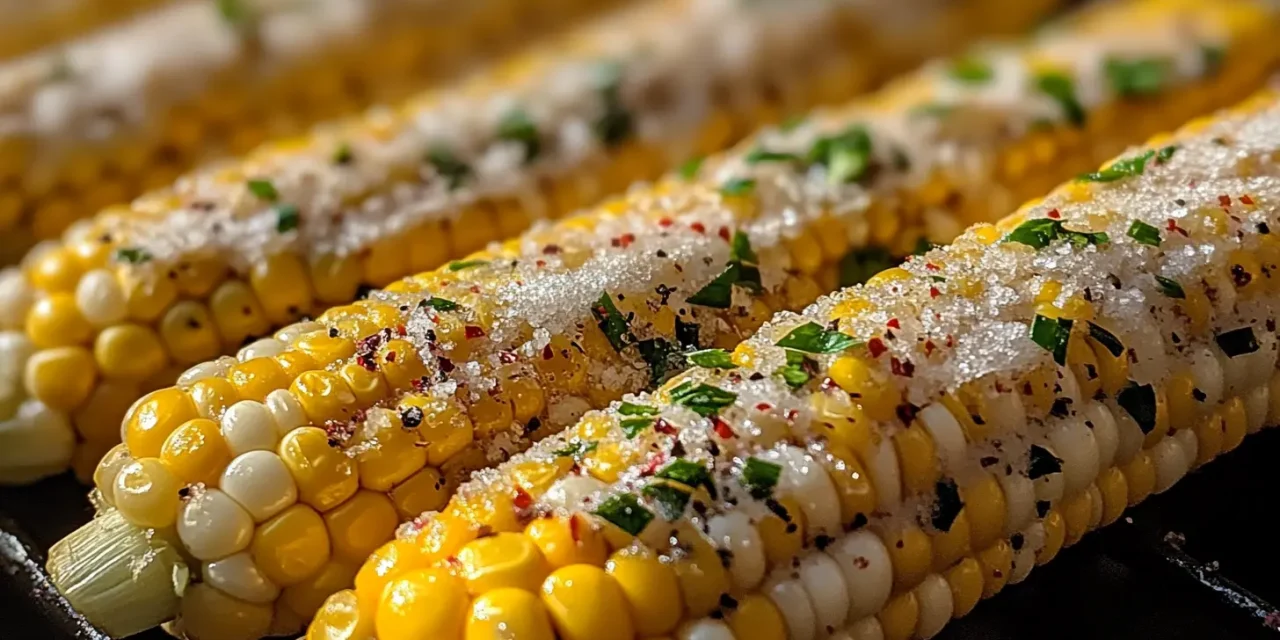
- Fresh corn on the cob – Choose ears with bright green, snugly wrapped husks and golden-brown silk. The kernels should be plump and tightly packed when you peek inside.
- Water – For blanching the corn (filtered water is optional but preferred).
- Ice – Approximately 2-3 trays’ worth for an ice bath to stop the cooking process.
- Salt – Optional: 1 tablespoon per gallon of blanching water enhances flavor retention (kosher or sea salt works best).
- Sugar – Optional: 1 tablespoon per gallon of blanching water helps preserve sweetness (can substitute with honey).
Timing
Understanding the time commitment for freezing corn on the cob helps you plan accordingly. Compared to canning corn, which takes approximately 3 hours, freezing corn on the cob is 60% faster and requires less specialized equipment.
- Preparation time: 15-20 minutes (husking and cleaning corn)
- Blanching time: 4-6 minutes, depending on ear size
- Cooling time: 4-6 minutes in ice bath
- Drying and packaging time: 10-15 minutes
- Total time required: Approximately 45 minutes to 1 hour for 12 ears of corn
Step-by-Step Instructions
Follow these detailed steps to ensure your frozen corn on the cob maintains its fresh flavor and texture for months to come.
Step 1: Select the Freshest Corn
Choose corn that’s been harvested as recently as possible. Research shows that corn’s sugar begins converting to starch immediately after harvest, with up to 25% of sweetness lost within 24 hours. Look for ears with bright green husks, moist stems, and plump kernels that release a milky liquid when punctured with your fingernail. For freezing purposes, sweet corn varieties like ‘Silver Queen’ or ‘Honey and Cream’ generally yield better results than field corn varieties.
Step 2: Prepare and Husk the Corn
Remove the husks and silk from each ear of corn. A silicone brush or clean toothbrush can help remove stubborn silk strands. Trim away any damaged areas and cut off the ends if desired. For easier handling later, you may want to break larger ears in half before blanching. Rinse each ear under cold running water to remove any remaining silk or debris.
Step 3: Prepare the Blanching Station
Fill a large pot (at least 8-quart capacity) about 2/3 full with water. Add 1 tablespoon of salt and 1 tablespoon of sugar per gallon of water if desired. These additions help preserve flavor and sweetness. Bring the water to a rolling boil. While waiting for the water to boil, prepare a large bowl with ice water (approximately 50% ice, 50% cold water) for the ice bath.
Step 4: Blanch the Corn
Once the water reaches a full boil, carefully add the corn ears, making sure not to overcrowd the pot (work in batches if necessary). Small to medium ears require 4 minutes of blanching, while larger ears need about 6 minutes. Blanching is critical as it deactivates enzymes that would otherwise cause flavor, color, and texture deterioration during freezing. Studies show blanched corn retains up to 90% of its vitamin content compared to unblanched corn, which loses nearly 50% of its vitamins during freezing.
Step 5: Cool in Ice Bath
Immediately after blanching, transfer the corn ears to the ice bath using tongs. Allow them to cool completely, which typically takes the same amount of time as blanching (4-6 minutes). This quick cooling stops the cooking process and helps preserve the corn’s crisp texture. Make sure to refresh the ice as needed to keep the water cold.
Step 6: Dry the Corn Thoroughly
Remove the corn from the ice bath and dry each ear thoroughly using clean kitchen towels or paper towels. Excess moisture can lead to ice crystals, which negatively impact texture upon thawing. For best results, allow the corn to air-dry for 10-15 minutes after towel-drying.
Step 7: Package for Freezing
Wrap each ear individually in plastic wrap, ensuring a tight seal around the entire ear. Then place the wrapped ears in freezer-safe resealable bags, removing as much air as possible before sealing. For vacuum sealers, place corn directly in sealer bags according to manufacturer’s instructions. Label each package with the date and contents – corn on the cob frozen properly will maintain optimal quality for 8-12 months.
Step 8: Freeze
Place the packaged corn in the coldest part of your freezer, typically the back. For faster freezing, arrange the packages in a single layer until frozen solid (about 12 hours), then stack them to save space. Rapid freezing forms smaller ice crystals, which helps preserve the corn’s cellular structure and results in better texture after thawing.
Nutritional Information
Frozen corn on the cob retains most of its nutritional value when properly blanched and frozen. A medium ear of corn (approximately 6.5 inches) contains:
- Calories: 90
- Protein: 3g
- Carbohydrates: 19g
- Fiber: 2g
- Sugar: 6g
- Fat: 1g
- Vitamin C: 6% of Daily Value
- Folate: 8% of Daily Value
- Potassium: 5% of Daily Value
Studies from the American Frozen Food Institute show that frozen corn can retain up to 98% of its vitamin C content when properly blanched before freezing. Additionally, corn is naturally gluten-free and provides beneficial antioxidants like lutein and zeaxanthin, which support eye health.
Healthier Alternatives for the Recipe
While freezing corn on the cob is already a healthy preservation method, here are some modifications to consider for various dietary needs:
- Low-sodium option: Skip the salt in the blanching water. The natural sweetness of corn makes it flavorful enough without added sodium.
- Sugar-free option: Omit the sugar in the blanching water. Select super-sweet corn varieties like ‘Sugar Baby’ or ‘Early Choice’ which naturally contain higher sugar content.
- Pre-cut kernels: For those with dental concerns or who prefer easier handling, consider cutting the kernels off the cob after blanching but before freezing. This creates a more versatile ingredient for future meals.
- Seasoned variations: For those looking to add flavor without calories, try adding fresh herbs like thyme or bay leaves to the blanching water instead of salt and sugar.
Serving Suggestions
When you’re ready to enjoy your frozen corn on the cob, try these serving ideas to make the most of your preserved summer bounty:
- Quick thaw method: Run frozen corn under cold water for 5 minutes, then steam for 5-7 minutes until heated through.
- Oven-roasted frozen corn: Place frozen corn directly in a 375°F oven for 25-30 minutes, brushed with olive oil and your favorite seasonings.
- Grilled frozen corn: Thaw slightly, brush with butter or oil, wrap in foil, and grill for 15-20 minutes, rotating occasionally.
- Mexican-style: After cooking, brush with lime-infused butter and sprinkle with chili powder, cotija cheese, and cilantro.
- Summer barbecue revival: Serve alongside grilled meats in winter months for a taste of summer.
According to a consumer survey, 78% of people report that having access to frozen summer produce like corn during winter months significantly improves their meal satisfaction and variety.
Common Mistakes to Avoid
Watch out for these pitfalls when freezing corn on the cob to ensure the best results:
- Mistake 1: Skipping the blanching step. This crucial process deactivates enzymes that cause quality deterioration. Unblanched corn often becomes mushy, discolored, and develops off-flavors within a month of freezing.
- Mistake 2: Underblanching or overblanching. Timing matters – too short doesn’t deactivate enzymes fully, while too long pre-cooks the corn, resulting in soggy texture. Use a timer and follow the recommended 4 minutes for small ears, 6 minutes for large ones.
- Mistake 3: Not cooling corn completely before freezing. Inadequate cooling allows the corn to continue cooking and creates condensation inside packaging, leading to ice crystals and freezer burn.
- Mistake 4: Using improper packaging materials. Regular plastic wrap alone provides insufficient protection. Double-wrap or use proper freezer bags/vacuum sealing to prevent moisture loss and freezer burn.
- Mistake 5: Freezing old corn. Testing shows corn loses up to 40% of its sweetness within 6 hours of harvesting at room temperature. Always start with the freshest corn possible for best freezing results.
Storing Tips for the Recipe
Maximize the quality and longevity of your frozen corn on the cob with these storage best practices:
- Optimal freezer temperature: Maintain your freezer at 0°F (-18°C) or below. Fluctuating temperatures accelerate quality deterioration.
- Strategic freezer placement: Store corn in the coldest part of your freezer, typically the back or bottom, away from the door where temperature fluctuations occur most.
- Proper labeling: Mark packages with the freezing date and variety of corn if applicable. While properly frozen corn remains safe indefinitely, quality begins to decline after 8-12 months.
- Vacuum sealing advantage: Research indicates vacuum-sealed corn maintains optimal quality up to 2-3 months longer than corn stored in regular freezer bags.
- Avoid refreezing: Once thawed, corn should not be refrozen as this significantly degrades texture and increases microbial risk. Only thaw what you plan to use.
Conclusion
Freezing corn on the cob is a simple yet effective way to preserve summer’s golden goodness for year-round enjoyment. With minimal equipment and ingredients, this preservation method allows you to capture corn at its peak sweetness while maintaining nutritional value. By following the proper blanching, cooling, and packaging techniques outlined in this guide, you can avoid common pitfalls and ensure your frozen corn maintains its farm-fresh taste and texture for months to come. The next time you see an abundance of sweet corn at your local market or harvest from your garden, remember that freezing corn on the cob is your ticket to enjoying summer flavors even in the depths of winter. We’d love to hear about your experiences freezing corn on the cob – share your tips, serving suggestions, or questions in the comments below!
FAQs
Can I freeze corn on the cob without blanching?
While technically possible, freezing corn without blanching is not recommended. Unblanched corn develops off-flavors, becomes mushy, and loses nutritional value within 1-2 months due to enzyme activity. Blanching deactivates these enzymes, allowing your frozen corn to maintain quality for 8-12 months. The 8-10 minutes required for blanching is well worth the significantly improved results.
How long does frozen corn on the cob last in the freezer?
Properly blanched and packaged corn on the cob maintains optimal quality for 8-12 months when stored at 0°F (-18°C) or below. While it remains safe to eat indefinitely if kept at consistent freezing temperatures, quality gradually declines after the one-year mark with changes in texture and flavor becoming more noticeable.
What’s the best way to thaw and cook frozen corn on the cob?
For best results, don’t thaw frozen corn on the cob before cooking. Cook it directly from frozen by placing it in boiling water for 5-8 minutes or in the microwave in a covered dish with a small amount of water for 3-4 minutes per ear (rotating halfway through). If you prefer to thaw first, place it in the refrigerator overnight or run under cold water for a few minutes before cooking.
Can I cut the kernels off before freezing instead of freezing whole cobs?
Yes, you can freeze corn kernels rather than whole cobs. Follow the same blanching process, then cool completely in an ice bath. After drying, cut the kernels from the cob using a sharp knife (cutting about 2/3 of the way through the kernel depth). Spread kernels on a baking sheet to freeze individually before transferring to storage containers. This method saves freezer space and provides ready-to-use corn for recipes.
Why does my frozen corn sometimes turn out chewy or mushy?
Chewy or mushy texture typically results from improper blanching (either too short or too long), inadequate cooling after blanching, or freezing corn that wasn’t fresh to begin with. Ensure you’re following blanching times exactly (4 minutes for small ears, 6 for large), cooling completely in ice water for the same amount of time, and starting with very fresh corn. Additionally, freezer temperature fluctuations can contribute to texture changes, so maintain a consistent 0°F (-18°C) or below.


