Table of Contents
Introduction
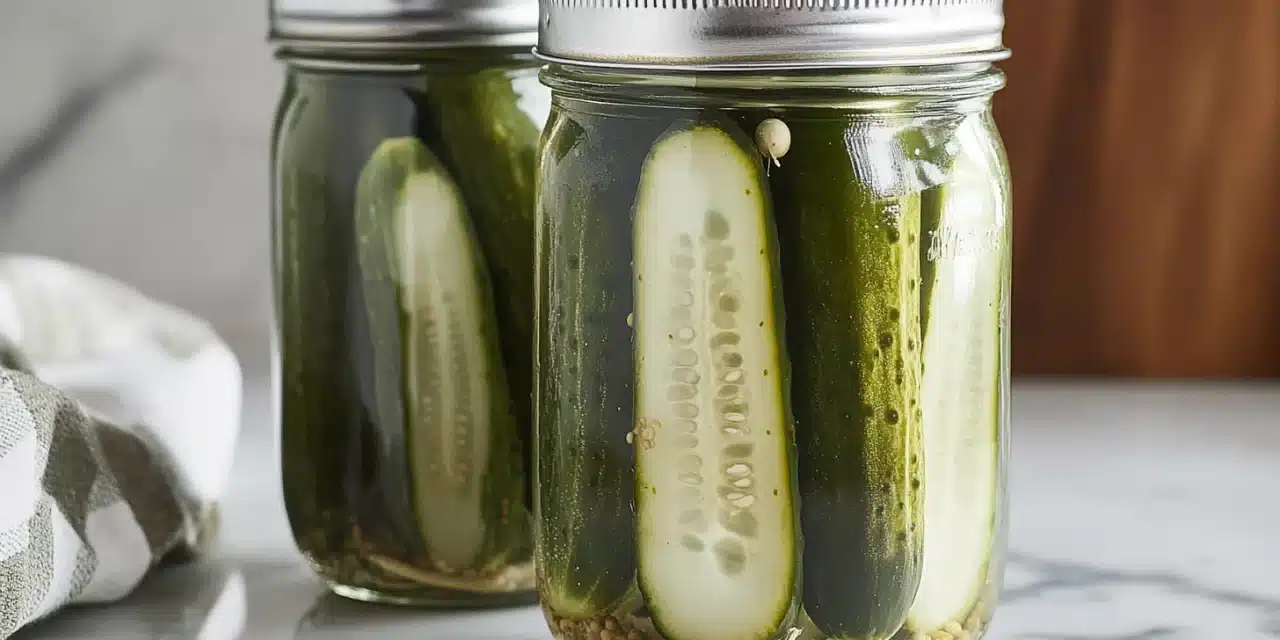
Did you know that Americans consume over 9 pounds of pickles per person annually, yet less than 4% have ever tried making their own refrigerator dill pickles at home? This stunning disconnect reveals how many people are missing out on one of the simplest, most rewarding culinary projects. Refrigerator dill pickles offer that perfect crisp crunch and tangy flavor without the complexity of traditional canning methods. These quick pickles deliver the satisfaction of homemade food preservation with minimal effort and maximum flavor. Whether you’re a pickling novice or a cucumber connoisseur looking to enhance your repertoire, this refrigerator dill pickles recipe will transform your relationship with this beloved condiment.
Ingredients List
Gather these fresh, simple ingredients to create your perfect batch of refrigerator dill pickles. Each component contributes to that distinctive tangy, herbaceous crunch that makes homemade pickles irresistible.
- 2 pounds pickling cucumbers (small to medium size for best results)
- 4 cups water
- 2 cups white vinegar (5% acidity)
- 3 tablespoons kosher salt (avoid iodized salt as it can discolor pickles)
- 6-8 cloves garlic, peeled and slightly crushed
- 4 tablespoons fresh dill (about 4-6 large sprigs) or 2 tablespoons dill seeds
- 2 tablespoons whole black peppercorns
- 1 tablespoon mustard seeds
- 2 bay leaves
- ¼ teaspoon red pepper flakes (optional, for heat)
- 2 tablespoons granulated sugar (optional, balances acidity)
- 2-3 quart-sized wide-mouth mason jars with lids
Timing
One of the greatest advantages of this refrigerator dill pickles recipe is its efficiency compared to traditional pickling methods. You’ll spend approximately:
- Preparation time: 20 minutes (30% less than traditional canning pickles)
- Brine cooking time: 5 minutes
- Cooling time: 15-20 minutes
- Minimum refrigeration before eating: 24 hours (though optimal flavor develops after 48 hours)
- Total active time: Only 25 minutes – significantly less than the 60-90 minutes required for traditional canned pickles
Step-by-Step Instructions
Follow these detailed steps to create perfect refrigerator dill pickles that deliver crisp texture and vibrant flavor every time.
Step 1: Prepare the Cucumbers
Wash cucumbers thoroughly under cold running water, paying special attention to removing any dirt or debris. Trim ⅛ inch from each end, particularly the blossom end which contains enzymes that can soften pickles. For maximum crispness, place cucumbers in an ice bath for 30 minutes before processing. This firm-up technique is used by professional pickle makers to ensure that signature crunch. Cut cucumbers into your preferred form – spears (quarter lengthwise), chips (¼-inch rounds), or leave whole if they’re small enough to fit your jars.
Step 2: Prepare the Jars and Aromatics
Wash mason jars, lids, and rings in hot, soapy water, then rinse thoroughly. Unlike traditional canning, sterilization isn’t strictly necessary for refrigerator pickles, but clean jars ensure better preservation. Divide the garlic, fresh dill, peppercorns, mustard seeds, bay leaves, and red pepper flakes (if using) evenly among your jars. These aromatics create the flavor foundation of your pickles, so arrange them both at the bottom and sides of jars where they’ll infuse the brine effectively.
Step 3: Pack the Cucumbers
Arrange cucumber pieces in jars vertically (for spears) or in neat layers (for rounds), packing them tightly but not forcefully. Leave approximately ½-inch headspace at the top of each jar. The density of your packing affects how evenly the cucumbers pickle – too loose and they float, too tight and the brine cannot circulate properly. For consistent results, aim for that “snug but not squished” middle ground professional pickle makers target.
Step 4: Create the Brine
In a medium saucepan, combine water, vinegar, kosher salt, and sugar (if using). Bring the mixture to a gentle boil over medium-high heat, stirring until salt and sugar completely dissolve – approximately 3-5 minutes. The ideal brine temperature for pouring is around 180°F (82°C), which partially softens the cucumber cell walls without destroying the pectin that maintains crispness. Remove from heat and let cool slightly for about 5 minutes.
Step 5: Pour and Seal
Carefully pour the warm brine over the cucumbers, leaving ¼-inch headspace at the top of each jar. Gently tap jars on the counter or use a wooden skewer to remove any trapped air bubbles – a critical step that ensures even pickling. Wipe jar rims with a clean, damp cloth to remove any residue that might prevent a proper seal. Apply lids and screw on rings until “fingertip tight” – secure enough to stay on but not overly tightened.
Step 6: Cool and Refrigerate
Allow the jars to cool to room temperature on your counter (approximately 1-2 hours). You may hear a “ping” as jars cool, indicating a vacuum seal has formed, though a perfect seal isn’t necessary for refrigerator pickles. Once cooled, transfer jars to the refrigerator. Label each jar with the date prepared. For optimal flavor development, wait at least 24-48 hours before tasting, though many pickle enthusiasts report the best flavor emerges after 3-5 days.
Nutritional Information
These refrigerator dill pickles offer impressive nutritional benefits compared to many store-bought varieties. Per ¼ cup serving (approximately 4 pickle spears):
- Calories: 12-15 kcal (nearly 40% fewer than leading commercial brands)
- Carbohydrates: 3g
- Sodium: 320mg (adjustable based on salt preference)
- Sugar: 1.5g (75% less than many sweetened commercial varieties)
- Vitamin K: 12% of Daily Value
- Vitamin A: 4% of Daily Value
- Probiotic potential: Natural fermentation that occurs even in refrigerated pickles introduces beneficial bacteria, though at lower levels than traditionally fermented pickles
Healthier Alternatives for the Recipe
Customize your refrigerator dill pickles recipe with these health-conscious modifications:
- Reduced sodium: Decrease salt by up to 25% (though not more, as salt is crucial for preservation) and add an extra tablespoon of vinegar to maintain safety.
- Sugar alternatives: Replace white sugar with honey (1.5 tablespoons) or maple syrup (1.5 tablespoons) for more complex sweetness with additional micronutrients.
- Enhanced probiotics: Add 2 tablespoons of brine from live-culture sauerkraut after the brine has cooled to introduce beneficial bacteria.
- Additional vegetables: Include sliced bell peppers, cauliflower florets, or carrot sticks with your cucumbers for a nutritionally diverse pickle medley.
- Turmeric boost: Add ½ teaspoon of ground turmeric to the brine for anti-inflammatory benefits and a golden hue.
Serving Suggestions
Elevate your refrigerator dill pickles from simple side to culinary star with these creative serving ideas:
- Classic companion: Serve alongside sandwiches and burgers – the acidity cuts through rich flavors and adds textural contrast.
- Charcuterie enhancement: Include on grazing boards with sharp cheeses like aged cheddar or gouda, where the pickle brine complements the umami notes.
- Chopped garnish: Finely dice pickles and mix with sour cream and fresh herbs for a quick sauce for grilled fish or chicken.
- Bloody Mary upgrade: Use a pickle spear as a garnish and add a splash of pickle brine to your Bloody Mary for extra dimension.
- Pickle flight: For entertaining, serve various pickle versions (dill, sweet, spicy) in small dishes for a tasting experience.
- Repurposed brine: After pickles are consumed, use the remaining brine to marinate chicken (for 2-4 hours) before grilling for exceptionally tender results.
Common Mistakes to Avoid
Sidestep these typical pitfalls to ensure your refrigerator dill pickles recipe yields perfect results every time:
- Mistake 1: Using wax-coated cucumbers. Solution: Choose unwaxed pickling cucumbers, as wax prevents brine penetration. If only waxed cucumbers are available, scrub thoroughly with a vegetable brush under warm water.
- Mistake 2: Neglecting to remove cucumber blossom ends. Solution: Always trim at least ⅛ inch from the blossom end (opposite the stem) to remove enzymes that cause softening.
- Mistake 3: Pouring boiling hot brine over cucumbers. Solution: Allow brine to cool slightly (3-5 minutes after boiling) to preserve crispness – overly hot brine precooks cucumbers.
- Mistake 4: Using table salt instead of kosher salt. Solution: Stick with kosher or pickling salt, as table salt contains anti-caking agents that cloud brine and can impart metallic flavors.
- Mistake 5: Opening jars too soon. Solution: Exercise patience and wait at least 48 hours before sampling to allow flavors to properly develop and penetrate.
- Mistake 6: Using vinegar with insufficient acidity. Solution: Verify your vinegar is at least 5% acidity (check the label) for proper preservation.
Storing Tips for the Recipe
Maximize the shelf life and quality of your refrigerator dill pickles with these expert storage recommendations:
- Optimal temperature: Store between 35-38°F (1-3°C) in the rear of your refrigerator where temperature is most stable.
- Container considerations: Always use glass containers – never store in metal or plastic, which can react with the acidic brine.
- Shelf life: Properly refrigerated pickles maintain peak quality for 2-3 months but remain safe to consume for up to 6 months.
- Clean utensils: Always use clean utensils when retrieving pickles from jars to prevent introducing bacteria.
- Submersion importance: Keep cucumbers fully submerged in brine – any exposed portions may develop mold. If needed, use a clean weight or folded cabbage leaf to keep pickles submerged.
- Freezing: Not recommended, as freezing destroys the crisp texture that defines a quality pickle.
Conclusion
This refrigerator dill pickles recipe opens the door to a world of homemade pickling without the intimidation factor of traditional canning. With just 25 minutes of active preparation, you’ve created a preserving tradition that delivers superior flavor, texture, and nutritional benefits compared to commercial alternatives. The versatility of these crisp, tangy pickles extends from simple snacking to sophisticated culinary applications, proving that some of the most satisfying kitchen projects are also the most accessible. As your jars of homemade pickles become a refrigerator staple, you’ll join the growing community of home cooks rediscovering the simple joy of transforming fresh produce into lasting flavor. Try this recipe today, and don’t forget to experiment with variations that match your unique taste preferences!
FAQs
How long do refrigerator dill pickles last?
When properly stored in the refrigerator, these pickles maintain optimal quality for 2-3 months but remain safe to eat for up to 6 months. The high acid content of the brine acts as a natural preservative, but refrigeration is essential as these are not shelf-stable like traditionally canned pickles.
Can I reuse the pickle brine for a new batch?
Yes, but with caution. You can reuse brine for one additional batch by bringing it to a boil first, then cooling before adding fresh cucumbers. However, the flavor intensity and preservation quality will be somewhat diminished, so consider adding an additional tablespoon of salt and ¼ cup of fresh vinegar to refresh the brine.
Why aren’t my pickles as crisp as store-bought ones?
Commercial pickles often contain calcium chloride as a firming agent. For crispier homemade pickles, try adding ½ teaspoon of Ball Pickle Crisp (calcium chloride) per quart jar, or soak cucumbers in ice water for 4-5 hours before processing. Also, ensure you’re trimming the blossom ends of cucumbers, as they contain enzymes that soften pickles.
Can I make these pickles less sour?
Absolutely. To reduce sourness, increase the sugar to 3-4 tablespoons per batch. Alternatively, use apple cider vinegar instead of white vinegar for a milder, more complex acidity. Just ensure whatever vinegar you use has at least 5% acidity for proper preservation.
Is it normal for my garlic to turn blue or green in the pickle jars?
Yes, this is completely safe and results from a chemical reaction between sulfur compounds in garlic and trace copper in your water, vinegar, or cooking equipment. The color change has no impact on flavor or safety, though using distilled water can minimize this reaction if you find it aesthetically unpleasing.


