I remember the first time I made a Waving Flag Cake for Fourth of July. It was a warm summer day, and my kids were bursting with excitement about the upcoming festivities. They begged me to bake something special, and as I flipped through my recipe book, the vibrant colors of the Waving Flag Cake caught my eye. I could already imagine their faces lighting up when they saw the cake adorned in red, white, and blue frosting, just like the American flag.
As I gathered my ingredients, my youngest was already bouncing around the kitchen, eager to help. We sifted flour together, and I taught them how to crack eggs—what a messy but fun experience that was! The smell of vanilla wafted through the air as I mixed the batter, and my heart swelled with joy. I could picture the cake proudly displayed on our picnic table, a centerpiece for laughter, sparklers, and stories shared among family and friends.
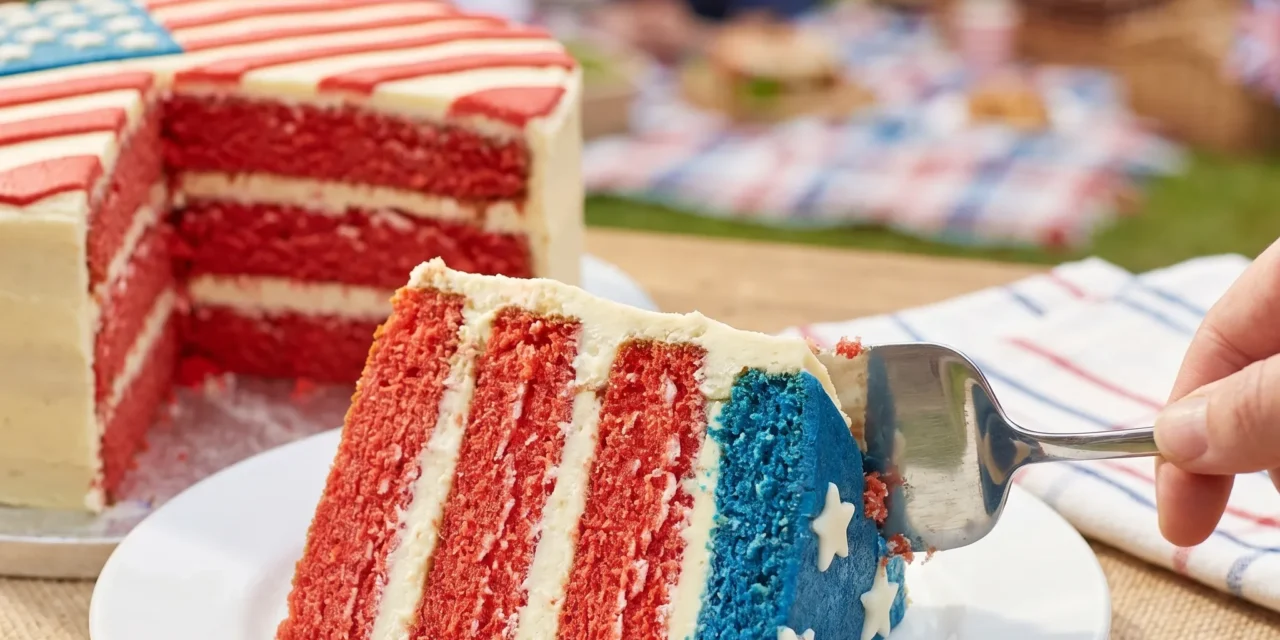
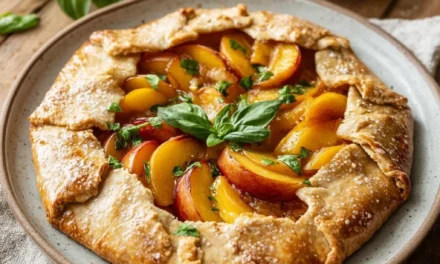
When the Waving Flag Cake finally came out of the oven, it was beautiful! The golden crust and fluffy interior made it hard to resist. We spent the afternoon decorating it with swirls of red, white, and blue frosting, topped off with fresh berries. The best part? Watching everyone dig into the cake, smiles on their faces, and joy in their hearts. That cake became a tradition in our home, a symbol of celebration and togetherness. Now, every year, I look forward to baking that same Waving Flag Cake, creating new memories while keeping the old ones alive.
Table of Contents
Why This Waving Flag Cake Recipe Will Become Your Go-To
The Secret Behind Perfect Waving Flag Cake
What makes this Waving Flag Cake truly special is the balance of flavors and the visual spectacle it brings to any gathering. The cake is light and fluffy, with a tender crumb that melts in your mouth, thanks to the careful combination of ingredients. By using simple pantry staples, you can whip up this cake in no time, making it perfect for last-minute celebrations. The vibrant colors of the frosting not only create a stunning presentation but also add a delightful sweetness that pairs perfectly with the cake’s subtle vanilla flavor.
This recipe is straightforward enough for novice bakers yet impressive enough to wow your guests. The combination of red, white, and blue frosting makes it a fantastic choice for patriotic holidays, birthday parties, or any festive occasion. Plus, the optional fresh berries on top add a fresh burst of flavor and a pop of color, making it a truly delightful dessert that everyone will remember.
Essential Ingredients You’ll Need
To create the perfect Waving Flag Cake, you’ll need the following ingredients:
2 cups all-purpose flour
All-purpose flour provides the structure and stability needed for a fluffy cake. It absorbs the right amount of moisture, ensuring your cake doesn’t turn out too dense.
1 ½ cups granulated sugar
Granulated sugar not only sweetens the cake but also contributes to its overall texture. It helps create a light, airy crumb by incorporating air during the creaming process.
½ cup unsalted butter, softened
Butter is essential for flavor and moisture. The creaminess of softened unsalted butter ensures your cake has a rich taste without being greasy.
1 cup milk
Milk adds moisture and helps to create a tender crumb. It also enhances the flavor of the cake, making it richer and more delicious.
3 large eggs
Eggs provide structure and stability to the cake while also adding moisture. They help bind the ingredients together and contribute to the cake’s overall richness.
1 tablespoon baking powder
Baking powder is a leavening agent that helps the cake rise. It creates those lovely air pockets that contribute to the cake’s fluffy texture.
1 teaspoon vanilla extract
Vanilla extract adds a warm, aromatic flavor that elevates the overall taste of the cake. It’s a must-have for any cake recipe.
1 cup red frosting
Red frosting brings the patriotic theme to life, making your cake visually stunning. It adds sweetness and a festive flair that everyone will love.
1 cup white frosting
White frosting serves as a neutral base that complements the flavors of the cake while providing a beautiful contrast to the red and blue frosting.
1 cup blue frosting
Blue frosting adds a vibrant pop, completing the flag design. It’s sweet and delicious, making each bite exciting.
Fresh berries for decoration
Fresh berries not only enhance the cake’s appearance but also provide a burst of flavor. They’re a healthy addition that elevates the cake’s aesthetic and taste.
Step-by-Step Waving Flag Cake Instructions
Preparing your Waving Flag Cake is a breeze and takes just 15 minutes of prep time, followed by 30 minutes of baking, for a total of 45 minutes. Gather your baking essentials like mixing bowls, measuring cups, a whisk, and an oven-safe cake pan to make the process smooth and enjoyable.
1- Start by preheating your oven to 350°F (175°C). Grease and flour a 9×13-inch cake pan to ensure easy removal later. You want your cake to come out perfectly without any sticking!
2- In a large mixing bowl, cream together the softened unsalted butter and granulated sugar until light and fluffy. This step should take about 3-4 minutes. You’ll notice the mixture turning pale and airy, which is what you’re aiming for.
3- Add the eggs one at a time, mixing well after each addition. Then, stir in the vanilla extract. The batter should become smooth and homogeneous, with a delightful aroma filling the kitchen.
4- In a separate bowl, whisk together the all-purpose flour and baking powder. Gradually add this dry mixture to the creamed butter and sugar, alternating with milk. Start and end with the dry ingredients. Mix until just combined to avoid overmixing, which can make the cake dense.
5- Pour the batter into the prepared cake pan and smooth the top with a spatula. Bake in your preheated oven for about 25-30 minutes. You’ll know it’s done when a toothpick inserted in the center comes out clean, and the edges start to pull away from the pan.
6- Once baked, let the cake cool in the pan for 10 minutes before transferring it to a wire rack. Allow it to cool completely before decorating. When ready, spread the red, white, and blue frosting in stripes to mimic the American flag, and finish with fresh berries for a festive touch.
Pro Tips for Success
- Make sure your butter is softened, not melted. This helps achieve the right texture when creaming with sugar.
- Use room temperature eggs and milk for better emulsification, ensuring a smoother batter.
- Be careful not to overmix the batter after adding the flour. This will help keep your cake light and fluffy.
- If you want an extra moist cake, consider brushing the cooled cake with a simple syrup made from equal parts sugar and water.
- For a more vibrant color in your frosting, consider using gel food coloring rather than liquid, as it won’t alter the icing’s consistency.
Serving and Storing Your Waving Flag Cake
Perfect Pairings for Waving Flag Cake
This Waving Flag Cake serves 12, making it perfect for gatherings. Pair it with a side of fresh fruit salad for a refreshing contrast. The sweetness of the cake complements the tartness of berries beautifully. For beverages, consider serving it alongside lemonade or iced tea—both refreshing choices that enhance the cake’s festive spirit. This cake is also perfect for barbecues, picnics, or any summer celebration, bringing a sense of joy and togetherness.
Storage and Make-Ahead Tips
You can store your Waving Flag Cake in an airtight container at room temperature for up to 3 days. If you want to keep it longer, refrigerate it for up to a week. For freezer storage, wrap individual slices in plastic wrap, then place them in a freezer-safe bag. They can last up to 3 months, making it easy to enjoy a slice anytime. To reheat, simply let the slice thaw at room temperature or pop it in the microwave for about 15-20 seconds for a warm treat.
Variations and Dietary Adaptations for Waving Flag Cake
Creative Waving Flag Cake Variations
Feel free to mix things up with your Waving Flag Cake! Consider adding chocolate chips to the batter for a delicious twist. You can also use lemon or almond extract instead of vanilla for a different flavor profile. For an autumn version, swap out the red frosting for orange and add pumpkin spice to the batter. Finally, top it with whipped cream instead of frosting for a lighter dessert option.
Making Waving Flag Cake Diet-Friendly
If you have dietary restrictions, you can easily adapt this Waving Flag Cake recipe. For a gluten-free option, substitute the all-purpose flour with a one-to-one gluten-free blend. To make it vegan, replace eggs with flax eggs (1 tablespoon of flaxseed meal mixed with 2.5 tablespoons of water per egg) and use plant-based milk and butter. For a low-carb version, use almond flour instead of all-purpose flour and a sugar substitute like erythritol to keep the sweetness.
Frequently Asked Questions
Q: Can I substitute the all-purpose flour with whole wheat flour?
A: Yes, you can use whole wheat flour, but the texture may be denser. Consider using a mix of whole wheat and all-purpose flour for a lighter result.
Q: How can I ensure my cake is moist after 45 minutes of baking?
A: Make sure to not overbake the cake. Check for doneness around the 25-minute mark. If a toothpick comes out clean, it’s ready!
Q: Can I make the Waving Flag Cake a day in advance?
A: Absolutely! You can bake the cake a day ahead, store it in an airtight container, and frost it the day you plan to serve it.
Q: How many servings does this recipe yield?
A: This Waving Flag Cake serves 12, making it a great choice for gatherings or celebrations.
Q: What should I do if my frosting is too runny?
A: If your frosting is too runny, add a tablespoon of powdered sugar at a time until you reach your desired consistency. It should hold its shape when piped.
Conclusion
I hope this Waving Flag Cake recipe inspires you to create something special for your next celebration. It’s not just a dessert; it’s a way to bring people together and make lasting memories. So roll up your sleeves, gather your ingredients, and let the fun begin! I’d love to hear how your cake turns out, so don’t forget to leave a comment and share your experience. Happy baking!
