I still remember the first time I made a Make-Your-Own Lunchable for my kids. It was one of those hectic mornings when I just couldn’t muster the energy to whip up an elaborate breakfast. I stumbled upon a pack of deli meats in the fridge and a few odds and ends that I thought might make a fun, portable lunch. The kids were thrilled; they loved the idea of assembling their own little snack platter! It was a hit! As they arranged their meats, cheeses, and fruits, I couldn’t help but enjoy the moment. They were giggling and chatting, creating their perfect combinations.
That day sparked a tradition in our house. We started making Make-Your-Own Lunchables on weekends, turning it into a family activity. Whether it was a picnic in the park or a quick lunch before soccer practice, these DIY lunchboxes became our go-to. The kids loved customizing their meals, and I appreciated that I could sneak in some healthy options, too. It was all about balance and fun! Plus, it took only 15 minutes to prepare—zero cook time—so I could whip them up in no time. That’s the beauty of a Make-Your-Own Lunchable; it’s not just about the food; it’s about creativity, family bonding, and making meal prep enjoyable.
If you’re looking for a quick, nutritious, and fun meal option, let me show you how to create your own Make-Your-Own Lunchable that will surely become a family favorite.
Table of Contents
Why This Make-Your-Own Lunchable Recipe Will Become Your Go-To
The Secret Behind Perfect Make-Your-Own Lunchable
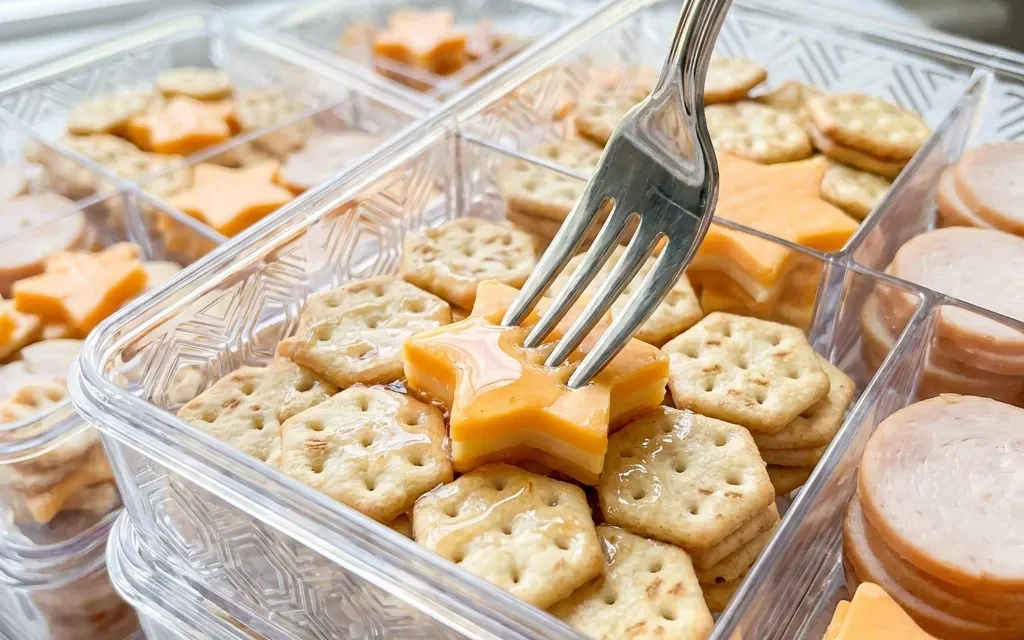
What makes this Make-Your-Own Lunchable recipe so special is its flexibility and ease. You’re not just throwing together random foods; you’re crafting an experience that’s as much about the process as it is about the meal. Each component is thoughtfully chosen to balance flavors and textures, from savory deli meats to creamy cheeses. The crunch of whole grain crackers complements the sweetness of fruits and the freshness of veggies, making every bite a delightful surprise.
Plus, it’s customizable! Whether you’re packing lunch for kids or prepping a snack for yourself, you can adjust the ingredients based on personal preferences or dietary needs. This recipe encourages creativity, allowing you to mix and match your favorite flavors, and it’s quick to prepare—only 15 minutes! You’ll find that once you’ve mastered this recipe, it will become your go-to lunch solution for busy days.
Essential Ingredients You’ll Need
To create your delicious Make-Your-Own Lunchable, you’ll need the following ingredients:
4 ounces deli meats (ham, turkey, or chicken)
The star of your lunchable! Deli meats provide protein and are easy to manage for little hands. Choose your kids’ favorites—ham, turkey, or chicken—to keep everyone happy.
4 ounces assorted cheeses (cheddar, mozzarella, or gouda)
Cheese adds a creamy, rich element that pairs perfectly with meats. Cheddar offers sharpness, mozzarella brings mildness, and gouda adds a sweet, nutty flavor.
1 cup whole grain crackers
These give a satisfying crunch and a healthier alternative to traditional crackers. Whole grain options are packed with nutrients and fiber, which makes them a great choice for a balanced lunch.
1 cup fresh fruits (grapes, apple slices, or berries)
Fruits provide natural sweetness and color, making your lunchable visually appealing. Grapes, apple slices, or berries are not only delicious but also packed with vitamins.
1/2 cup baby carrots or cherry tomatoes
These veggies add freshness and crunch, offering a healthy contrast to the other components. Baby carrots are sweet and crunchy, while cherry tomatoes burst with flavor.
1/4 cup hummus or ranch dressing for dipping (optional)
A dipping sauce can elevate your lunchable experience. Hummus adds a creamy, savory flavor, while ranch dressing provides a classic taste that kids adore.
Step-by-Step Make-Your-Own Lunchable Instructions
Preparing Your Make-Your-Own Lunchable
Preparing your Make-Your-Own Lunchable is a breeze! With just a 15-minute prep time and no cooking involved, you can get this meal ready in no time. All you need is a cutting board, a knife for slicing, and a few containers or plates for assembly. Let’s dive into the steps!
1- Start by gathering all your ingredients to create a colorful and inviting spread. Lay out the deli meats, cheeses, crackers, fruits, veggies, and dip in a way that inspires creativity. Take a moment to appreciate the vibrant colors and textures; this will make the assembling process more enjoyable for everyone.
2- Slice the assorted cheeses into bite-sized pieces. You want them small enough for little hands to manage easily but still large enough to savor. Try varying the shapes—triangles, squares, or even fun shapes using cookie cutters for an extra touch of fun!
3- Next, portion out the deli meats. You can roll them up for easy grabbing or leave them flat, depending on how you want your kids to interact with them. Think about creating a little deli “sandwich” using the crackers as the bread, making it more interactive!
4- Prepare your fresh fruits. Wash the grapes, slice the apples, or rinse the berries, ensuring everything is clean and ready to eat. For apple slices, a squeeze of lemon juice can help prevent browning and keep them looking fresh.
5- Arrange the baby carrots or cherry tomatoes in a small container or directly on the plate. The vibrant colors of the veggies will pop against the other ingredients, making it visually appealing.
6- Lastly, if you’re using a dip, pour the hummus or ranch dressing into a small cup or section of the plate. This adds an exciting element to the lunchable, encouraging kids to experiment with flavors.
Pro Tips for Success
To make your Make-Your-Own Lunchable a success, here are a few pro tips:
- Get creative with shapes! Use cookie cutters for the cheese and deli meats to make fun shapes that will entice kids to eat.
- Keep everything bite-sized. The easier it is for kids to pick up and munch, the more likely they are to enjoy the meal.
- Rotate ingredients! Switch up the fruits, veggies, and meats weekly to keep things exciting and introduce new flavors.
- Use high-quality ingredients. Fresh, flavorful meats and cheeses will make a noticeable difference in taste.
- Prepare in advance! You can slice and portion out ingredients the night before to make lunchtime even quicker.
Serving and Storing Your Make-Your-Own Lunchable
Perfect Pairings for Make-Your-Own Lunchable
This Make-Your-Own Lunchable serves 2, making it perfect for a quick lunch or snack for kids. To elevate the meal, consider pairing it with a refreshing drink like sparkling water or a homemade lemonade. If you’re feeling indulgent, a small piece of dark chocolate or a cookie can round out the meal perfectly. For a healthy side dish, try adding a small salad or yogurt to complement the lunchable’s flavors.
Storage and Make-Ahead Tips
To store your Make-Your-Own Lunchable, keep the components separate in airtight containers in the refrigerator. The deli meats and cheeses should last about 3-5 days, while fresh fruits and veggies are best consumed within 1-2 days for optimal freshness. If you want to prep ahead of time, you can slice and portion everything the night before, making it easy to grab and go in the morning. Avoid adding dips until just before serving to maintain freshness.
Variations and Dietary Adaptations for Make-Your-Own Lunchable
Creative Make-Your-Own Lunchable Variations
Get creative with your Make-Your-Own Lunchable by trying different combinations. You could make a Mediterranean version with sliced salami, feta cheese, pita chips, olives, and cherry tomatoes. For a breakfast-themed lunchable, include mini pancakes or waffles, maple syrup for dipping, and sliced strawberries. A Mexican-inspired option could feature tortilla chips, guacamole, cheese, and black beans. The possibilities are endless!
Making Make-Your-Own Lunchable Diet-Friendly
If you have dietary restrictions, there are plenty of ways to adapt this recipe. For a gluten-free option, swap out whole grain crackers for gluten-free varieties or rice cakes. If you’re vegan, use plant-based deli slices, vegan cheese, and hummus for dipping. For a low-carb alternative, replace crackers with cucumber slices or bell pepper strips. These substitutions keep the spirit of the Make-Your-Own Lunchable while accommodating different dietary needs.
Frequently Asked Questions
Q: Can I substitute the deli meats for something else?
A: Absolutely! You can use vegetarian options like hummus or roasted veggies, or even make it a cheese-focused lunch with more varieties of cheese.
Q: How long does it take to prepare this lunchable?
A: It takes just 15 minutes to prepare your Make-Your-Own Lunchable, with no cooking time involved. Perfect for busy days!
Q: How do I store leftovers from my Make-Your-Own Lunchable?
A: Keep any leftovers in airtight containers in the refrigerator for up to 3-5 days. Just make sure to store ingredients separately to maintain freshness.
Q: Is this recipe suitable for more than 2 servings?
A: Yes! You can easily double or triple the ingredients to serve more people. Just adjust the quantities based on how many you’re feeding.
Q: What should I do if I have leftover ingredients?
A: Use any leftover ingredients in salads, wraps, or as snacks throughout the week. They’re versatile and can be enjoyed in many ways.
Conclusion
Making your own Make-Your-Own Lunchable is not just about food; it’s about creativity, family time, and making mealtime fun! With just 15 minutes of prep, you can create a colorful, nutritious spread that everyone will love. Whether you’re packing lunches for kids or just looking for a quick snack, this recipe is sure to impress. Don’t forget to share your creations in the comments and let me know how you personalize your Lunchables! Dive into this fun culinary adventure and enjoy every delicious bite!


