
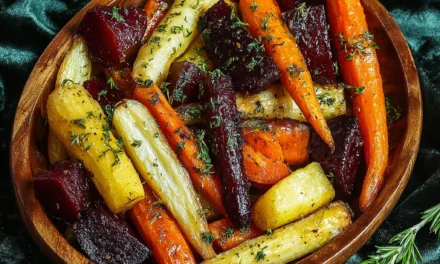
I can remember the first time I ever had homemade apple butter. It was at my grandma’s house when I was just a little kid, and the smell of it simmering on the stove filled the whole kitchen. Grandma would always make a big batch of her secret apple butter recipe every fall, and the whole family would gather around to help peel and core the apples. It was such a special tradition that I looked forward to all year long.
I can still picture myself sitting at the kitchen table, covered in apple peels, listening to Grandma tell stories about how she learned the recipe from her own grandmother. She’d let me dip a slice of fresh bread right into the thick, golden apple butter, and I’d savor every single bite. There was just something so comforting and nostalgic about that flavor – a perfect balance of sweetness and spice that instantly transported me back to my childhood.
As I got older and started cooking for myself, I knew I had to learn Grandma’s famous apple butter recipe. It took me a few tries to get it just right, but once I did, it quickly became a staple in my own kitchen. This apple butter recipe has now become a cherished tradition that I look forward to making every fall, just like Grandma did. And let me tell you, it’s the perfect way to capture the cozy, autumnal flavors of the season.
Table of Contents
Why This Apple Butter Recipe Will Become Your Go-To
What makes this apple butter recipe so special is the unique blend of spices and the slow-simmering process that transforms the apples into a rich, velvety spread. Unlike store-bought varieties that can taste overly sweet or artificial, this homemade version is all about allowing the natural flavors of the apples to shine.
The Secret Behind Perfect apple butter recipe
The secret ingredient that really sets this apple butter recipe apart is the addition of a touch of warm spices like cinnamon, nutmeg, and cloves. These spices complement the sweetness of the apples perfectly, creating a depth of flavor that you just can’t find in a jar. And by simmering the mixture low and slow, you end up with an incredibly smooth and silky texture that’s miles ahead of anything you’d find at the grocery store.
Essential Ingredients You’ll Need
– Apples: The foundation of this recipe, you’ll want to use a mix of sweet and tart apples for the best flavor. I like to use a combination of Honeycrisp, Gala, and Granny Smith.
– Cider vinegar: A splash of vinegar helps to balance out the sweetness and gives the apple butter a nice tangy kick.
– Brown sugar: To sweeten things up, you’ll need just a bit of brown sugar. I find that it adds a lovely caramelized flavor.
– Spices: As I mentioned, the secret is in the spices. You’ll need ground cinnamon, nutmeg, and cloves to create that quintessential autumn aroma.
– Salt: A pinch of salt helps to enhance all the other flavors.
Step-by-Step apple butter recipe Instructions
Preparing your apple butter recipe is a labor of love, but I promise it’s worth every minute. The entire process takes a few hours, but the majority of that time is hands-off simmering, so you can tackle other tasks while the apple butter works its magic.
1- Start by peeling, coring, and chopping your apples into 1-inch pieces. You want to end up with about 8 cups of chopped apples.
2- In a large pot or Dutch oven, combine the chopped apples, cider vinegar, brown sugar, cinnamon, nutmeg, cloves, and a pinch of salt. Stir everything together until well combined.
3- Bring the mixture to a boil over medium-high heat, then reduce the heat to low and let it simmer, stirring occasionally, for 2-3 hours. You’ll know it’s ready when the apples have broken down completely and the mixture has thickened to a spreadable consistency.
4- Once the apple butter has reached your desired texture, use an immersion blender or transfer it to a regular blender to puree it until smooth and creamy.
5- Allow the apple butter to cool slightly, then transfer it to clean jars or an airtight container. You can store it in the refrigerator for up to 2 weeks.
6- Serve your homemade apple butter on toast, biscuits, pancakes, or even as a topping for pork or chicken. It also makes a wonderful gift for friends and family during the holiday season.
Pro Tips for Success
The key to perfect apple butter is patience and low, slow cooking. Resist the urge to crank up the heat, as that can cause the sugars to burn and the texture to become grainy. Stir the mixture occasionally and keep a close eye on it towards the end to make sure it doesn’t scorch.
It’s also important to use a variety of apples for the best flavor. The combination of sweet and tart apples creates a more balanced and complex taste. And don’t be afraid to experiment with different spice blends – you can easily adjust the amounts of cinnamon, nutmeg, and cloves to suit your personal preferences.
Serving and Storing Your apple butter recipe
One of the best things about this apple butter recipe is its versatility. It’s the perfect complement to so many different dishes, from breakfast to dessert.
Perfect Pairings for apple butter recipe
For breakfast, try spreading it on toast, English muffins, or buttermilk biscuits. It also makes a delicious topping for pancakes, waffles, or oatmeal. And if you’re feeling indulgent, a dollop of apple butter is the perfect accompaniment to a slice of pumpkin or pecan pie.
But it’s not just for sweet treats – apple butter also pairs wonderfully with savory foods. Use it as a glaze for roasted pork or chicken, or stir it into your favorite barbecue sauce for extra flavor. It’s even a great dip for crisp apple slices or salty crackers.
Storage and Make-Ahead Tips
Homemade apple butter will keep in the refrigerator for up to 2 weeks, so it’s a great make-ahead option for busy weekdays or holiday entertaining. Simply transfer the cooled apple butter to an airtight container and store it in the fridge.
If you want to enjoy your apple butter for even longer, you can also freeze it for up to 6 months. Just spoon it into freezer-safe jars or bags, leaving a bit of headspace for expansion. When you’re ready to use it, simply thaw it in the refrigerator overnight.
Variations and Dietary Adaptations for apple butter recipe
Creative apple butter recipe Variations
While this classic apple butter recipe is pretty hard to beat, there are lots of ways you can put your own spin on it. Try swapping out some of the apples for pears or quince for a twist on the flavor. You can also add a splash of brandy or apple cider for a boozy twist.
And for the holidays, consider stirring in a bit of orange zest, ginger, or vanilla extract to give it a festive flair. Or experiment with different spice blends – a touch of cardamom or allspice would be a lovely addition.
Making apple butter recipe Diet-Friendly
This apple butter recipe is naturally gluten-free, and you can easily make it vegan by using coconut sugar or maple syrup instead of brown sugar. For a lower-sugar version, simply reduce the amount of brown sugar to your taste.
If you’re following a keto or low-carb diet, you can enjoy this apple butter in moderation. The natural sugars from the apples mean it’s not entirely carb-free, but a small serving can be a nice occasional treat.
Frequently Asked Questions
Q: Can I use a different type of apple in this recipe?
A: Absolutely! While I recommend using a blend of sweet and tart apples for the best flavor, you can certainly experiment with different varieties. Just keep in mind that some apples may have more moisture or less acidity, which can affect the final texture and sweetness of the apple butter.
Q: How long does it take to make this apple butter recipe?
A: The total hands-on time for this recipe is about 30-45 minutes, but the majority of the cooking time is hands-off simmering. The apples need to simmer for 2-3 hours to break down and reach the perfect spreadable consistency. So while the total time from start to finish is 2-3 hours, most of that is just letting the apple butter do its thing on the stove.
Q: Can I can or preserve this apple butter?
A: Yes, you can definitely can or preserve this apple butter for longer-term storage. Simply follow safe canning practices, such as sterilizing the jars and lids and processing the sealed jars in a water bath. Properly canned apple butter can be stored for up to 1 year.
Q: How much apple butter does this recipe make?
A: This recipe will yield approximately 3-4 cups of apple butter, depending on how long you let it simmer and reduce. I find that it’s the perfect amount to enjoy for a few weeks and share with friends and family. If you need to make a larger batch, you can easily double or triple the recipe.
Q: My apple butter turned out a bit grainy. What did I do wrong?
A: A grainy texture is usually a sign that the apple butter was cooked at too high of a temperature. The key is to maintain a gentle simmer rather than a rapid boil. Additionally, make sure to stir the mixture occasionally to prevent any scorching or sticking on the bottom of the pot. If you do end up with a slightly grainy texture, you can try blending it again to smooth it out.
Conclusion
I hope this homemade apple butter recipe becomes a new fall tradition in your household, just like it is in mine. There’s nothing quite like the comforting aroma of simmering apples and warm spices to make your kitchen feel extra cozy and inviting.
Whether you enjoy it on toast, biscuits, or straight by the spoonful, this apple butter is sure to become a cherished staple. And don’t forget to share it with your loved ones – it makes a wonderful homemade gift that’s sure to be appreciated.
So what are you waiting for? Grab some apples and get to work on this delicious recipe. I can’t wait to hear how it turns out for you!


