Growing up, I have so many fond memories of my grandma’s famous Magic Apple Plum Cobbler. It was a dish that seemed to magically appear at every family gathering, bringing warmth, comfort, and the most heavenly aroma to the room. I can still vividly remember the first time I tried it – the flaky, golden crust, the sweet and tart filling, and the way it melted in my mouth. From that moment on, I was hooked, and I know you will be too once you taste this incredible Magic Apple Plum Cobbler recipe.
Table of Contents
Why This Magic Apple Plum Cobbler Recipe Will Become Your Go-To
The Secret Behind Perfect Magic Apple Plum Cobbler
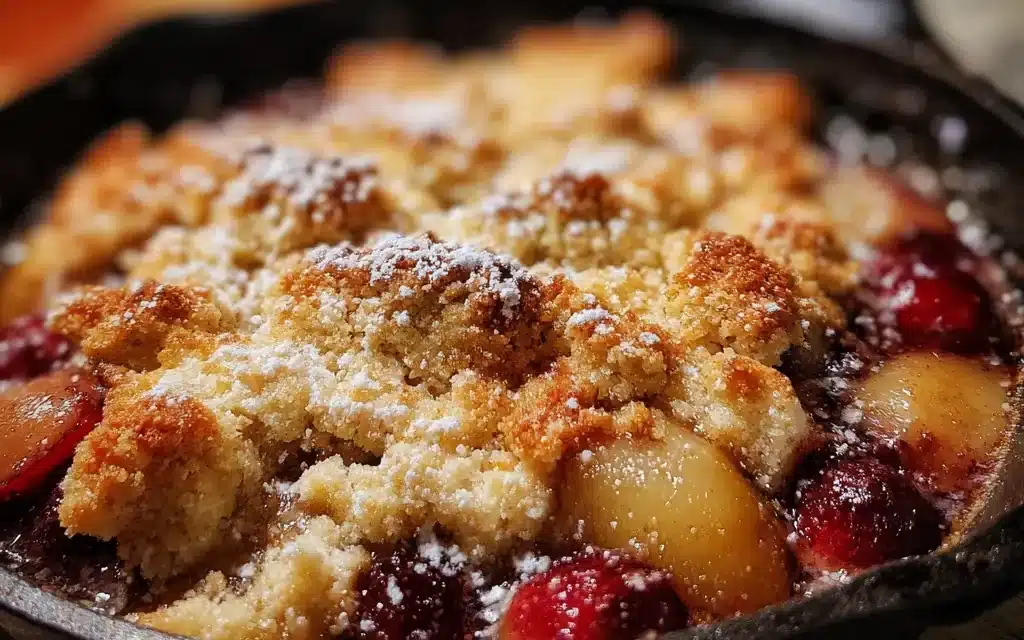
What sets this Magic Apple Plum Cobbler apart is the perfect balance of flavors and textures. The combination of tart apples, sweet plums, and a touch of cinnamon and nutmeg creates a filling that is simply divine. But the real secret lies in the buttery, flaky crust that perfectly complements the fruit filling. With just the right amount of sweetness and a hint of crunch, this cobbler will have your family and friends begging for seconds.
Essential Ingredients You’ll Need
- Apples: The foundation of this recipe, choose a variety that holds its shape well when baked, like Granny Smith or Honeycrisp.
- Plums: Ripe, juicy plums add a lovely sweetness and vibrant color to the filling.
- All-purpose flour: This helps create the perfect cobbler crust.
- Butter: For a rich, flaky texture that can’t be beat.
- Sugar: A combination of white and brown sugar enhances the natural sweetness of the fruit.
- Spices: Cinnamon and nutmeg add warmth and depth of flavor.
Step-by-Step Magic Apple Plum Cobbler Instructions
Preparing Your Magic Apple Plum Cobbler
This Magic Apple Plum Cobbler is surprisingly easy to make, with just a few simple steps. In total, it takes about an hour and a half from start to finish, and the end result is well worth the effort. You’ll need a large baking dish, a mixing bowl, and a few basic kitchen tools to get started.
1- Preheat your oven to 375°F (190°C) and grease a 9×13 inch baking dish with butter or non-stick cooking spray.
2- In a large mixing bowl, combine the chopped apples and plums. Toss with sugar, flour, cinnamon, and nutmeg until the fruit is evenly coated.
3- For the crust, cut the cold butter into the flour using a pastry blender or two forks until the mixture resembles coarse crumbs. Stir in just enough cold water to bring the dough together.
4- Gently press the dough into the prepared baking dish, covering the fruit in an even layer. Be careful not to overmix, as this can make the crust tough.
5- Bake the Magic Apple Plum Cobbler for 45-55 minutes, or until the crust is golden brown and the fruit is bubbly.
6- Allow the cobbler to cool for at least 15 minutes before serving. Scoop into bowls and enjoy warm, with a scoop of vanilla ice cream if desired.
Pro Tips for Success
To ensure your Magic Apple Plum Cobbler turns out perfectly every time, here are a few pro tips:
- Use a mix of tart and sweet apples for the best flavor balance.
- Don’t skip the chilling step for the crust – this helps it stay flaky and tender.
- Be careful not to overfill the baking dish, as the fruit can bubble over.
- Keep an eye on the cobbler towards the end of baking to prevent the crust from getting too dark.
Serving and Storing Your Magic Apple Plum Cobbler
Perfect Pairings for Magic Apple Plum Cobbler
This Magic Apple Plum Cobbler is the ultimate comfort food, and it pairs beautifully with a scoop of vanilla ice cream or a dollop of freshly whipped cream. It’s also delicious on its own or with a cup of hot coffee or tea. For a special occasion, you could even serve it alongside a scoop of sorbet or a drizzle of caramel sauce.
Storage and Make-Ahead Tips
Leftover Magic Apple Plum Cobbler can be stored in the refrigerator for up to 4 days. To reheat, simply place a serving in the microwave for 30-60 seconds, or until warmed through. You can also bake the cobbler ahead of time and reheat it in the oven at 350°F (175°C) for 15-20 minutes before serving.
Variations and Dietary Adaptations for Magic Apple Plum Cobbler
Creative Magic Apple Plum Cobbler Variations
If you’re feeling adventurous, there are so many ways to put your own spin on this classic Magic Apple Plum Cobbler recipe. Try using a mixture of different fruits, like peaches and berries, or add a crumble topping for extra texture. You could also experiment with different spices, like ginger or cardamom, or swap out the crust for a biscuit topping.
Making Magic Apple Plum Cobbler Diet-Friendly
For a healthier version of this Magic Apple Plum Cobbler, you can try using whole wheat flour in the crust, reducing the sugar in the filling, or using a sugar substitute. You can also make it gluten-free by using a gluten-free flour blend, or make it vegan by using non-dairy butter and skipping the ice cream.
Frequently Asked Questions
Q: Can I use a different type of fruit instead of apples and plums?
A: Absolutely! This recipe is incredibly versatile, and you can use a variety of fruits, such as peaches, berries, or even a combination of different fruits. Just be sure to adjust the sugar and spices accordingly.
Q: How do I know when the cobbler is done baking?
A: The cobbler is done when the crust is golden brown and the fruit filling is bubbly. You can also check with a toothpick or knife – it should come out clean when the cobbler is fully baked.
Q: Can I make this cobbler ahead of time?
A: Yes, you can! The cobbler can be prepared and baked up to 3 days in advance. Store it in the refrigerator, and then reheat it in the oven before serving.
Q: How many servings does this recipe make?
A: This Magic Apple Plum Cobbler recipe makes approximately 8-10 servings, depending on the size of the portions.
Q: What should I do if the crust is browning too quickly?
A: If the crust is browning too quickly, you can cover the cobbler loosely with a piece of aluminum foil to prevent further browning while the filling cooks through.


Effortless Magic Apple Plum Cobbler
- Total Time: 55
- Yield: 8
Description
Indulge in the cozy, comforting flavors of this homemade Magic Apple Plum Cobbler. Tender apples and juicy plums are enveloped in a buttery, flaky crust for a delightful dessert that’s sure to satisfy your sweet tooth.
Ingredients
– 4 cups peeled, sliced Granny Smith apples
– 2 cups pitted, sliced plums
– 1 cup granulated sugar
– 1/4 cup all-purpose flour
– 1 teaspoon ground cinnamon
– 1/4 teaspoon ground nutmeg
– 1 cup all-purpose flour
– 1/2 cup unsalted butter, chilled and cubed
– 1/4 cup cold water
Instructions
1. – Preheat oven to 375°F.
2. – In a large bowl, toss the apple and plum slices with the sugar, 1/4 cup flour, cinnamon, and nutmeg until well combined.
3. – In a separate bowl, whisk together the 1 cup of flour. Cut in the chilled butter using a pastry blender or two forks until the mixture resembles coarse crumbs.
4. – Gradually add the cold water, mixing just until the dough comes together.
5. – Roll out the dough into a 12-inch circle and place it in a 9-inch pie dish.
6. – Spoon the fruit mixture into the pie dish, spreading it evenly.
7. – Bake for 40-45 minutes, or until the crust is golden brown and the fruit is bubbly.
8. – Allow to cool for at least 30 minutes before serving.
Notes
For a more indulgent version, serve the cobbler warm with a scoop of vanilla ice cream. You can also experiment with different fruit combinations, such as peaches or berries, in place of the plums.
- Prep Time: 15
- Cook Time: 40
- Category: Dessert
- Method: Baking
- Cuisine: American
Conclusion
I hope this Magic Apple Plum Cobbler recipe has inspired you to get into the kitchen and create a truly special dessert for your loved ones. With its perfect balance of flavors and textures, this cobbler is sure to become a new family favorite. Don’t be afraid to get creative and make it your own – I can’t wait to hear about your delicious variations in the comments below. Happy baking!


