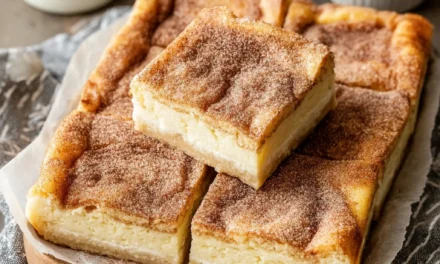
Baking Christmas cookie bars has always been one of my favorite holiday traditions. There’s just something so comforting and nostalgic about the aroma of warm, buttery cookies wafting through the house. I can still remember the year my grandma taught me her secret recipe – it was the first time I ever helped out in the kitchen during the holiday season.
I must have been around 8 or 9 years old, just a little tyke, but I was so eager to learn. Grandma gathered all the ingredients and tools we’d need, and I watched in awe as she effortlessly mixed the dough and pressed it into the pan. When it came time to add the toppings, she let me sprinkle on the crushed candy canes and drizzle the melted chocolate. I was so proud of the finished Christmas cookie bars, and even more thrilled when the whole family devoured them at our Christmas Eve party.
From that day on, baking Christmas cookie bars has been a cherished ritual. It’s the one recipe I make without fail every single holiday season. And let me tell you, this particular Christmas cookie bars recipe is an absolute showstopper. The buttery, crumbly base is the perfect canvas for layers of festive flavors – rich chocolate, creamy peppermint, and a dusting of powdered sugar that looks just like freshly fallen snow. Once you try these, they’ll become your go-to Christmas treat, I just know it.
Table of Contents
Why This Christmas Cookie Bars Recipe Will Become Your Go-To
The secret behind these perfect Christmas cookie bars lies in the balance of textures and flavors. The cookie base is slightly crisp on the edges but delightfully soft and chewy in the center. The chocolate and peppermint topping provides a decadent contrast, while the powdered sugar adds a lovely seasonal sweetness. But the true magic happens when you take that first bite and experience all those flavors and textures melting together in your mouth. It’s a true holiday delight!
The Secret Behind Perfect Christmas Cookie Bars
What sets this Christmas cookie bars recipe apart is the technique I use to get that irresistible texture. Rather than a typical cookie dough, the base is made with a buttery shortbread-like mixture that’s pressed into the pan. This gives you a richer, more substantial “cookie bar” instead of a thin, crunchy cookie. The secret is to not over-mix the dough – you want it to have a slightly crumbly, sandy texture before pressing it into the pan.
Another unique aspect is the way the toppings are applied. The chocolate is melted and drizzled in a zig-zag pattern, then the crushed candy canes are sprinkled on top. This creates a beautifully festive look, with the red and white candy cane pieces peeking through the chocolate. And of course, the final dusting of powdered sugar adds that magical holiday touch.
Essential Ingredients You’ll Need
- Unsalted butter – The foundation of the buttery cookie base.
- Granulated sugar – Sweetens the dough and balances the richness.
- All-purpose flour – Provides structure and a tender crumb.
- Vanilla extract – Enhances the overall flavor.
- Salt – Helps bring out the sweetness.
- Semi-sweet chocolate chips – For the delectable chocolate topping.
- Crushed candy canes – Adds a refreshing peppermint flavor.
- Powdered sugar – For the classic Christmas cookie snow-like dusting.
Step-by-Step Christmas Cookie Bars Instructions
Preparing Your Christmas Cookie Bars
These Christmas cookie bars are incredibly easy to make, with just a handful of simple steps. The total prep and baking time is about an hour, so you can whip up a batch in no time. You’ll need a 9×13 baking pan, a hand mixer or stand mixer, and a few basic kitchen tools. Let’s get started!
1- Preheat your oven to 350°F (175°C) and grease the baking pan with butter or non-stick spray.
2- In a large bowl, beat the softened butter and granulated sugar together until light and fluffy, about 2-3 minutes.
3- Add the vanilla and a pinch of salt, then gradually mix in the all-purpose flour until a soft dough forms.
4- Press the dough evenly into the prepared baking pan, making sure to reach all the corners.
5- Bake for 20-22 minutes, until the edges are lightly golden brown. Allow the cookie bars to cool completely.
6- Once cooled, melt the chocolate chips in the microwave or a double boiler, then drizzle the melted chocolate over the bars in a zig-zag pattern. Immediately sprinkle the crushed candy canes on top. Finish with a light dusting of powdered sugar.
Pro Tips for Success
The key to perfectly textured Christmas cookie bars is to not over-mix the dough. You want it to have a slightly crumbly, sandy consistency before pressing it into the pan. Also, be sure to let the bars cool completely before adding the toppings – this helps the chocolate set nicely.
Another pro tip is to use high-quality chocolate and candy canes for the best flavor. I like to buy peppermint bark and crush it myself, but you can also use regular candy canes. And don’t be afraid to be generous with the powdered sugar – it really makes the bars look like they’ve been kissed by fresh snowfall.
Serving and Storing Your Christmas Cookie Bars
Perfect Pairings for Christmas Cookie Bars
These Christmas cookie bars are the perfect sweet treat to enjoy with a steaming mug of hot cocoa or mulled cider. The rich chocolate and peppermint flavors also pair beautifully with a glass of eggnog or a small slice of traditional Christmas fruitcake. And of course, they’re an absolute must-have on any holiday dessert table or cookie tray.
Storage and Make-Ahead Tips
The great thing about these Christmas cookie bars is that they keep really well. Once the bars have completely cooled and the toppings have set, you can store them in an airtight container at room temperature for up to 5 days. They also freeze beautifully for longer-term storage – just wrap them tightly and freeze for up to 3 months.
If you want to get a head start on your holiday baking, you can even make the cookie base a few days in advance and keep it frozen until you’re ready to assemble and bake. Then it’s just a matter of melting the chocolate, crushing the candy canes, and finishing with that festive powdered sugar dusting.
Variations and Dietary Adaptations for Christmas Cookie Bars
Creative Christmas Cookie Bars Variations
While the classic chocolate-peppermint combination is hard to beat, you can easily customize these Christmas cookie bars to fit different tastes and preferences. For a nutty twist, swap out the chocolate for chopped toasted pecans or walnuts. Or try using white chocolate chips and crushed peppermint Oreos instead of candy canes.
You could also experiment with other holiday flavors, like using orange zest and cranberries, or even a swirl of caramel. And for a more decadent dessert, you can add a layer of cream cheese frosting between the cookie base and toppings.
Making Christmas Cookie Bars Diet-Friendly
If you’re looking to lighten things up, there are a few simple substitutions you can make to create a healthier version of these Christmas cookie bars. For the cookie base, you can use a combination of whole wheat flour and all-purpose flour. And instead of regular butter, try using a plant-based butter alternative.
To make them gluten-free, simply swap out the all-purpose flour for a 1-to-1 gluten-free flour blend. For a vegan option, use dairy-free chocolate chips and replace the regular butter with coconut oil or vegan butter. And if you’re watching your carbs, you can make a low-sugar version by using sugar-free chocolate chips and a granulated sugar substitute.
Frequently Asked Questions
Q: Can I use regular chocolate chips instead of semi-sweet?
A: Absolutely! You can use any type of chocolate chips or chopped chocolate that you prefer. Semi-sweet is my personal favorite, but milk chocolate or dark chocolate would also work beautifully.
Q: How long do these Christmas cookie bars need to bake?
A: The cookie bars should bake for 20-22 minutes at 350°F (175°C). You’re looking for the edges to be lightly golden brown, while the center remains soft.
Q: Can I make these Christmas cookie bars ahead of time?
A: Yes, these bars keep really well! You can store them in an airtight container at room temperature for up to 5 days, or freeze them for up to 3 months.
Q: How much does this recipe make?
A: This recipe makes one 9×13 pan of Christmas cookie bars, which can be cut into 24 squares or bars.
Q: What if my chocolate doesn’t drizzle nicely?
A: If the melted chocolate is too thick to drizzle, you can thin it out by mixing in a teaspoon or two of vegetable oil or coconut oil. This will help the chocolate flow more smoothly.

Christmas Cookie Bars
- Total Time: 40
- Yield: 24
Description
These rich and buttery Christmas cookie bars are a delightful holiday treat. Packed with festive flavors and a tender, melt-in-your-mouth texture, they’re perfect for sharing with family and friends.
Ingredients
– 1 cup (2 sticks) unsalted butter, softened
– 1 cup granulated sugar
– 2 large eggs
– 1 teaspoon vanilla extract
– 2 1/4 cups all-purpose flour
– 1 teaspoon baking powder
– 1/2 teaspoon salt
– 1 cup semi-sweet chocolate chips
Instructions
1. – Preheat the oven to 350°F. Grease a 9×13-inch baking pan and set aside.
2. – In a large bowl, cream together the butter and sugar until light and fluffy, about 2-3 minutes.
3. – Beat in the eggs one at a time, then stir in the vanilla.
4. – In a separate bowl, whisk together the flour, baking powder, and salt.
5. – Gradually add the dry ingredients to the wet ingredients and mix until just combined. Fold in the chocolate chips.
6. – Spread the batter evenly into the prepared baking pan.
7. – Bake for 25-30 minutes, or until a toothpick inserted in the center comes out clean.
8. – Allow the bars to cool completely before cutting into squares.
Notes
– For an extra festive touch, sprinkle the top of the bars with crushed candy canes or a dusting of powdered sugar.
– Store the cooled bars in an airtight container at room temperature for up to 5 days.
- Prep Time: 15
- Cook Time: 25
- Category: Dessert
- Method: Baking
- Cuisine: American
Conclusion
Christmas cookie bars are truly one of the most magical holiday treats you can make. With their irresistible layers of buttery cookie, rich chocolate, and refreshing peppermint, these bars are guaranteed to be a hit at any holiday gathering. Plus, they’re so easy to prepare that you can whip up a batch in no time.
I hope this recipe inspires you to get into the kitchen and start baking. These Christmas cookie bars are the perfect way to fill your home with the comforting scents of the season and create cherished memories with your loved ones. So what are you waiting for? Grab your apron and get ready to bake up a batch of holiday deliciousness!


