It was a lazy Sunday afternoon when the craving for something sweet and nostalgic hit me. As I rummaged through my pantry, my eyes landed on a box of Rice Krispies and a container of leftover sushi rice from the night before. That’s when the idea struck – why not combine these two childhood favorites and create something truly unique?
I can still remember the look of pure delight on my partner’s face as I presented the first batch of Sushi Rice Krispie Treats. They were an instant hit, with the perfect balance of chewiness and crunch, and the unexpected burst of sushi rice flavor. From that day on, this recipe has become a go-to for any occasion, from family gatherings to potluck parties. It’s the kind of dessert that brings a smile to everyone’s face and has them reaching for just one more piece.
Table of Contents
Why This Sushi Rice Krispie Treats Recipe Will Become Your Go-To
The Secret Behind Perfect Sushi Rice Krispie Treats
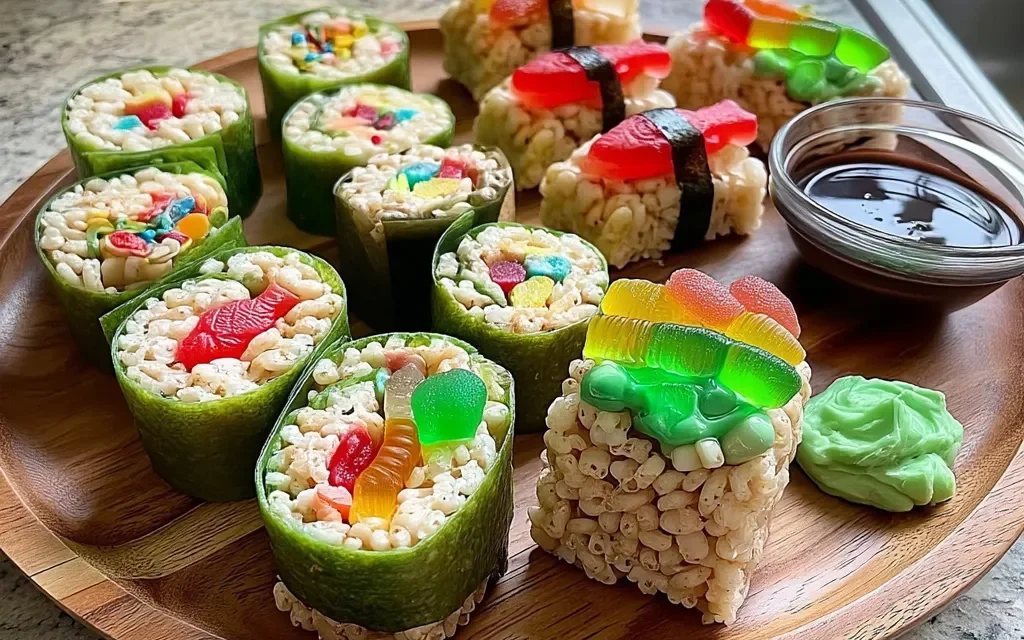
What makes this Sushi Rice Krispie Treats recipe so special is the unique combination of the classic Rice Krispies cereal and the savory, slightly sweet sushi rice. The cooked sushi rice adds a subtle yet distinct flavor that perfectly complements the marshmallowy goodness of the treats.
But the real secret lies in the way the ingredients are combined. By folding the sushi rice into the melted marshmallow mixture, you create a beautifully swirled and visually appealing treat that’s sure to impress. And the best part? The entire process takes just 15 minutes from start to finish, making it the ultimate quick and easy dessert.
Essential Ingredients You’ll Need
To make these Sushi Rice Krispie Treats, you’ll need a few simple ingredients:
- 3 cups rice krispies cereal: The classic crunchy base that provides the signature texture.
- 2 cups cooked sushi rice, cooled: This is the star ingredient, adding a delightful sushi flavor and chewiness to the treats.
- 4 cups miniature marshmallows: The gooey binding agent that holds everything together and creates that iconic Rice Krispies treat taste.
- 3 tablespoons unsalted butter: Helps to melt and incorporate the marshmallows, making the treats extra smooth and rich.
By using these exact ingredients in the right proportions, you’ll achieve the perfect balance of flavors and textures that will have everyone reaching for seconds.
Step-by-Step Sushi Rice Krispie Treats Instructions
Preparing Your Sushi Rice Krispie Treats
With a prep time of just 15 minutes and a cook time of 0 minutes, this Sushi Rice Krispie Treats recipe is the ultimate in convenience. All you’ll need is a large microwave-safe bowl, a spatula, and a greased 9×13 inch baking pan.
1- Start by measuring out your 3 cups of Rice Krispies cereal and 2 cups of cooked, cooled sushi rice. Have these ingredients ready to go, as the process moves quickly once the marshmallows are melted.
2- In the microwave-safe bowl, melt the 3 tablespoons of unsalted butter. Once the butter is melted, add in the 4 cups of miniature marshmallows and stir to coat them evenly.
3- Microwave the marshmallow mixture in 30-second intervals, stirring in between, until the marshmallows are completely melted and the mixture is smooth and creamy. This should take about 1-2 minutes total.
4- Immediately remove the bowl from the microwave and fold in the 2 cups of cooked sushi rice. The mixture will be thick and sticky, so work quickly to incorporate the rice evenly. You’ll notice a beautiful swirled pattern starting to take shape.
5- Once the sushi rice is fully incorporated, gently fold in the 3 cups of Rice Krispies cereal. Be sure to mix just until the cereal is evenly coated, being careful not to crush the delicate puffed rice.
6- Transfer the Sushi Rice Krispie Treats mixture to the greased baking pan, pressing it down firmly to create an even layer. Allow the treats to cool completely before cutting into squares and serving.
Pro Tips for Success
- For the best texture, make sure to use cold, cooked sushi rice. Warm rice will cause the marshmallows to become too sticky and difficult to work with.
- Grease your hands or a spatula with a bit of non-stick cooking spray before pressing the mixture into the pan. This will prevent the treats from sticking to your hands.
- Don’t overwork the mixture once the Rice Krispies are added. Gentle folding is key to maintaining the crunchy cereal texture.
- For a fun twist, try adding in some chopped toasted nori (seaweed sheets) or a sprinkle of sesame seeds on top.
- If you find the treats are too sticky, try refrigerating them for 30 minutes before cutting. This will firm up the marshmallow and make them easier to slice.
Serving and Storing Your Sushi Rice Krispie Treats
Perfect Pairings for Sushi Rice Krispie Treats
These Sushi Rice Krispie Treats are the perfect sweet treat to enjoy on their own, but they also pair beautifully with a variety of beverages and side dishes. For a classic pairing, serve them alongside a tall glass of cold milk for dipping.
If you’re looking to elevate the experience, try serving the Sushi Rice Krispie Treats with a refreshing green tea or a fruity iced tea. The delicate flavors of the sushi rice will complement the earthy tea notes perfectly.
As for side dishes, these treats would make a fantastic addition to a sushi platter or a Japanese-inspired dessert spread. They also work well as a sweet counterpoint to savory dishes like teriyaki chicken or miso-glazed salmon. With 12 servings per batch, this recipe is perfect for sharing at potlucks, picnics, or family gatherings.
Storage and Make-Ahead Tips
One of the best things about Sushi Rice Krispie Treats is their long shelf life and versatility. Once the treats have cooled completely, you can store them in an airtight container at room temperature for up to 5 days.
If you’d like to make them ahead of time, you can also freeze the Sushi Rice Krispie Treats for up to 2 months. Simply wrap the individual squares tightly in plastic wrap and place them in a freezer-safe bag or container. When ready to enjoy, thaw the treats at room temperature for about an hour before serving.
For quick reheating, you can place the frozen treats in the microwave for 10-15 seconds, just until they’re slightly softened. Be careful not to overheat them, as this can cause the marshmallows to become too sticky and gooey.
Variations and Dietary Adaptations for Sushi Rice Krispie Treats
Creative Sushi Rice Krispie Treats Variations
While the classic Sushi Rice Krispie Treats are a real crowd-pleaser, there are plenty of ways to put your own spin on this recipe. For a seasonal twist, try incorporating festive additions like crushed peppermint candies around the holidays or diced fresh strawberries in the spring.
You could also experiment with different types of rice, such as brown rice or even black forbidden rice, to create unique flavor profiles. And for a more grown-up version, consider adding a drizzle of melted dark chocolate or a sprinkle of toasted coconut flakes on top.
Making Sushi Rice Krispie Treats Diet-Friendly
If you’re looking to enjoy these Sushi Rice Krispie Treats while accommodating dietary restrictions, there are a few simple substitutions you can make. For a gluten-free version, simply swap the regular Rice Krispies cereal for a gluten-free variety.
To make them vegan, replace the unsalted butter with a plant-based butter alternative, and use vegan marshmallows instead of the traditional kind. Just be sure to double-check the labels to ensure all your ingredients are truly vegan-friendly.
For a low-carb spin, you can substitute the Rice Krispies cereal with crushed pork rinds or almond flour-based cereal. And to reduce the overall sugar content, consider using a combination of regular and sugar-free marshmallows.
Frequently Asked Questions
Q: Can I use regular white rice instead of sushi rice?
A: While you can use regular white rice in a pinch, the sushi rice is really the star of the show in this recipe. The slightly sticky and sweet nature of sushi rice helps bind the treats together and provides a unique flavor profile that you just can’t replicate with plain white rice.
Q: How long does it take to make these Sushi Rice Krispie Treats?
A: This recipe has a total time of just 15 minutes, with 15 minutes of prep time and 0 minutes of cook time. The quick and easy preparation is what makes these treats so appealing for busy schedules or last-minute cravings.
Q: Can I store the Sushi Rice Krispie Treats for later?
A: Absolutely! The treats can be stored in an airtight container at room temperature for up to 5 days. You can also freeze them for up to 2 months. Just be sure to thaw them at room temperature for about an hour before serving.
Q: How many servings does this recipe make?
A: This recipe yields 12 servings of Sushi Rice Krispie Treats. The serving size is perfect for sharing at parties, picnics, or as a sweet snack.
Q: What if my Sushi Rice Krispie Treats turn out too sticky?
A: If the treats end up being too sticky, try refrigerating them for 30 minutes before cutting. This will firm up the marshmallow and make them easier to slice. You can also try spraying your knife or spatula with a bit of non-stick cooking spray to prevent sticking.
Conclusion
Sushi Rice Krispie Treats are the ultimate fusion of two beloved childhood classics, and this recipe is sure to become your new go-to dessert. With its perfectly balanced flavors, irresistible texture, and quick preparation time, it’s no wonder these treats have become a hit with family and friends.
So, what are you waiting for? Gather your ingredients, whip up a batch of these delightful Sushi Rice Krispie Treats, and get ready to be the star of your next gathering. Don’t forget to let me know how they turn out – I can’t wait to hear all about your sushi-meets-cereal adventure!


