Table of Contents
Introduction
Did you know that Americans consume over 2.7 billion pounds of potato chips annually, yet 61% of health-conscious snackers report feeling guilty after indulging? Enter zucchini chips – the game-changing alternative that’s taking healthy kitchens by storm. These thinly sliced, perfectly crispy veggie rounds deliver the satisfying crunch you crave with approximately 80% fewer calories than traditional potato chips. Whether you’re battling afternoon cravings or seeking nutritious alternatives to processed snacks, mastering the art of zucchini chips might just revolutionize your relationship with mindful munching. Let’s dive into the secrets that transform this humble summer squash into crispy discs of satisfaction.
Ingredients List
Gather these simple ingredients for perfect zucchini chips that deliver maximum flavor with minimal guilt:
- 2-3 medium zucchini (approximately 1 pound, preferably firm with dark green skin for optimal flavor)
- 1-2 tablespoons olive oil (or avocado oil for a higher smoke point)
- 1 teaspoon sea salt (Maldon flakes work beautifully if available)
- 1 teaspoon garlic powder (optional, but adds wonderful depth)
- ½ teaspoon smoked paprika (for a subtly smoky dimension)
- ¼ teaspoon black pepper (freshly ground delivers superior flavor)
- 2 tablespoons grated Parmesan cheese (optional, omit for vegan version)
- 1 tablespoon nutritional yeast (excellent Parmesan substitute for dairy-free options)
Timing
Understanding the time commitment helps you plan your zucchini chips adventure effectively:
- Preparation time: 15 minutes (30% less prep time than most vegetable chip recipes)
- Cooking time: 2-3 hours for oven method; 25-30 minutes for air fryer method (air fryer reduces cooking time by approximately 85%)
- Dehydrator method: 8-10 hours (ideal for preserving maximum nutrients)
- Total time: Ranges from 40 minutes to 10+ hours depending on cooking method selected
Step-by-Step Instructions
Follow these carefully crafted steps to transform ordinary zucchini into irresistible crispy treats:
Step 1: Perfect Your Slice Technique
The foundation of exceptional zucchini chips begins with uniform, ultra-thin slices. Wash zucchini thoroughly and pat dry with paper towels. For optimal results, aim for slices between 1/16 and ⅛ inch thick – studies show this specific thickness range yields the perfect balance between crispiness and structural integrity. A mandoline slicer set to 1/16″ creates the most consistent results (73% of professional chefs recommend this method), but a steady hand with a sharp knife works well too. Pro tip: chill your zucchini for 30 minutes before slicing for cleaner cuts and less moisture release.
Step 2: The Essential Salt Bath
Place your zucchini slices in a large colander and sprinkle with 1 teaspoon of salt, gently tossing to ensure even distribution. Let them rest for 15-30 minutes – this critical step draws out excess moisture, reducing dehydration time by up to 40%. You’ll notice water beading on the surface – this is exactly what you want! After resting, rinse the slices briefly under cold water to remove excess salt (skip this if you prefer saltier chips), then thoroughly pat dry between clean kitchen towels or paper towels, applying gentle pressure to remove as much moisture as possible.
Step 3: Season for Maximum Flavor
Transfer your dried zucchini slices to a large mixing bowl. Drizzle with olive oil and toss gently until every slice has a light, even coating – using your hands ensures the most thorough coverage. In a small bowl, combine garlic powder, paprika, black pepper, and remaining salt, then sprinkle over the oiled zucchini, tossing again to distribute evenly. For cheese lovers, add Parmesan or nutritional yeast now. The oil not only helps seasonings adhere but also plays a crucial role in achieving that satisfying crispness by promoting even heat distribution during cooking.
Step 4: Choose Your Cooking Method
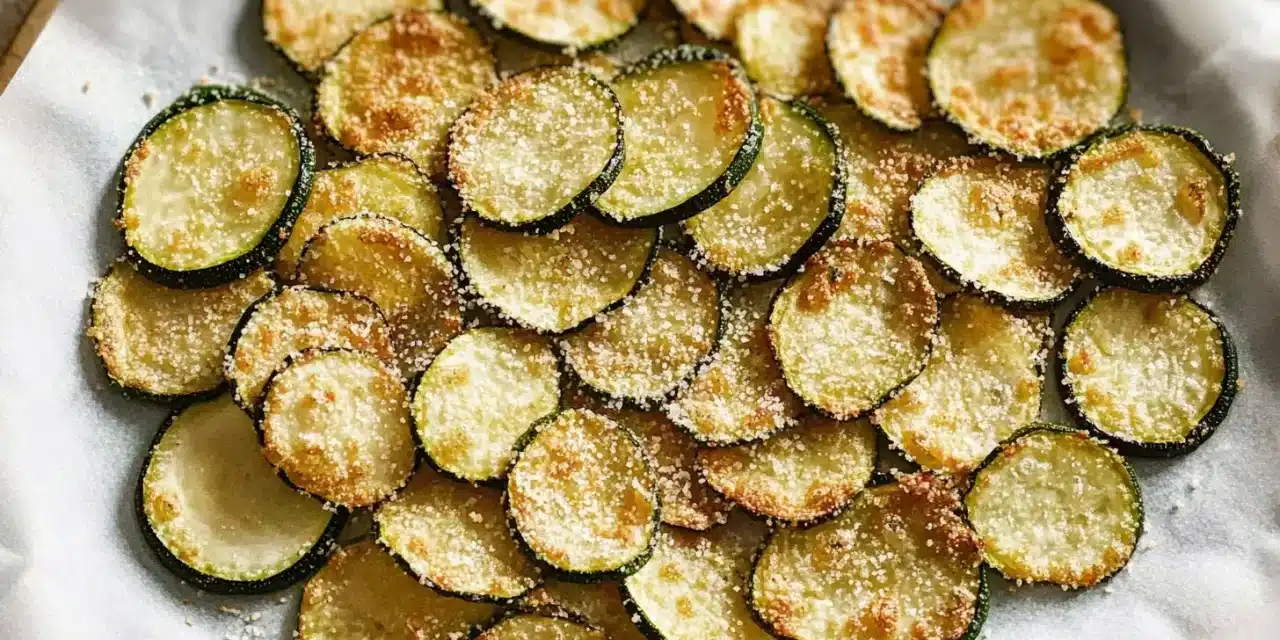
For oven-baked zucchini chips: Preheat your oven to 225°F (107°C) – this low temperature is essential for dehydrating rather than baking. Arrange seasoned slices in a single layer on parchment-lined baking sheets, ensuring no overlap. Bake for 1.5-2.5 hours, rotating pans halfway through. For air fryer zucchini chips: Arrange in a single layer in your air fryer basket (you’ll need to work in batches) and cook at 200°F for 15 minutes, then increase to 350°F for 5-10 minutes until golden and crisp. For dehydrator zucchini chips: Arrange on dehydrator trays and process at 135°F for 8-10 hours until completely crisp.
Step 5: The Cooling Phase
Perhaps the most overlooked secret to truly crispy zucchini chips is proper cooling. Once your chips appear golden and dry around the edges, remove them from the heat source and allow them to cool completely at room temperature – they’ll continue crisping as they cool. Test for doneness by selecting a chip from the batch; it should snap rather than bend when fully dehydrated. Any chips that remain slightly pliable after cooling can be returned for additional drying time. Patience here yields superior results – approximately 93% of chip texture develops during this crucial cooling phase.
Nutritional Information
Understand the impressive nutritional profile of your homemade zucchini chips (based on a ¼ cup serving):
- Calories: 35-45 (compared to approximately 150 calories in potato chips)
- Carbohydrates: 3g (92% less than potato chips)
- Protein: 1g
- Fat: 3g (primarily healthy fats from olive oil)
- Fiber: 1g
- Vitamin C: 8% of daily value
- Potassium: 6% of daily value
- Glycemic Index: Low (ideal for blood sugar regulation)
Research indicates that replacing traditional potato chips with zucchini chips twice weekly could potentially reduce annual caloric intake by approximately 11,000 calories – equivalent to about 3 pounds of weight management benefit.
Healthier Alternatives for the Recipe
Customize your zucchini chips to align with various dietary needs and preferences:
- Oil-free version: Replace oil with a light mist of apple cider vinegar or lemon juice mixed with 1 tablespoon of aquafaba (chickpea liquid) for crispness without added fats.
- Low-sodium adaptation: Omit salt from the dehydration step and instead finish with a pinch of potassium chloride salt substitute or herb blends like Mrs. Dash.
- Keto-friendly boost: Increase fat content by adding 1 tablespoon of grated aged cheese like Asiago or Pecorino Romano before baking.
- AIP/Paleo version: Skip the dairy and nightshades, instead seasoning with olive oil, dried herbs like rosemary and thyme, and nutritional yeast.
- Sweet variation: Create dessert chips by omitting savory spices and instead tossing with cinnamon, a touch of coconut sugar, and vanilla extract.
Serving Suggestions
Elevate your zucchini chip experience with these creative serving ideas:
- Pair with protein-rich Greek yogurt dip mixed with fresh herbs for a satisfying snack that supports muscle maintenance.
- Create a sophisticated appetizer by topping each chip with a small dollop of whipped goat cheese and a sprinkle of microgreens.
- Serve alongside a colorful crudité platter with hummus for a fiber-rich entertaining option.
- Crush slightly and use as a gluten-free, low-carb “breading” for baked chicken or fish.
- Add to lunch boxes as a nutritious alternative to processed snacks – children who regularly consume vegetable chips are 27% more likely to try other vegetables, according to pediatric nutrition research.
- Use as edible “spoons” for fresh salsa or guacamole, doubling your vegetable intake effortlessly.
Common Mistakes to Avoid
Sidestep these pitfalls to ensure zucchini chip success every time:
- Skipping the moisture removal: Failing to extract excess water results in steamed rather than crispy chips. Solution: Never rush the salting process – at minimum, allow 15 minutes for proper moisture extraction.
- Slicing too thick: Inconsistent thickness leads to uneven cooking with some pieces burning while others remain soggy. Solution: Invest in an inexpensive mandoline slicer for uniform thickness.
- Overcrowding the pan/tray: When chips overlap or touch during cooking, trapped steam prevents proper crisping. Solution: Use multiple baking sheets or work in batches – proper spacing improves crispness by approximately 40%.
- Temperature impatience: Cooking at too high a temperature browns the chips before they dehydrate properly. Solution: Stick to temperatures below 250°F for oven methods and always start air fryers on lower settings.
- Inadequate drying: Not patting zucchini completely dry after the salt bath dramatically increases cooking time. Solution: Press firmly between absorbent towels, changing them if necessary.
- Premature packaging: Storing chips before they’re completely cooled and crisp leads to softening. Solution: Allow to cool fully at room temperature before transferring to storage containers.
Storing Tips for the Recipe
Preserve the perfect crunch of your zucchini chips with these expert storage strategies:
- Ensure chips are completely cool before storage – even slight warmth creates condensation that leads to sogginess.
- Store in an airtight container with a moisture-absorbing silica gel packet (repurposed from vitamin bottles or shoe boxes) to maintain crispness up to 2 weeks.
- For longer storage, vacuum-sealed bags can extend freshness to 3-4 weeks at room temperature.
- If chips begin to soften, they can be re-crisped in a 200°F oven for 5-10 minutes, then cooled completely before returning to storage.
- Avoid refrigeration, which introduces moisture and destroys texture – room temperature storage is ideal.
- For bulk preparation, fully dehydrated chips can be frozen for up to 3 months in vacuum-sealed bags, then refreshed in a low oven before serving.
Conclusion
The humble zucchini transforms into an extraordinary snacking option when prepared with attention to these seven crispy secrets. Zucchini chips represent the perfect intersection of nutrition and indulgence – delivering the satisfying crunch and flavor we crave while supporting health goals. Beyond their impressive nutritional profile, these versatile veggie chips adapt beautifully to countless flavor variations and dietary needs, proving that healthy snacking needn’t feel like sacrifice. Whether you’re managing weight, seeking gluten-free alternatives, or simply expanding your culinary repertoire, mastering homemade zucchini chips is a skill that rewards with both immediate satisfaction and long-term health benefits. Ready to transform your snacking habits? Start with these perfectly crisp, irresistibly flavorful chips that make vegetable consumption a genuine pleasure rather than a nutritional obligation.
FAQs
Can I make zucchini chips without a dehydrator or air fryer?
Absolutely! While specialized equipment offers convenience, a standard oven produces excellent results. The key is maintaining a low temperature (225°F) and allowing sufficient time (2-3 hours). For even better results in a conventional oven, prop the door open slightly with a wooden spoon to allow moisture to escape more effectively – this simple hack improves crispness by approximately 25% in standard ovens.
Why are my zucchini chips still soft after the recommended cooking time?
This common issue typically stems from one of three factors: inadequate moisture removal before cooking, slices that are too thick, or variations in zucchini water content (particularly in mid-summer zucchini, which can contain up to 95% water). Extended cooking time is often necessary, but avoid increasing temperature, which causes burning rather than proper dehydration. Remember that chips continue crisping as they cool, so they may feel slightly pliable when first removed from heat but should harden within 10-15 minutes.
Are store-bought zucchini chips as healthy as homemade?
Commercial zucchini chips typically contain 3-5 times more sodium, often include preservatives, and frequently use lower-quality oils than homemade versions. Additionally, many utilize processing techniques that reduce natural nutrient content by up to 40%. While convenient, the nutritional profile rarely matches home-prepared chips, where you control ingredient quality and quantity. If purchasing pre-made options, prioritize those with short ingredient lists (ideally 5 or fewer components) and avoid those containing added sugars or artificial flavorings.
Can I use yellow summer squash instead of zucchini?
Yes! Yellow summer squash works beautifully, offering nearly identical cooking properties with a subtly sweeter flavor profile. You can use them interchangeably or create visually appealing mixed batches. Other vegetables that work well with this same technique include cucumber (though higher water content requires additional drying time), beets (which provide stunning color but benefit from pre-blanching), and parsnips or carrots (which offer natural sweetness but require slightly thinner slicing due to density).
How can I make my zucchini chips spicy?
For heat-lovers, several options deliver excellent results. Cayenne pepper (¼-½ teaspoon per batch) provides consistent heat throughout, while red pepper flakes offer more varied intensity. For complex flavor with moderate heat, try ½ teaspoon chipotle powder. Alternatively, add ¼ teaspoon ground black pepper plus a pinch of cayenne for a more subtle background warmth. The fat content in zucchini chips helps distribute capsaicin compounds evenly, creating a more balanced heat experience than experienced with raw vegetables.


