
I still remember the first time I made Oreo Cheesecake Bars. It was for my sister’s birthday party, and I wanted to wow the guests with something truly special. When I pulled those rich, creamy bars out of the fridge, the collective gasp from the room said it all – this was a dessert that was destined to become a new family favorite.
The secret? It’s all in the perfect balance of flavors and textures. The buttery Oreo crust provides the perfect base for the silky smooth cheesecake filling, which is then topped with a dollop of sweetened whipped cream. It’s like taking everyone’s beloved Oreo cookie and elevating it to an absolute decadent new level.
Table of Contents
Why This Oreo Cheesecake Bars Recipe Will Become Your Go-To
The Secret Behind Perfect Oreo Cheesecake Bars
What sets this Oreo Cheesecake Bars recipe apart is the attention to detail in every step. From the way the Oreo crumbs are perfectly crushed to create that ideal crust texture, to the careful whipping of the cream cheese and sugar to achieve that signature creamy filling – no aspect has been overlooked.
The key is in taking the time to really let the flavors meld together. While the total time clocks in at 135 minutes, the hands-on prep is just 15 minutes. The rest is simply chilling time, allowing the cheesecake to set up into that divine, rich texture. Trust me, it’s worth the wait!
Essential Ingredients You’ll Need
Let’s talk about the all-star cast of ingredients that make these Oreo Cheesecake Bars so incredible:
- 24 Oreo cookies, crushed – The Oreo cookie crumbs form the base of the crust, giving you that signature chocolatey flavor and crisp texture.
- 4 ounces cream cheese, softened – Cream cheese is the foundation of the cheesecake filling, providing that luscious, velvety mouthfeel.
- 1/4 cup granulated sugar – Just the right amount of sweetness to balance out the cream cheese.
- 1 teaspoon vanilla extract – A classic flavor pairing that enhances the overall taste.
- 1 cup heavy whipping cream – Whipped to perfection, this provides the light, fluffy topping.
- 1/4 cup powdered sugar – Sweetens the whipped cream for the perfect finishing touch.
Step-by-Step Oreo Cheesecake Bars Instructions
Preparing Your Oreo Cheesecake Bars
With just 15 minutes of prep time and 0 minutes of cook time, these Oreo Cheesecake Bars come together in a flash. You’ll need a food processor or blender to crush the Oreos, a hand mixer for whipping the cream cheese filling, and a baking dish to assemble everything in.
1- Start by crushing the 24 Oreo cookies into fine crumbs using a food processor or blender. The more uniform the crumb, the better the crust will hold together.
2- In a medium bowl, use a hand mixer to beat the softened cream cheese until it’s light and fluffy. Then, gradually mix in the granulated sugar and vanilla extract until well combined.
3- Carefully fold in the whipped cream, gently incorporating it to maintain that airy texture. The filling should be smooth and creamy.
4- Press the Oreo crumb crust into the bottom of your baking dish, packing it down firmly. Then, spread the cheesecake filling evenly over the top.
5- Cover and refrigerate the Oreo Cheesecake Bars for at least 2 hours, allowing the filling to set completely.
6- When ready to serve, top the chilled bars with a light dusting of powdered sugar. Cut into squares and enjoy the perfect balance of chocolate, cream, and just the right amount of sweetness.
Pro Tips for Success
- Make sure your cream cheese is truly softened before beating – this will help it whip up light and fluffy.
- Chill the cheesecake bars for at least 2 hours, but ideally 3-4 hours or overnight, for the best set texture.
- Don’t over-mix the whipped cream – you want it to maintain its airy, light consistency.
- Adjust the amount of powdered sugar on top to your personal taste preferences.
- Try different Oreo varieties like the seasonal flavors for a fun twist.
Serving and Storing Your Oreo Cheesecake Bars
Perfect Pairings for Oreo Cheesecake Bars
These Oreo Cheesecake Bars are the ultimate crowd-pleasing dessert, serving up to 12 people. They pair beautifully with a rich cup of coffee or a cold glass of milk for dunking.
For a more elevated affair, consider serving them alongside a selection of fresh berries, a drizzle of chocolate sauce, or a sprinkle of toasted nuts. And of course, they’re a showstopper at any birthday party, potluck, or holiday gathering.
Storage and Make-Ahead Tips
The great news is that Oreo Cheesecake Bars are incredibly make-ahead friendly. You can prepare the entire recipe up to 3 days in advance and store them covered in the refrigerator until ready to serve.
For longer-term storage, they also freeze exceptionally well. Simply slice the bars, place them in a single layer on a baking sheet, and freeze until solid. Then, transfer the frozen bars to an airtight container or resealable bag and store in the freezer for up to 2 months.
When ready to enjoy, thaw the frozen bars in the refrigerator overnight. You can also enjoy them straight from the freezer for a delightful frozen treat on a hot day.
Variations and Dietary Adaptations for Oreo Cheesecake Bars
Creative Oreo Cheesecake Bars Variations
The great thing about this Oreo Cheesecake Bars recipe is that it lends itself beautifully to all sorts of fun variations. Try swapping in different Oreo flavors like mint, peanut butter, or even seasonal offerings like pumpkin spice for a festive twist.
You can also experiment with add-ins like chopped nuts, chocolate chips, or a drizzle of caramel or raspberry sauce. For a more decadent version, consider topping the bars with a rich chocolate ganache.
Making Oreo Cheesecake Bars Diet-Friendly
If you’re looking to make these Oreo Cheesecake Bars a little more diet-friendly, there are a few simple substitutions you can try. For a gluten-free version, simply use gluten-free Oreo cookies in the crust.
To reduce the carbs, you can use a sugar-free sweetener like erythritol or monk fruit in place of the granulated sugar. And for a dairy-free adaptation, swap the cream cheese and heavy cream for your favorite non-dairy alternatives.
Just keep in mind that any substitutions may slightly alter the texture and flavor, so you may need to do a bit of experimenting to get the results you’re after.
Frequently Asked Questions
Q: Can I use a different type of cookie in place of Oreos?
A: While Oreos are the classic choice, you can certainly experiment with other cookie varieties like graham crackers, Nilla wafers, or even chocolate chip cookies. Just be sure to adjust the amount of crumbs and sweetener as needed.
Q: Why does this recipe take 135 minutes total?
A: The majority of the total time is spent chilling the Oreo Cheesecake Bars to allow the filling to set up properly. The hands-on prep time is just 15 minutes, but you’ll want to plan for at least 2-3 hours of refrigeration for best results.
Q: How long will the Oreo Cheesecake Bars last in the fridge?
A: Stored properly in an airtight container, the bars will keep in the refrigerator for up to 5 days. For longer-term storage, they can be frozen for up to 2 months.
Q: How many servings does this recipe make?
A: This Oreo Cheesecake Bars recipe is designed to yield 12 servings. You can easily scale the recipe up or down depending on the size of your crowd.
Q: What if my cheesecake filling isn’t setting up properly?
A: Make sure you’ve thoroughly chilled the bars for at least 2-3 hours before slicing. If the filling still seems too soft, try popping the entire pan in the freezer for 30 minutes to firm it up.


Oreo Cheesecake Bars
- Total Time: 135
- Yield: 12 servings
Description
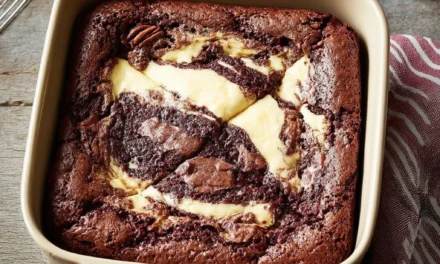
Indulge in the ultimate no-bake treat with these creamy, decadent Oreo Cheesecake Bars. With a crunchy Oreo crust and a rich, smooth cheesecake filling, they’re the perfect bite-sized dessert that’s sure to satisfy your sweet tooth.
Ingredients
– 24 Oreo cookies, crushed
– 4 ounces cream cheese, softened
– 1/4 cup granulated sugar
– 1 teaspoon vanilla extract
– 1 cup heavy whipping cream
– 1/4 cup powdered sugar
Instructions
1. Line an 8×8-inch baking pan with parchment paper, leaving some overhang on the sides for easy removal.
2. In a food processor, pulse the Oreo cookies until they are finely crushed. Press the Oreo crumbs into the bottom of the prepared baking pan.
3. In a large bowl, beat the cream cheese with a hand mixer until smooth and creamy. Add the granulated sugar and vanilla extract, and beat until well combined.
4. In a separate bowl, whip the heavy cream with a hand mixer until stiff peaks form. Gently fold the whipped cream into the cream cheese mixture until fully incorporated.
5. Spread the cheesecake filling over the Oreo crust in an even layer. Refrigerate for at least 2 hours, or until set.
6. When ready to serve, lift the Oreo Cheesecake Bars out of the pan using the parchment paper overhang. Cut into squares and dust with powdered sugar, if desired.
Notes
– For a richer flavor, use dark Oreos instead of regular.
– Refrigerate any leftovers in an airtight container for up to 5 days.
– Top with fresh berries or a drizzle of chocolate for an extra special touch.
- Prep Time: 15
- Category: Cakes, Pies & Cheesecakes
- Method: No-Bake
- Cuisine: American
Conclusion
These Oreo Cheesecake Bars are a true dessert showstopper that’s guaranteed to delight your taste buds. With their irresistible combination of chocolate, cream cheese, and whipped cream, it’s no wonder they’ve become a new family favorite in my household.
I encourage you to give this recipe a try – I promise it’ll have everyone asking for the secret to your success. Don’t be surprised if these Oreo Cheesecake Bars become the star of your next gathering or potluck. Just be sure to make an extra batch, because they’re going to disappear quickly! Let me know how they turn out in the comments below.
