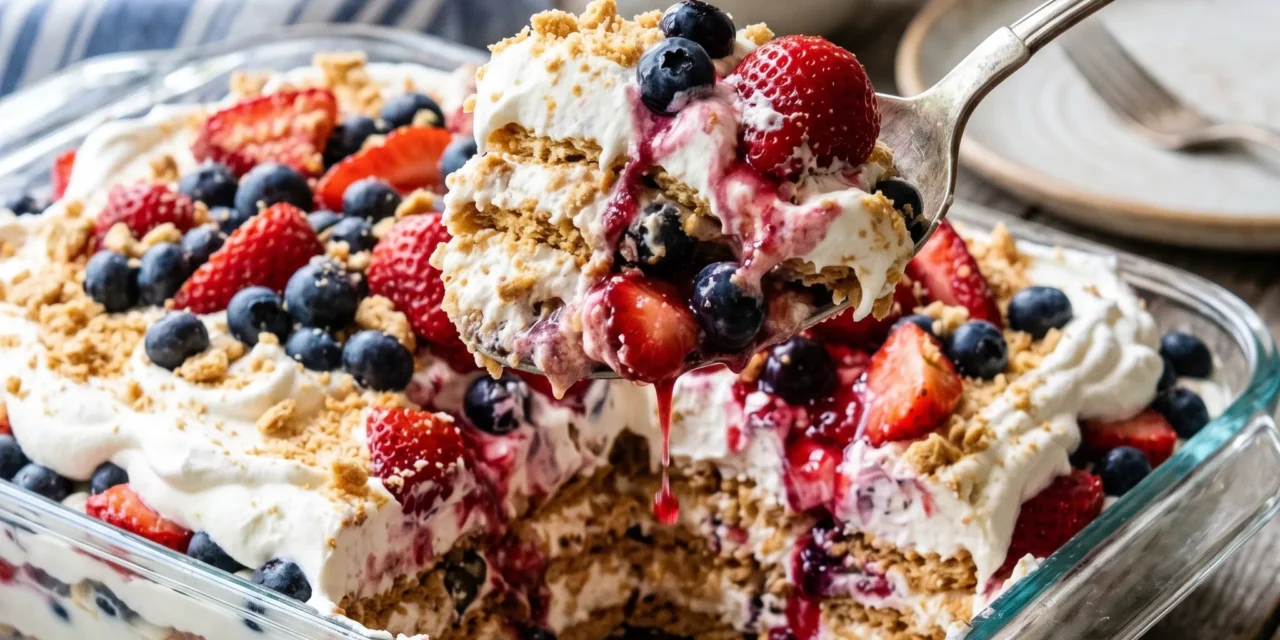
I still remember the first time I made a Red, White and Blue Icebox Cake for a Fourth of July picnic. It was a sweltering summer day, and I wanted something refreshing and festive to celebrate the occasion. As I gathered my ingredients, I could feel the excitement bubbling in the air. The combination of fresh strawberries and blueberries against the creamy backdrop of whipped cream was as vibrant as the fireworks that would light up the night sky. I can vividly recall my niece peeking over the counter, her eyes wide with anticipation, as I layered the ladyfingers and whipped cream mixture. The whole process took just about 15 minutes, which left plenty of time for us to play outdoor games and enjoy the sunshine.
The best part? After four hours of letting it chill in the fridge, we finally sliced into that beautiful Red, White and Blue Icebox Cake. The layers were stunning, and each bite was a delightful explosion of flavors and textures. I still hear my family talking about that cake; it became the highlight of our gathering. It’s easy to see why this dessert is a go-to for holidays or summer barbecues. The smooth creaminess, the sweet and tart notes from the berries, and the airy ladyfingers create a dessert that is both sophisticated and playfully simple. Making this Red, White and Blue Icebox Cake has become a cherished tradition in our family, and I can’t wait for you to try it and create your own delicious memories.
Table of Contents
Why This Red, White and Blue Icebox Cake Recipe Will Become Your Go-To
The Secret Behind Perfect Red, White and Blue Icebox Cake
This Red, White and Blue Icebox Cake is more than just a dessert; it’s a celebration of flavors and textures that come together beautifully. What sets this recipe apart is its simplicity and the use of fresh ingredients. With no cooking required, it’s a fantastic choice for those hot summer days when you want a sweet treat without heating up the kitchen. The creamy filling, made with heavy whipping cream and cream cheese, provides a rich texture that contrasts perfectly with the light and airy ladyfingers.
In just 15 minutes of prep time, you can create a dessert that looks and tastes like it took hours to prepare! The fresh strawberries and blueberries not only add a pop of color but also a burst of natural sweetness that elevates the overall experience. Plus, the chilling time allows the flavors to meld beautifully, resulting in a cake that’s just as delightful after a few hours in the fridge. This is the kind of dessert that brings people together, making it a perfect choice for celebrations or casual gatherings.
Essential Ingredients You’ll Need
To make the perfect Red, White and Blue Icebox Cake, you’ll need the following ingredients:
2 cups heavy whipping cream
Heavy whipping cream is the star of this dessert, providing a luscious texture. When whipped, it becomes light and airy, creating the cake’s creamy filling.
1 cup cream cheese, softened
Cream cheese adds richness and tanginess, balancing the sweetness of the whipped cream and making the filling smooth and creamy.
1 cup powdered sugar
Powdered sugar sweetens the filling without adding graininess. It dissolves easily, ensuring your cream mixture is silky smooth.
1 teaspoon vanilla extract
Vanilla extract enhances the flavors in the cake, adding a warm, aromatic note that rounds out the taste beautifully.
1 package (12 oz) ladyfinger cookies
Ladyfinger cookies are light and absorbent, making them the perfect base for this icebox cake. They give the cake structure while remaining tender and delicious.
1 cup fresh strawberries, sliced
Fresh strawberries offer a sweet and slightly tart flavor, adding vibrancy and color to the cake. Their juiciness contrasts nicely with the creaminess.
1 cup fresh blueberries
Blueberries provide a burst of natural sweetness and a pop of color, complementing the strawberries beautifully and adding a nutritional boost.
Fresh mint leaves for garnish (optional)
Mint leaves not only add an extra layer of flavor but also bring a refreshing touch to the presentation. They’re optional but highly recommended for that finishing touch.
Step-by-Step Red, White and Blue Icebox Cake Instructions
Preparing Your Red, White and Blue Icebox Cake
This Red, White and Blue Icebox Cake comes together in just 15 minutes of prep time, and there’s no cooking involved, which is a huge bonus! You’ll need a mixing bowl, a hand mixer or stand mixer, and a 9×13-inch baking dish for assembly. The chilling time is 240 minutes, allowing the flavors to marry and the cake to set perfectly.
1- Begin by whipping the heavy cream in a large mixing bowl. Use a hand mixer or stand mixer to beat the cream on medium speed until soft peaks form. This should take about 3-4 minutes. You want it to be fluffy but still hold its shape. The creamy texture will create a luscious filling that’s the heart of your Red, White and Blue Icebox Cake.
2- In another bowl, combine the softened cream cheese, powdered sugar, and vanilla extract. Beat this mixture until it’s smooth and well combined. You want the cream cheese to be fully incorporated without any lumps. This step ensures each bite of the cake has that delightful creamy flavor that complements the berries.
3- Gently fold the whipped cream into the cream cheese mixture. Use a spatula to combine them, being careful not to deflate the whipped cream. The goal is to create a light, airy filling that will layer beautifully with the ladyfingers. This should take about 2-3 minutes, and you’ll see the mixture turn into a lovely light and fluffy cream.
4- Now, it’s time to assemble! Place a layer of ladyfinger cookies at the bottom of your baking dish. You can dip each cookie briefly in milk or a splash of fruit juice for added flavor, but it’s not necessary. The ladyfingers should cover the bottom completely, creating a solid base for your cake.
5- Spread half of the cream mixture over the layer of ladyfingers. Use a spatula to smooth it out evenly. The cream should be thick enough to hold its shape but spreadable. Layering is key; you want to make sure each bite has an equal amount of cream and fruit.
6- Next, sprinkle half of the sliced strawberries and blueberries over the cream layer, creating a colorful and inviting display. Repeat the layering process with another layer of ladyfingers, the remaining cream mixture, and finish with the rest of the berries on top. Cover the dish with plastic wrap and place it in the refrigerator for at least 240 minutes. This chilling time allows the flavors to meld and the cake to set perfectly. When you’re ready to serve, garnish with fresh mint leaves for an extra touch of elegance.
Pro Tips for Success
To ensure your Red, White and Blue Icebox Cake turns out perfectly, here are some expert tips to keep in mind:
- Use cold equipment: Make sure your mixing bowls and beaters are cold before whipping the cream. This helps it whip up faster and achieve the right texture.
- Don’t rush the folding: When combining the whipped cream and cream cheese, take your time. Gently folding helps maintain the airiness of the whipped cream, which is crucial for the cake’s texture.
- Chill adequately: Allow the cake to chill for the full 240 minutes. This time is essential for the layers to meld together and set properly, ensuring a beautiful slice when served.
- Experiment with flavors: Feel free to swap out the berries for other seasonal fruits like raspberries or peaches. Just make sure to keep the color theme in mind for that patriotic flair!
- Keep it covered: Always cover the cake with plastic wrap while it chills. This prevents any unwanted odors from the fridge from seeping into your dessert.
Serving and Storing Your Red, White and Blue Icebox Cake
Perfect Pairings for Red, White and Blue Icebox Cake
This Red, White and Blue Icebox Cake serves 12, making it perfect for gatherings! Pair it with a light summer salad for a refreshing contrast. Consider a simple arugula salad with lemon vinaigrette; the acidity complements the sweetness of the cake beautifully.
For beverages, a chilled white sangria or lemonade pairs wonderfully with the cake’s flavors. The fruity notes will echo the fresh berries, creating a cohesive dining experience. This dessert is also fantastic for picnics or barbecues, where guests can enjoy it as a light finish after a savory meal.
Storage and Make-Ahead Tips
If you want to make your Red, White and Blue Icebox Cake ahead of time, it stores beautifully in the refrigerator for up to 3 days. Just keep it covered with plastic wrap to maintain freshness. If you need to prepare it further in advance, you can freeze the assembled cake for up to a month.
To freeze, wrap it tightly in plastic wrap, then foil to prevent freezer burn. When ready to serve, transfer it to the refrigerator to thaw overnight. Do not refreeze once it’s been thawed. For best results, consume within a few days after thawing to enjoy the ideal texture and flavor.
Variations and Dietary Adaptations for Red, White and Blue Icebox Cake
Creative Red, White and Blue Icebox Cake Variations
The beauty of the Red, White and Blue Icebox Cake is in its versatility. Here are a few creative variations to consider:
- Chocolate Red, White and Blue Icebox Cake: Incorporate chocolate ladyfingers or a layer of chocolate ganache between the cream and fruit layers. This adds a rich depth of flavor that chocolate lovers will adore.
- Coconut Red, White and Blue Icebox Cake: Add shredded coconut to the cream mixture for a tropical twist. Top with toasted coconut flakes for added texture and flavor.
- Lemon Blueberry Icebox Cake: Swap the strawberries for lemon curd and increase the blueberry amount. The tartness of the lemon with the blueberries creates a refreshing and zesty variation.
- Peach and Berry Icebox Cake: In summer, use fresh peaches instead of strawberries for a sweeter, juicy alternative. The combination of peaches and blueberries is a delightful summer treat.
Making Red, White and Blue Icebox Cake Diet-Friendly
If you have dietary restrictions, you can still enjoy this delicious dessert! Here are some easy swaps:
- Gluten-Free: Use gluten-free ladyfinger cookies. Many specialty stores offer gluten-free options that work just as well as traditional ones.
- Vegan: Substitute the heavy cream with coconut cream and the cream cheese with vegan cream cheese. Make sure to use powdered sugar that does not contain bone char.
- Low-Carb: Use sugar-free powdered sugar and ladyfinger alternatives made with almond flour. This will keep the carb count down while maintaining flavor.
- Dairy-Free: Replace the heavy cream and cream cheese with dairy-free alternatives, like cashew cream, to enjoy the same creamy texture without dairy.
Frequently Asked Questions
Q: Can I substitute the cream cheese for something else?
A: Yes! You can use mascarpone cheese or a dairy-free cream cheese alternative if you’re looking for a change or have dietary restrictions.
Q: How long does it take for the cake to set?
A: The total time for this recipe is 240 minutes, which includes chilling. This time is essential for the layers to meld and the cake to set properly.
Q: Can I make this cake ahead of time?
A: Absolutely! You can make the Red, White and Blue Icebox Cake up to three days in advance. Just keep it covered in the refrigerator for optimal freshness.
Q: How many servings does this cake make?
A: This recipe serves 12, making it perfect for gatherings or parties. You can easily cut it into smaller or larger pieces as needed.
Q: What should I do if my whipped cream doesn’t hold its shape?
A: If your whipped cream doesn’t hold its shape, it may not have been whipped long enough. Next time, whip it until it reaches soft peaks, and be sure to keep your mixing bowls cold!
Conclusion
This Red, White and Blue Icebox Cake is not just a dessert; it’s a celebration of togetherness, flavors, and cherished memories. I encourage you to try your hand at this delightful treat and share it with your loved ones. You’ll find that it’s not only easy to make but also a showstopper at any gathering. I’d love to hear about your experiences, so don’t hesitate to leave a comment or share your own variations. Let’s keep the joy of baking alive!