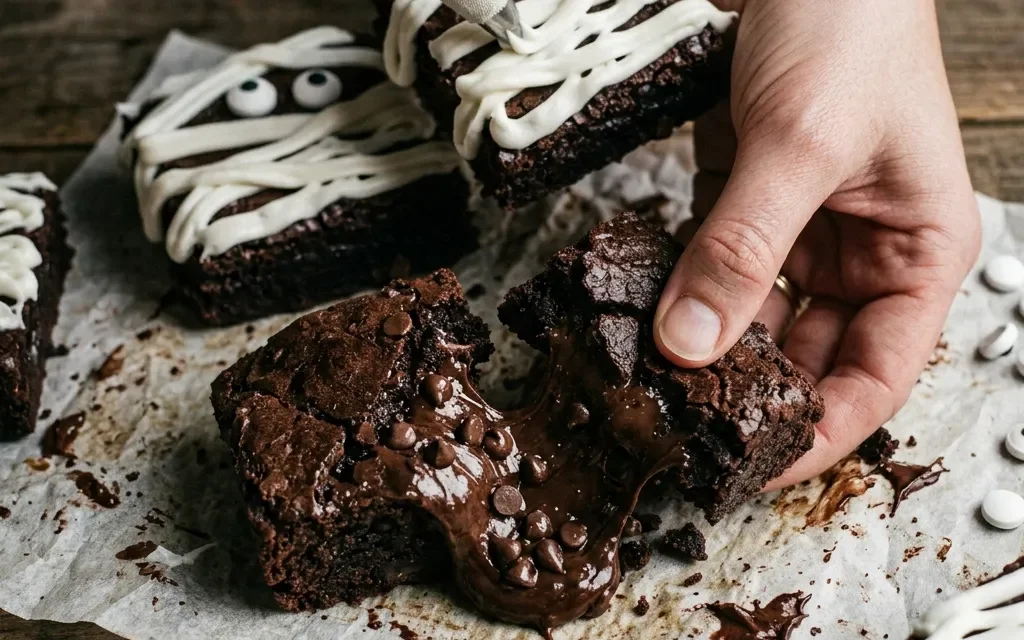
I still remember the first time I made Mummy Brownies for Halloween. My kids were bubbling with excitement as we prepared for our annual spooky movie night. The house was filled with the aroma of melting chocolate and buttery goodness, and I could hear them giggling as they imagined their favorite monsters sneaking around our living room. As we were prepping, I had the bright idea to turn our usual brownie recipe into something festive. I decided to create Mummy Brownies, a fun twist that would not only satisfy our sweet tooth but also bring a Halloween theme to our dessert table.
With a few simple ingredients, we transformed our classic brownies into adorable mummies with white icing bandages and candy eyes. As we draped the icing over the brownies, the kids helped by placing the eyes on top, and their laughter filled the kitchen. The Mummy Brownies turned out to be a hit, not just for their taste but for the joy they brought to our Halloween celebration. Now, every year, we whip up a batch together, and it’s become a beloved tradition that marks the start of the spooky season. These Mummy Brownies are more than just a treat; they’re a memory of laughter, creativity, and the joy of sharing spooky sweets with loved ones.
Table of Contents
Why This Mummy Brownies Recipe Will Become Your Go-To
The Secret Behind Perfect Mummy Brownies
This Mummy Brownies recipe stands out for its rich, fudgy texture that melts in your mouth, paired with the playful decoration that brings a smile to everyone’s face. The combination of butter and sugar creates a chewy brownie base, while the cocoa powder infuses it with deep chocolate flavor. What makes this recipe truly special is the balance of sweetness from the icing and the whimsical presentation that makes it perfect for Halloween or any festive gathering. You’ll love how easy it is to bring these Mummy Brownies to life, turning a simple dessert into a conversation starter. Whether you’re hosting a Halloween party or looking for a fun family activity, these brownies are sure to impress and delight.
Essential Ingredients You’ll Need
To create the perfect Mummy Brownies, you’ll need the following ingredients:
1 cup unsalted butter
Unsalted butter is essential for achieving the rich and creamy texture that makes these brownies melt-in-your-mouth delicious. It adds depth to the flavor without any added salt, allowing the sweetness of the sugar to shine through.
2 cups granulated sugar
Sugar is the key to achieving that perfect sweetness and chewy texture. It helps the brownies rise beautifully while ensuring they have a delightful, sugary crust on top.
4 large eggs
Eggs provide structure and moisture, making the brownies rich and fudgy. They also act as a binding agent, holding all the ingredients together perfectly.
1 teaspoon vanilla extract
Vanilla extract enhances the overall flavor profile, adding a warm, aromatic touch that complements the chocolate beautifully.
1 cup all-purpose flour
Flour is vital for giving the brownies their structure. It helps create that perfect chewy texture while providing the necessary backbone to hold everything together.
1 cup cocoa powder
Cocoa powder is what gives these Mummy Brownies their rich chocolate flavor. It adds depth and intensity, making them irresistibly delicious.
1/2 teaspoon baking powder
Baking powder allows the brownies to rise slightly, contributing to their soft, cake-like texture while still remaining fudgy.
1/2 teaspoon salt
A pinch of salt enhances the sweetness and balances the flavors, ensuring the brownies taste completely harmonious.
White icing (for decoration)
White icing is what transforms these brownies into mummies! It’s used to create the bandage effect, making them not only delicious but visually appealing as well.
Candy eyes (for decoration)
Candy eyes are the finishing touch that brings these Mummy Brownies to life. They add a playful element that kids and adults alike will enjoy.
Step-by-Step Mummy Brownies Instructions
Preparing Your Mummy Brownies
Making Mummy Brownies is a fun and straightforward process that takes just 15 minutes to prep and 30 minutes to cook, for a total time of 45 minutes. You’ll need a mixing bowl, a whisk, a baking pan, and a piping bag for the icing. Just gather your ingredients, and let’s get started!
1- Preheat your oven to 350°F (175°C). Grease a 9×13 inch baking pan with cooking spray or line it with parchment paper for easy removal. The smell of the preheating oven will fill your kitchen with warmth, hinting at the delicious brownies that are about to come.
2- In a large mixing bowl, melt 1 cup of unsalted butter in the microwave or on the stovetop. Once melted, add in 2 cups of granulated sugar and whisk together until combined. The mixture should be smooth and glossy, indicating the sugar is sufficiently mixed with the butter.
3- Next, crack 4 large eggs into the bowl, one at a time, mixing well after each addition. Add 1 teaspoon of vanilla extract. The eggs will create a fluffy consistency, and the mixture should appear pale and frothy after about a minute of whisking.
4- Add in 1 cup of all-purpose flour, 1 cup of cocoa powder, 1/2 teaspoon of baking powder, and 1/2 teaspoon of salt. Gently fold the dry ingredients into the wet mixture using a spatula. Be careful not to overmix; you want to keep the batter thick and fudgy.
5- Pour the brownie batter into the prepared baking pan and spread it evenly with a spatula. Bake in the preheated oven for 30 minutes. The brownies are done when a toothpick inserted into the center comes out with a few moist crumbs, indicating they’re fudgy but not undercooked.
6- Once baked, remove the brownies from the oven and let them cool in the pan for about 15 minutes. After cooling, transfer them to a wire rack to cool completely before decorating. For serving, cut into 12 equal squares, and get ready to transform them into mummies!
Pro Tips for Success
To ensure your Mummy Brownies turn out perfectly every time, here are some expert tips:
1- Make sure your butter is fully melted before incorporating it with the sugar. This step helps create a smooth batter and gives your brownies that desirable chewy texture.
2- Don’t overmix the batter once you add the dry ingredients. Overmixing can result in tough brownies instead of the desired fudgy texture.
3- Use high-quality cocoa powder for the best flavor. The chocolatey taste is the star of the show, so don’t skimp on this key ingredient.
4- Allow the brownies to cool completely before decorating. This will prevent the icing from melting and losing its shape.
5- When decorating, use a piping bag for the icing to create neat and even “bandages.” This will enhance the spooky look of your Mummy Brownies.
Serving and Storing Your Mummy Brownies
Perfect Pairings for Mummy Brownies
These Mummy Brownies serve 12, making them perfect for gatherings. Pair them with a scoop of vanilla ice cream for a delightful contrast of temperatures and flavors. The creamy vanilla complements the rich chocolate beautifully. You might also enjoy them with a glass of cold milk or a warm cup of coffee, enhancing the overall experience. For Halloween parties, consider serving them alongside pumpkin spice desserts or themed snacks like ghost-shaped cookies, creating a festive dessert table that all guests will love.
Storage and Make-Ahead Tips
To store your Mummy Brownies, place them in an airtight container at room temperature for up to 3 days. If you want to keep them fresh for longer, you can refrigerate them for up to a week. For longer storage, wrap the brownies tightly in plastic wrap and place them in the freezer, where they can last for up to 3 months. To reheat, simply pop them in the microwave for about 10-15 seconds or warm them in the oven at 350°F (175°C) for 5-10 minutes until heated through.
Variations and Dietary Adaptations for Mummy Brownies
Creative Mummy Brownies Variations
Feel free to play around with this Mummy Brownies recipe! For a fun twist, try adding peppermint extract to the batter for chocolate mint Mummy Brownies. You could also mix in chocolate chips or nuts for added texture. For a seasonal variation, consider making pumpkin spice brownies by swapping out some of the cocoa powder with pumpkin puree and adding cinnamon and nutmeg. Another idea is to use colored icing to make rainbow mummies, perfect for any festive occasion beyond Halloween!
Making Mummy Brownies Diet-Friendly
If you have dietary restrictions, here are some easy swaps. For a gluten-free version, substitute the all-purpose flour with a 1:1 gluten-free baking blend. To make them vegan, replace the eggs with flax eggs (1 tablespoon of ground flaxseed mixed with 2.5 tablespoons of water per egg) and use vegan butter. You can also sweeten the brownies with coconut sugar or a sugar substitute for a low-carb option, adjusting the quantities slightly for taste.
Frequently Asked Questions
Q: Can I substitute the butter for oil?
A: Yes, you can use vegetable oil instead of butter, but the texture will differ slightly. You’ll want to use a little less oil—about 3/4 cup should do the trick.
Q: How long do these Mummy Brownies take to make?
A: The total time to make Mummy Brownies is 45 minutes, including 15 minutes for prep and 30 minutes for baking.
Q: How do I store leftover Mummy Brownies?
A: Store leftover Mummy Brownies in an airtight container at room temperature for up to 3 days, or refrigerate for up to a week.
Q: How many servings does this recipe yield?
A: This Mummy Brownies recipe yields 12 servings, making it perfect for sharing at parties or gatherings.
Q: What should I do if my brownies turn out too dry?
A: If your brownies are dry, it could be due to overbaking. Make sure to check for doneness a few minutes before the timer goes off. If they do come out dry, serve them warm with ice cream or whipped cream for added moisture.
Conclusion
I hope you’re as excited to try this Mummy Brownies recipe as I was when I first made them! They’re not just delicious but also a fantastic way to create lasting memories with family and friends. So gather your ingredients, get your kids involved in the decorating, and let the fun begin! Don’t forget to share your experiences in the comments below, and let’s spread the joy of Mummy Brownies together. Happy baking!