I still remember the first time I made Chocolate Cheesecake Bars. It was a chilly Sunday afternoon, and I wanted something sweet to brighten up the day. My friends were coming over for a small gathering, and I knew I had to impress them with something decadent. I flipped through my recipe book, and there it was—Chocolate Cheesecake Bars. The creamy, rich layers combined with a crunchy graham cracker crust sounded perfect.
As I gathered my ingredients, the aroma of melted chocolate wafted through the kitchen. I could already imagine my friends’ faces lighting up when they took that first bite. The excitement was palpable! I remember mixing the cream cheese and sugar, watching it turn into a velvety batter, and then folding in those semi-sweet chocolate chips. My mouth was watering just thinking about the deliciousness that awaited us.
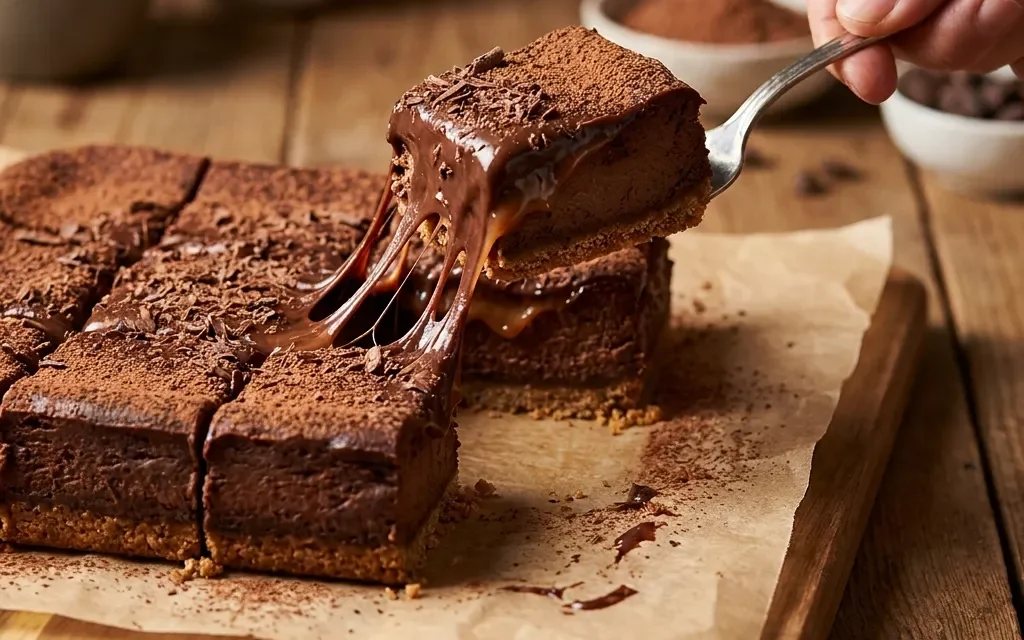
Once they were baked and cooled, I cut the bars into squares, and the first slice revealed that beautiful marbling of chocolate and cream. They were rich, satisfying, and everything I hoped they’d be. As my friends arrived, I served the bars with a dollop of whipped cream, and we all savored each bite together. That day turned into a lovely memory filled with laughter and joy, all thanks to those Chocolate Cheesecake Bars. Since then, they’ve become a staple in my recipe repertoire, and I can’t wait to share this recipe with you so you can create your own sweet memories!
Table of Contents
Why This Chocolate Cheesecake Bars Recipe Will Become Your Go-To
The Secret Behind Perfect Chocolate Cheesecake Bars
What makes these Chocolate Cheesecake Bars so special? It’s all in the balance of flavors and textures. The crust, made from graham cracker crumbs, provides a buttery crunch that complements the smooth, creamy filling. The melted semi-sweet chocolate melds into the cheesecake, creating a rich chocolate flavor that isn’t overpowering. Each bite is a delightful experience, with the slight bitterness of cocoa balancing the sweetness of the sugar.
This recipe is also surprisingly easy, making it perfect for both seasoned bakers and beginners. With just 15 minutes of prep time and 30 minutes in the oven, you’ll have a dessert that looks and tastes like it’s straight from a gourmet bakery. Plus, it serves 12, making it an ideal choice for gatherings, celebrations, or just a cozy night in. Once you’ve made these Chocolate Cheesecake Bars, they’ll quickly become a go-to recipe for any occasion.
Essential Ingredients You’ll Need
To create these delicious Chocolate Cheesecake Bars, you’ll need the following ingredients:
1 ½ cups graham cracker crumbs
The base of our bars, graham cracker crumbs bring a sweet and crunchy texture. They provide a perfect contrast to the smooth filling and hold the bars together.
½ cup unsalted butter, melted
Butter adds richness and moisture to the crust, helping it bind together while enhancing the overall flavor of the bars.
2 cups cream cheese, softened
Cream cheese is the star of the filling, giving it that signature creamy texture. It’s essential for achieving that luscious cheesecake consistency.
1 cup granulated sugar
Sugar sweetens the filling, balancing the slight tang of the cream cheese. It’s crucial for achieving the perfect dessert sweetness.
1 teaspoon vanilla extract
Vanilla extract adds depth and warmth to the flavor profile. It elevates the overall taste of the cheesecake filling, making it more inviting.
2 large eggs
Eggs provide structure and stability to the filling, ensuring the cheesecake sets properly once baked. They also contribute to the creamy texture.
1 cup semi-sweet chocolate chips, melted
These chips infuse the filling with rich chocolate flavor. Melting them before mixing ensures a smooth consistency and even distribution throughout the bars.
1/4 cup cocoa powder
Cocoa powder intensifies the chocolate flavor and adds a beautiful dark color to the filling. It’s the final touch that makes these bars utterly irresistible.
Step-by-Step Chocolate Cheesecake Bars Instructions
Preparing Your Chocolate Cheesecake Bars
Making these Chocolate Cheesecake Bars is a breeze with just 15 minutes of prep time and 30 minutes of cook time, totaling 45 minutes. To get started, you’ll need an 8×8 inch baking pan, parchment paper, a mixing bowl, and a hand mixer or stand mixer. Now, let’s dive into the steps!
1- Preheat your oven to 350°F (175°C). While it heats up, prepare your baking pan by lining it with parchment paper, leaving some overhang for easy removal later. This step will help the bars come out cleanly and prevent sticking.
2- In a mixing bowl, combine the graham cracker crumbs and melted butter. Use a fork to mix them until the crumbs are evenly coated and resemble wet sand. Press this mixture firmly into the bottom of the prepared pan. You want it to be compact so that the crust holds together beautifully after baking.
3- In another bowl, beat the softened cream cheese with granulated sugar until smooth and creamy, about 2-3 minutes. Make sure there are no lumps—this will ensure a silky texture in your filling. Add in the vanilla extract and mix until well combined.
4- Next, add the eggs one at a time, mixing well after each addition. This step is crucial for achieving a beautifully creamy filling. Once the eggs are incorporated, melt the semi-sweet chocolate chips and fold them into the cream cheese mixture along with the cocoa powder. You should see a rich, chocolatey batter forming.
5- Pour the chocolate filling over the graham cracker crust in the pan, smoothing the top with a spatula. Bake in the preheated oven for 30 minutes, or until the edges are set but the center still has a slight jiggle. The bars will firm up as they cool, so don’t worry if it seems a little soft.
6- Once baked, remove the pan from the oven and let it cool completely on a wire rack. After cooling, refrigerate for at least 2 hours before slicing into 12 bars. This chilling time allows the flavors to meld and the bars to set up perfectly. Serve chilled or at room temperature, and enjoy the rich, decadent chocolate goodness!
Pro Tips for Success
To ensure your Chocolate Cheesecake Bars turn out perfect every time, keep these expert tips in mind:
- Use room temperature ingredients: Make sure your cream cheese and eggs are at room temperature. This helps them blend smoothly, resulting in a creamy filling without lumps.
- Don’t overmix: When adding the eggs, mix just until combined. Overmixing can introduce too much air, leading to cracks in the cheesecake as it bakes.
- Check for doneness: The center should look slightly underbaked and jiggle just a bit. It will continue to firm up as it cools, so don’t worry if it seems a little soft at first.
- Chill properly: Allow the bars to cool completely at room temperature before refrigerating. This step prevents condensation from forming on the surface, which can affect the texture.
- Use high-quality chocolate: Since chocolate is a main ingredient, using high-quality semi-sweet chocolate will significantly enhance the flavor of your bars.
Serving and Storing Your Chocolate Cheesecake Bars
Perfect Pairings for Chocolate Cheesecake Bars
These Chocolate Cheesecake Bars are delicious on their own, but they can be elevated with some thoughtful pairings. Since this recipe serves 12, they’re perfect for sharing at gatherings. Consider serving them with a dollop of freshly whipped cream, a sprinkle of cocoa powder, or even some fresh berries for a pop of color and flavor.
For beverages, a nice cup of coffee or a glass of dessert wine pairs wonderfully with the chocolate richness. They’re also fantastic alongside a scoop of vanilla ice cream, creating a delightful contrast of temperatures and textures. Whether you’re hosting a birthday party or enjoying a casual family dinner, these bars are sure to impress!
Storage and Make-Ahead Tips
If you have leftovers (though I doubt you will!), storing your Chocolate Cheesecake Bars is easy. Keep them in an airtight container in the refrigerator for up to 5 days. Ensure they’re completely cooled before sealing to prevent moisture buildup.
For longer storage, you can freeze the bars. Wrap them tightly in plastic wrap and then place them in a freezer-safe container. They can last up to 3 months in the freezer. When you’re ready to enjoy them, simply thaw them in the refrigerator overnight and serve them chilled or at room temperature.
Variations and Dietary Adaptations for Chocolate Cheesecake Bars
Creative Chocolate Cheesecake Bars Variations
While the classic version is undeniably delicious, there are plenty of ways to switch things up! Here are a few creative variations:
- Mint Chocolate Cheesecake Bars: Add a teaspoon of peppermint extract to the filling for a refreshing twist. Top with crushed mint candies for extra flair.
- Salted Caramel Chocolate Cheesecake Bars: Drizzle homemade or store-bought salted caramel over the top before serving. The sweet and salty combination is divine!
- Nutty Chocolate Cheesecake Bars: Incorporate finely chopped nuts like walnuts or pecans into the crust for added crunch and flavor.
- Fruit-Infused Chocolate Cheesecake Bars: Swirl in some raspberry or strawberry puree into the filling before baking for a fruity contrast to the chocolate.
Making Chocolate Cheesecake Bars Diet-Friendly
If you have dietary restrictions, don’t worry; there are ways to adapt this recipe. Here are some substitutions:
- Gluten-free version: Use gluten-free graham cracker crumbs for the crust. Ensure all other ingredients are certified gluten-free.
- Vegan option: Swap the cream cheese for a vegan cream cheese alternative and replace the eggs with flaxseed meal mixed with water (1 tablespoon flaxseed meal + 3 tablespoons water = 1 egg). Use dairy-free chocolate chips as well.
- Low-carb adaptation: Substitute granulated sugar with a granulated sweetener like erythritol to lower the carb content. Use almond flour in place of graham cracker crumbs for the crust.
- Dairy-free version: Use coconut cream instead of cream cheese and almond milk in place of eggs for a lighter, dairy-free option.
Frequently Asked Questions
Q: Can I substitute the cream cheese?
A: Yes, you can use a vegan cream cheese alternative for a dairy-free version. Just ensure it has a similar consistency for the best results.
Q: How do I know when the bars are done baking?
A: The edges should be set while the center still has a slight jiggle. This will firm up as the bars cool, so don’t worry if it looks a little underbaked.
Q: Can I make these bars ahead of time?
A: Absolutely! You can prepare them a day or two in advance. Just store them in the refrigerator, and they’ll be ready to serve when you need them.
Q: How many servings does this recipe make?
A: This recipe serves 12 servings, making it perfect for gatherings or sharing with friends and family.
Q: What should I do if my bars crack while baking?
A: Cracks can happen if the mixture is overmixed or if the temperature is too high. To prevent this, mix just until combined and check for doneness a few minutes before the suggested baking time.
Conclusion
I hope you’re as excited to make these Chocolate Cheesecake Bars as I am! They’re not just a dessert; they’re an experience. Whether you’re celebrating a special occasion or simply treating yourself, these bars are sure to impress. Don’t forget to share your thoughts and experiences in the comments below. I’d love to hear how your Chocolate Cheesecake Bars turned out! So, roll up your sleeves and get baking—happiness is just a slice away!