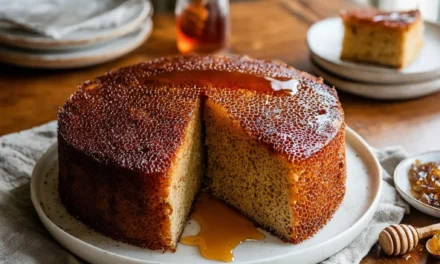
I remember the first time I made an Oreo Icebox Cake. It was a hot summer day, and the kids were clamoring for something sweet and cool. I had just discovered this no-bake recipe online, and it sounded like the perfect treat. With a pack of Oreo cookies in hand, I gathered the ingredients and set to work. The smell of the crushed cookies mixed with cream cheese and whipped cream filled the kitchen, making my mouth water. I layered the cookies with the creamy filling, and each layer looked more delicious than the last.
After just 15 minutes of prep, I slid the cake into the refrigerator, letting it chill for a few hours while we played outside. When it was finally time to dig in, I was greeted with excited cheers from the kids. The cake was decadent, creamy, and refreshing, with a perfect balance of flavors. Each slice was a delightful combination of crunchy cookie and rich filling. It felt like the ultimate summer dessert, and from that moment on, the Oreo Icebox Cake became a staple for family gatherings and birthday parties. Whether it’s a casual weekend treat or a special occasion, this cake never fails to impress.
If you’re looking for a dessert that’s quick, easy, and absolutely delicious, you’ve got to try this Oreo Icebox Cake! It’s become a beloved recipe in our family, and I can’t wait for you to experience the joy it brings.
Table of Contents
Why This Oreo Icebox Cake Recipe Will Become Your Go-To
The Secret Behind Perfect Oreo Icebox Cake
What makes this Oreo Icebox Cake truly special is its simplicity and flavor. You don’t need to be a master baker to whip up this delightful dessert. The beauty of it lies in the layers of crushed Oreo cookies, creamy filling, and the way it transforms in the fridge. As it chills, the cookies soften, melding beautifully with the cream, creating a texture that’s both rich and light. This cake is not just about taste; it’s about the experience of making something that brings joy to those you love. With no baking required, it’s perfect for those hot days when you want dessert but don’t want to heat up the kitchen.
Essential Ingredients You’ll Need
To create this Oreo Icebox Cake, you’ll need the following ingredients:
2 packages (14.3 oz each) Oreo cookies
The star of the show! These chocolate sandwich cookies provide a delightful crunch and rich flavor that forms the base of your cake.
1 (8 oz) package cream cheese, softened
Cream cheese adds a creamy texture and slight tanginess to the filling, balancing the sweetness of the cake.
1 cup powdered sugar
This sweetener dissolves easily, creating a smooth filling that perfectly complements the cookies.
3 cups whipped cream (or 2 cups heavy cream whipped)
Whipped cream lightens the filling and adds a fluffy texture. You can use store-bought or make your own for an extra touch.
1 cup chocolate syrup
This syrup not only adds a rich chocolate flavor but also enhances the visual appeal when drizzled on top.
Optional: additional crushed Oreos for garnish
A sprinkle of crushed Oreos on top adds a finishing touch and makes it look extra special.
Step-by-Step Oreo Icebox Cake Instructions
Preparing Your Oreo Icebox Cake
This Oreo Icebox Cake is quick to prepare, taking only 15 minutes of active time. With a total time of 240 minutes, this includes chilling in the refrigerator. You’ll need a mixing bowl, a spatula, and a 9×13 inch baking dish to assemble the cake.
1- Start by crushing one package of Oreo cookies into fine crumbs. You can do this by placing them in a ziplock bag and using a rolling pin or simply pulsing them in a food processor. The goal is to have uniform crumbs that will create a solid base for the cake.
2- In a mixing bowl, combine the softened cream cheese and powdered sugar. Beat them together with an electric mixer until the mixture is smooth and creamy with no lumps. This should take about 2-3 minutes. You’ll know it’s ready when it’s light and fluffy.
3- Gently fold in the whipped cream. If you’re using heavy cream, whip it until stiff peaks form before folding. The mixture should be light and airy. Take your time with this step; you want to maintain the fluffiness of the whipped cream.
4- In your baking dish, start layering! Begin with a layer of crushed Oreos on the bottom. Spread a generous layer of the cream mixture over the Oreos. Repeat this process until you’ve used all the cookies and cream, finishing with a layer of the cream mixture on top.
5- Drizzle chocolate syrup over the top layer of cream. You can be creative here; zigzag it or make a beautiful pattern. This adds an enticing visual element and a rich chocolate flavor.
6- Cover the dish with plastic wrap and place it in the refrigerator. Let it chill for at least 4 hours, or ideally overnight. This allows the flavors to meld and the cookies to soften into a deliciously creamy treat. When you’re ready to serve, slice it into squares, and if desired, garnish with additional crushed Oreos.
Pro Tips for Success
To ensure your Oreo Icebox Cake turns out perfectly, keep these tips in mind:
- Use room temperature cream cheese. This makes blending easier and ensures a smooth filling.
- Don’t skip the chilling time! Allowing the cake to set in the fridge is crucial for the best texture.
- For an extra touch, consider adding a layer of chocolate or vanilla pudding between the cream layers.
- Be gentle when folding in the whipped cream—this preserves the light texture of the filling.
- If you want to make it ahead of time, you can assemble the cake a day in advance, making it perfect for parties.
Serving and Storing Your Oreo Icebox Cake
Perfect Pairings for Oreo Icebox Cake
This Oreo Icebox Cake serves 12, making it great for gatherings. Pair it with fresh berries, like strawberries or raspberries, for a tart contrast that cuts through the sweetness. A scoop of vanilla ice cream on the side also elevates the dessert experience. For beverages, serve it with a chilled glass of milk or a cup of coffee to balance the richness. It’s perfect for summer barbecues, birthday parties, or simply a delightful treat after dinner.
Storage and Make-Ahead Tips
Store your Oreo Icebox Cake in the refrigerator, tightly covered, for up to 5 days. If you want to make it in advance, it can be prepared and assembled a day ahead of time. For longer storage, consider freezing it. Wrap individual slices in plastic wrap, then place them in an airtight container for up to 2 months. To serve frozen slices, let them thaw in the fridge for about 2-3 hours before enjoying.
Variations and Dietary Adaptations for Oreo Icebox Cake
Creative Oreo Icebox Cake Variations
There are so many fun ways to switch up this Oreo Icebox Cake! Consider trying:
- Peanut Butter Delight: Add a layer of peanut butter to the cream mixture for a nutty twist.
- Mint Chocolate: Use mint Oreos instead of regular ones, and add a few drops of peppermint extract to the cream.
- Seasonal Flavors: For fall, use pumpkin spice cream cheese and crushed gingersnap cookies for an autumn-inspired version.
- Fruit Layering: Incorporate fresh fruit layers, such as banana slices or sliced strawberries, between the Oreo layers for added freshness.
Making Oreo Icebox Cake Diet-Friendly
If you’re looking to adapt this recipe for dietary restrictions, consider these substitutions:
- Gluten-Free: Use gluten-free Oreo cookies to make it suitable for those with gluten sensitivities.
- Vegan: Swap cream cheese for a vegan alternative, use coconut whipped cream, and choose dairy-free chocolate syrup.
- Low-Carb: Opt for almond flour cookies instead of Oreos and use a sugar substitute in the cream mixture.
Frequently Asked Questions
Q: Can I substitute the cream cheese?
A: Yes! You can use mascarpone cheese or a vegan cream cheese alternative for a different flavor profile.
Q: How long does it take for the cake to chill?
A: The total chilling time is about 240 minutes, but for the best results, let it chill overnight.
Q: Can I make this cake ahead of time?
A: Absolutely! You can prepare it a day in advance, and it will be just as delicious the next day.
Q: How many servings does this recipe yield?
A: This Oreo Icebox Cake serves 12, perfect for sharing with family and friends.
Q: What do I do if my cake is too soft?
A: If it seems too soft, it may need a bit more chilling time. Ensure it’s fully chilled before slicing.
Conclusion
I can’t express how much joy this Oreo Icebox Cake brings to gatherings. Its creamy layers and crunchy texture make it a crowd-pleaser every time. I encourage you to try making this recipe for your next event or simply as a treat for yourself. Don’t forget to share your experience in the comments below. Let’s spread the love for this delicious cake!