I still remember the first time I made Pizza Pinwheels with my kids on a rainy Saturday afternoon. It was one of those days when the sky was gray, and the kids were bouncing off the walls, desperate for something to do. I had a package of refrigerated pizza dough sitting in the fridge, and in a moment of inspiration, I decided to turn our kitchen into a mini pizzeria. We rolled the dough out on the counter, and I could already see their eyes lighting up with excitement.
As we layered on the shredded mozzarella cheese and pepperoni, the aroma of Italian seasoning filled the air. We laughed and chatted, each of us taking turns sprinkling the ingredients, making it a fun family affair. The best part? Watching them roll up the dough into pinwheels, their little hands working diligently while they giggled about how they were creating “pizza spirals.”
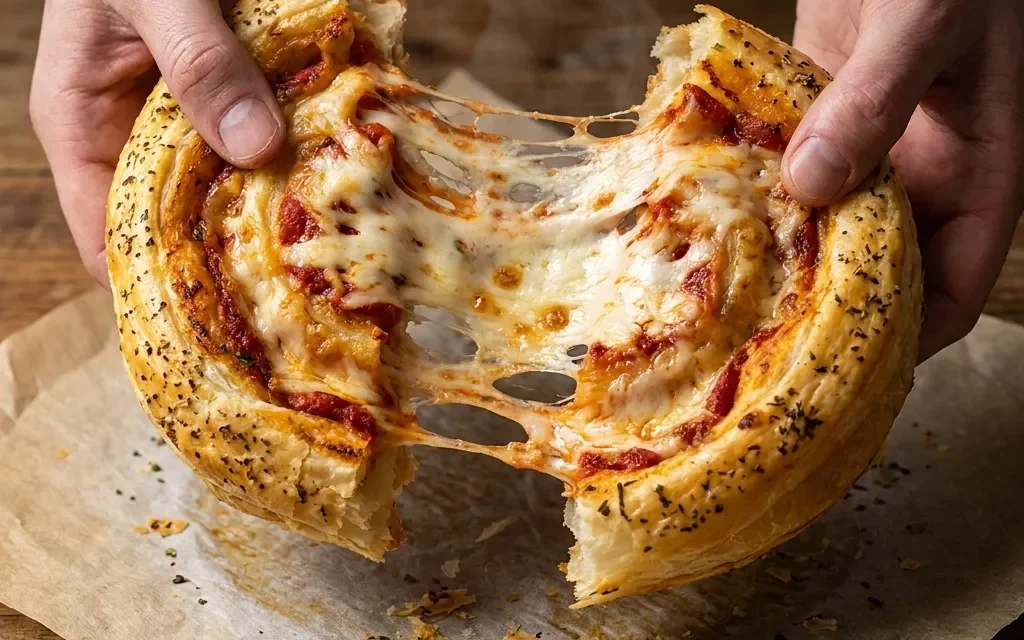
When the timer finally dinged, and we pulled the golden-brown Pizza Pinwheels out of the oven, the smell was heavenly. We dug into them with marinara sauce for dipping, and each bite was a warm hug of cheesy goodness. It became our go-to recipe for movie nights and family gatherings. These Pizza Pinwheels are more than just a dish; they’re a cherished memory and a delicious way to spend time together. Trust me, once you try making these, they’ll quickly become a beloved staple in your home too.
Table of Contents
Why This Pizza Pinwheels Recipe Will Become Your Go-To
The Secret Behind Perfect Pizza Pinwheels
What makes this Pizza Pinwheels recipe so special is its simplicity and versatility. You get to enjoy the classic flavors of pizza in a fun, bite-sized form, perfect for parties, game days, or just a cozy night in. The combination of gooey mozzarella, savory pepperoni, and a hint of Italian seasoning creates a mouthwatering flavor explosion that’s hard to resist. Plus, the use of refrigerated pizza dough means you’ll have a delicious snack ready in just 35 minutes—perfect for when those cravings hit unexpectedly!
The unique technique of rolling the dough tightly ensures that each slice reveals a beautiful spiral filled with melty cheese and zesty pepperoni. This not only makes for an impressive presentation but also ensures that every bite is packed with flavor. And let’s not forget about the marinara sauce for dipping; it adds a delightful tanginess that complements the richness of the pinwheels. Once you try these, you’ll find yourself reaching for this recipe time and time again.
Essential Ingredients You’ll Need
To make these delightful Pizza Pinwheels, you’ll need the following ingredients:
1 package refrigerated pizza dough
Using refrigerated pizza dough saves time and effort while still delivering that fresh-baked taste. It’s perfectly stretchy and easy to work with, making it ideal for rolling.
1 cup shredded mozzarella cheese
Mozzarella is the quintessential pizza cheese. Its creamy texture melts beautifully, creating that gooey, stretchy goodness we all crave in pizza.
1/2 cup sliced pepperoni
Pepperoni is a classic pizza topping that adds a savory, slightly spicy kick to each pinwheel. You can also substitute it with other meats or veggies for variety.
1/4 cup grated Parmesan cheese
Parmesan adds a nutty, salty flavor that elevates the overall taste. It’s the perfect finishing touch that complements the mozzarella.
1 teaspoon Italian seasoning
This blend of herbs infuses the pinwheels with aromatic notes that transport you to Italy. It enhances the flavors of the cheese and pepperoni beautifully.
1/2 cup marinara sauce (for dipping)
No Pizza Pinwheel is complete without a side of marinara sauce for dipping. Its tangy flavor balances the richness of the cheese and meat, making each bite even more enjoyable.
Step-by-Step Pizza Pinwheels Instructions
Preparing Your Pizza Pinwheels
Making these Pizza Pinwheels is a breeze. With a prep time of just 15 minutes and a cook time of 20 minutes, you’ll have a delicious snack ready in a total time of 35 minutes. Gather your ingredients and preheat your oven to 400°F (200°C). You’ll need a baking sheet lined with parchment paper for easy clean-up, and a rolling pin will help with flattening the dough.
1- Start by unrolling the package of refrigerated pizza dough onto a lightly floured surface. Use a rolling pin to gently roll the dough into a rectangle, about 1/4 inch thick. The dough should be soft and pliable, giving off a slight aroma of yeast.
2- Next, sprinkle the shredded mozzarella cheese evenly over the surface of the dough. Make sure to leave a small border around the edges so the cheese doesn’t spill out when you roll it. Follow that by layering the sliced pepperoni on top of the cheese. The colors should pop against the creamy white of the mozzarella.
3- Now, sprinkle the grated Parmesan cheese and Italian seasoning over the top. Use your hands to gently press the toppings into the cheese, ensuring they adhere well. This step is crucial for flavor distribution.
4- Carefully roll the dough away from you, starting at one of the long edges. As you roll, keep the pinwheel tight, ensuring that the layers of cheese and pepperoni are snugly packed together. The dough should feel smooth and stretchy as you work.
5- Once you have a tight roll, use a sharp knife or a pizza cutter to slice the dough into 12 equal pinwheels, about 1 inch thick. Place the pinwheels cut-side up on the prepared baking sheet. Arrange them with space in between so they can expand while baking.
6- Bake the pinwheels in the preheated oven for 15-20 minutes or until they’re golden brown and bubbly. You’ll know they’re done when they’re slightly puffed and the cheese is melted and gooey. Serve them warm alongside the marinara sauce for dipping, and watch them disappear!
Pro Tips for Success
- For an extra crispy bottom, preheat the baking sheet in the oven for 5-10 minutes before placing the pinwheels on it. This will help achieve a golden crust.
- Don’t overload on toppings; too many ingredients can make the pinwheels difficult to roll and may result in them unrolling during baking.
- If you’re using homemade dough, let it rest for 10 minutes after kneading. This relaxes the gluten and makes it easier to roll out.
- Experiment with different cheeses! Cheddar or provolone can add interesting flavors. Just ensure they melt well.
- Keep an eye on the pinwheels while they’re baking, as ovens can vary. Look for a golden-brown color and a bubbly texture.
Serving and Storing Your Pizza Pinwheels
Perfect Pairings for Pizza Pinwheels
These Pizza Pinwheels serve 12, making them a fantastic appetizer for gatherings. Pair them with a fresh garden salad with tangy vinaigrette dressing for a balanced meal. For a comforting touch, serve them alongside some garlic bread or cheesy breadsticks.
If you’re hosting a game day or movie night, consider pairing these pinwheels with your favorite beverages. A crisp soda or a nice glass of red wine complements the flavors beautifully. For a fun twist, you could even serve some beer that matches the Italian theme, like a light lager.
Storage and Make-Ahead Tips
If you find yourself with leftovers (though they’re unlikely!), you can store them in an airtight container in the refrigerator for up to 3 days. To reheat, simply pop them back in the oven at 350°F (175°C) for about 10 minutes or until warmed through.
For make-ahead options, you can assemble the Pizza Pinwheels the day before and store them in the fridge before baking. Just cover them tightly with plastic wrap. When you’re ready to bake, let them sit at room temperature for about 10-15 minutes before popping them in the oven. If you want to freeze them, place the uncooked pinwheels in a single layer on a baking sheet until they’re firm, then transfer them to a freezer-safe bag. They’ll last up to 2 months. Bake from frozen, adding about 5-10 minutes to the cooking time.
Variations and Dietary Adaptations for Pizza Pinwheels
Creative Pizza Pinwheels Variations
These Pizza Pinwheels are incredibly versatile! You can swap out the pepperoni for other meats like ham or cooked sausage, or even go vegetarian with spinach, mushrooms, and olives.
For a sweet twist, try spreading a layer of Nutella and adding banana slices before rolling. For a seasonal variation, incorporate pumpkin puree and ricotta cheese in the fall for a unique flavor profile. You could also create a breakfast version by using scrambled eggs, cheese, and crumbled bacon.
Making Pizza Pinwheels Diet-Friendly
If you’re looking to make these Pizza Pinwheels diet-friendly, there are plenty of substitutions available. For a gluten-free option, use a gluten-free pizza dough.
If you want to make them vegan, opt for vegan cheese and substitute the pepperoni with slices of bell pepper, zucchini, or other vegetables. For a low-carb version, consider using a cauliflower crust or a low-carb tortilla instead of traditional dough. These adaptations allow everyone to enjoy Pizza Pinwheels without compromising on taste.
Frequently Asked Questions
Q: Can I substitute the pepperoni with another type of meat?
A: Absolutely! You can use any cooked meat of your choice, such as ham, turkey, or even cooked sausage. Just ensure that it’s sliced thinly for easy rolling.
Q: How can I ensure my Pizza Pinwheels are cooked perfectly in 35 minutes?
A: By preheating your oven to 400°F (200°C) before starting, you’ll maximize your cooking time. Keep an eye on them during the last few minutes of baking for that perfect golden brown.
Q: Can I prepare Pizza Pinwheels ahead of time?
A: Yes! You can assemble them a day in advance and refrigerate them before baking. Let them sit at room temperature for about 10-15 minutes before baking for the best results.
Q: How many servings do these Pizza Pinwheels make?
A: This recipe yields 12 delightful pinwheels, perfect for sharing at parties or enjoying as a snack.
Q: What should I do if my pinwheels come out too soggy?
A: If the pinwheels are soggy, it may be due to too many wet ingredients. Make sure to drain any excess moisture from toppings. Baking them a bit longer can also help crisp them up.
Conclusion
I hope you’re as excited to try this Pizza Pinwheels recipe as I was the first time I made them! With just a few simple ingredients and 35 minutes of your time, you can create a delicious snack that’s perfect for any occasion. Don’t forget to share your experiences in the comments—I’d love to hear how they turned out for you! So roll up your sleeves, gather your loved ones in the kitchen, and enjoy the delightful process of making these tasty treats together. Happy cooking!