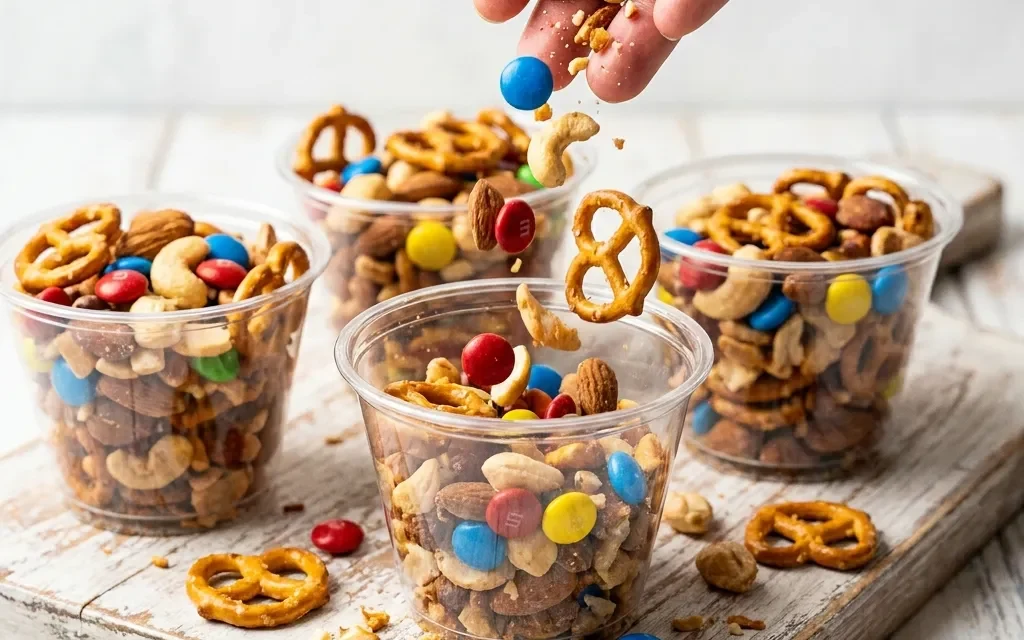
I’ll never forget the first time I made Trail Mix Snack Cups for a road trip with my friends. We were headed to a weekend camping trip, and I wanted to bring something that was not only delicious but also easy to grab on the go. As we packed the car with tents, sleeping bags, and a cooler full of snacks, I knew these little cups would be a hit. I remember mixing together the vibrant colors and textures of nuts, dried cranberries, and chocolate chips. The sweet smell of honey wafted through the kitchen as I drizzled it over the mixture.
When we finally hit the road, I couldn’t wait to share these Trail Mix Snack Cups with everyone. The excitement in the car was palpable as we took our first bites. The crunch of the nuts paired perfectly with the chewy cranberries and the rich chocolate chips. It was the ultimate snack for our adventure, keeping our energy up as we hiked and explored. Since that trip, I’ve made these Trail Mix Snack Cups countless times, tweaking the ingredients slightly but always coming back to this winning combination. They’re perfect for road trips, school lunches, or just a quick energy boost during a busy day. Honestly, once you try these, you’ll understand why they’ve become a staple in my snack rotation.
Table of Contents
Why This Trail Mix Snack Cups Recipe Will Become Your Go-To
The Secret Behind Perfect Trail Mix Snack Cups
What makes this Trail Mix Snack Cups recipe so special is its incredible versatility and simplicity. Within just 10 minutes, you can create a deliciously satisfying snack that caters to both sweet and salty cravings. The combination of mixed nuts, dried cranberries, chocolate chips, sunflower seeds, and pretzel pieces creates a flavor profile that’s both exciting and comforting. Each ingredient has its role, ensuring that every bite is a delightful surprise. The beauty of these Trail Mix Snack Cups lies in their adaptability; you can easily swap out ingredients based on your preferences or what you have at home. Plus, they’re a fantastic option for meal prep, allowing you to whip up a batch at the beginning of the week for quick, healthy snacks.
Essential Ingredients You’ll Need
To make these Trail Mix Snack Cups, you’ll need the following ingredients:
1 cup mixed nuts (almonds, cashews, walnuts)
Mixed nuts provide a satisfying crunch and are packed with healthy fats and protein, making them a nutrient-dense choice for snacking.
1 cup dried cranberries
The sweet-tart flavor of dried cranberries adds a burst of fruity goodness that balances the richness of the nuts and chocolate.
1 cup chocolate chips
Chocolate chips bring a touch of sweetness that makes these Trail Mix Snack Cups feel indulgent. You can use dark, milk, or even white chocolate depending on your preference.
1 cup sunflower seeds
Sunflower seeds contribute a delightful crunch and are an excellent source of vitamins and minerals, enhancing the nutritional profile of your snack.
1 cup pretzel pieces
Pretzel pieces add a salty, crunchy texture that complements the sweetness of the other ingredients, creating a perfect balance.
1 tablespoon honey (optional)
While optional, honey serves as a natural sweetener that helps bind the ingredients together, enhancing the overall flavor and texture of your Trail Mix Snack Cups.
Step-by-Step Trail Mix Snack Cups Instructions
Preparing Your Trail Mix Snack Cups
Making these Trail Mix Snack Cups is incredibly straightforward. With a prep time of just 10 minutes and no cooking required, you can have a delicious snack ready in no time. You’ll need a large mixing bowl and measuring cups to get started. Let’s dive into the steps:
1- In a large mixing bowl, combine 1 cup of mixed nuts, 1 cup of dried cranberries, 1 cup of chocolate chips, 1 cup of sunflower seeds, and 1 cup of pretzel pieces. As you mix, notice the array of colors and textures coming together. The nuts should be crunchy, the cranberries chewy, and the chocolate chips glossy.
2- If you’re using honey, now’s the time to drizzle 1 tablespoon over the mixture. Use a spatula to gently stir everything together, ensuring that each ingredient is evenly coated. The honey will add a slight stickiness, making it easier for the mixture to hold together in the cups.
3- Once everything is well mixed, grab your serving cups. You can use small paper cups, silicone molds, or even muffin tins. Take a scoop of the mixture and fill each cup generously. Aim for about 1/4 cup in each, which should yield around 10 servings.
4- As you fill the cups, press down gently with the back of a spoon to compact the mixture. This will help the ingredients stick together and create a more structured snack cup. You’ll want to see the different layers, with nuts, seeds, and chocolate peeking through.
5- After filling and compacting all the cups, you can pop them in the refrigerator for about 10 minutes. This will allow the honey to set slightly, making the cups easier to handle. You’ll notice the mixture becoming firmer as it chills.
6- Once they’re ready, serve your Trail Mix Snack Cups immediately or store them in an airtight container. They’re perfect for on-the-go snacking, and you can even add a touch of creativity by garnishing with extra chocolate chips or a sprinkle of sea salt before serving.
Pro Tips for Success
To ensure that your Trail Mix Snack Cups turn out perfectly, keep these pro tips in mind:
- Use fresh ingredients: Ensure that your nuts and dried fruits are fresh for the best flavor and texture. Stale ingredients can ruin the overall taste.
- Customize to your taste: Feel free to swap out any nuts or seeds based on what you enjoy or have on hand. This recipe is flexible and can be tailored to your preferences.
- Don’t skip the refrigeration step: Chilling the cups for a short time helps everything bind together and makes them easier to handle.
- Portion control: Use a measuring cup to ensure you’re filling each cup with the same amount, making it easier to manage serving sizes.
- Experiment with flavors: Try adding spices or extracts like cinnamon or vanilla for a unique twist on the classic flavor profile.
Serving and Storing Your Trail Mix Snack Cups
Perfect Pairings for Trail Mix Snack Cups
These Trail Mix Snack Cups are incredibly versatile and can be paired with a variety of foods and drinks. Since this recipe serves 10, they’re perfect for sharing at gatherings or enjoying throughout the week. Pair them with a refreshing smoothie for a quick breakfast, or serve them alongside yogurt for a satisfying snack. They’re also great for picnics or road trips when you need something portable. For a sweet treat, consider pairing them with coffee or tea for a delightful afternoon snack.
Storage and Make-Ahead Tips
Storing your Trail Mix Snack Cups is simple. Keep them in an airtight container at room temperature for up to a week. If you want to extend their shelf life, you can refrigerate them, where they’ll last for up to two weeks. If you plan to make them ahead of time, prepare the cups and store them in the fridge. You can also freeze them for up to a month; just make sure to wrap them tightly to avoid freezer burn. When you’re ready to enjoy, simply let them thaw at room temperature for a few minutes.
Variations and Dietary Adaptations for Trail Mix Snack Cups
Creative Trail Mix Snack Cups Variations
There are endless ways to get creative with your Trail Mix Snack Cups. Here are a few variations to consider:
- Tropical Twist: Swap the dried cranberries for dried pineapple or mango and add shredded coconut for a tropical flavor.
- Spicy Kick: Mix in a pinch of cayenne or chili powder with the nuts for a spicy version that adds a bit of heat to the sweet and salty combination.
- Nut-Free Version: Substitute mixed nuts with extra seeds like pumpkin or flaxseeds for a nut-free option that’s still packed with flavor and nutrition.
- Holiday Special: During the holidays, consider adding festive ingredients like dark chocolate-covered raisins or seasonal spices like nutmeg and cinnamon to bring a seasonal flair.
Making Trail Mix Snack Cups Diet-Friendly
If you’re looking to make your Trail Mix Snack Cups more diet-friendly, here are some easy swaps:
- Gluten-Free: Ensure that your pretzel pieces are gluten-free, or substitute them with gluten-free crackers or puffed rice.
- Vegan: Omit the honey or replace it with maple syrup or agave nectar for a completely vegan-friendly option.
- Low-Carb: To reduce carbs, use unsweetened coconut flakes instead of dried fruit and eliminate the chocolate chips. You can also add in more seeds or nuts.
- Paleo: Use raw nuts and seeds, and replace chocolate chips with cacao nibs for a paleo-friendly version.
Frequently Asked Questions
Q: Can I substitute the nuts for other ingredients?
A: Absolutely! You can replace the mixed nuts with seeds or even puffed grains for a nut-free version. Just be mindful of any allergies.
Q: How long does it take to make these Trail Mix Snack Cups?
A: The total time is just 10 minutes, making them a quick and easy snack option that’s perfect for busy days.
Q: Can I make these ahead of time and store them?
A: Yes! You can prepare these Trail Mix Snack Cups ahead of time. They’ll keep well in an airtight container at room temperature for up to a week.
Q: How many servings does this recipe yield?
A: This recipe makes about 10 servings, perfect for sharing with friends or enjoying throughout the week.
Q: What should I do if my cups fall apart?
A: If they don’t hold together, try adding a bit more honey or letting them chill longer in the fridge before serving. Pressing them down firmly when filling can also help.
Conclusion
I hope you’re as excited to make these Trail Mix Snack Cups as I am! This recipe is not just a delightful treat; it’s a versatile snack that can adapt to your cravings and dietary needs. With just 10 minutes of prep time, you’ll have a mouthwatering snack that’s perfect for any occasion. I’d love to hear how yours turn out, so be sure to leave a comment or share your variations. Happy snacking!