I can still remember that one Sunday morning when my family and I decided to try something a little different for breakfast. We’d been stuck in a pancake rut, and I thought it was time to switch things up. That’s when I stumbled upon the idea of Sheet Pan Pancakes. At first, I was skeptical. Could a pancake really be made in a sheet pan and still taste like the fluffy, golden pancakes I grew up loving? But as soon as those pancakes emerged from the oven, my doubts melted away. The smell wafted through the house, and I couldn’t help but sneak a piece while they were still warm.
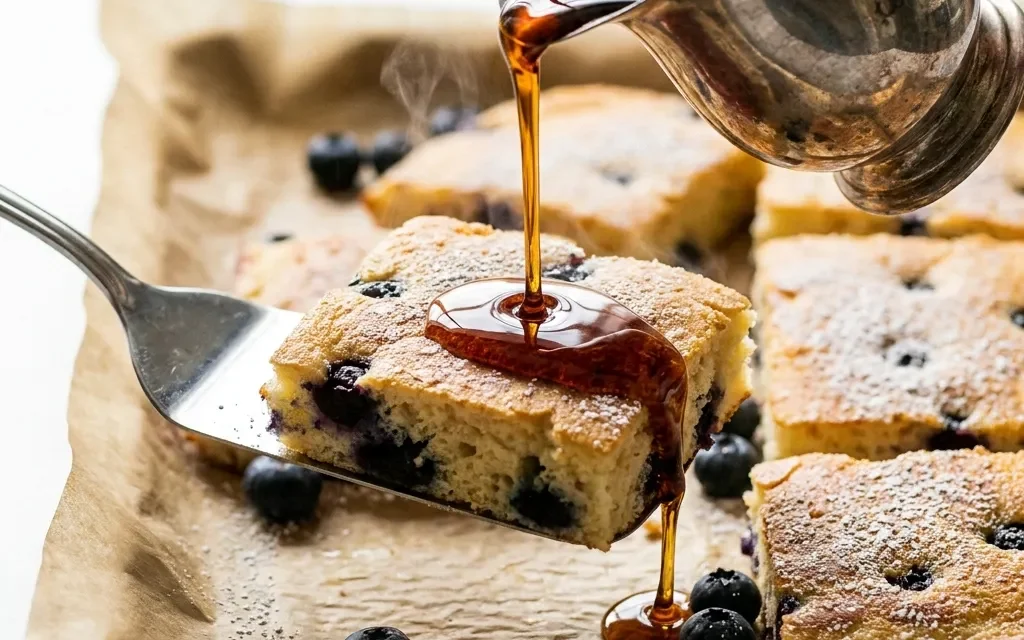
The beauty of Sheet Pan Pancakes is not just in their simplicity but also in their ability to feed a crowd. With a family of five, it’s usually a challenge to keep everyone happy at breakfast time. But with this recipe, I whipped up twelve servings in no time flat! No flipping, no mess—just pour, bake, and enjoy. My kids were thrilled, devouring them with a range of toppings from maple syrup to fresh berries. It turned into a little pancake party, and we all loved the fact that we could customize our servings.
Since that day, Sheet Pan Pancakes have become a staple in our household. They’re perfect for busy weekdays or lazy weekends, and you can even prep them the night before. If you’re looking for a fun, quick, and delicious breakfast option, I promise this recipe will become a favorite in your home too.
Table of Contents
Why This Sheet Pan Pancakes Recipe Will Become Your Go-To
The Secret Behind Perfect Sheet Pan Pancakes
What makes this Sheet Pan Pancakes recipe so special is its ease and versatility. Unlike traditional pancakes that require individual attention, this method allows you to pour the batter onto a single sheet pan and bake it all at once. This not only saves time but also ensures every piece comes out evenly cooked.
The best part? You can easily customize these pancakes to fit your family’s tastes. Want to add chocolate chips? Go for it! Feel like tossing in some blueberries or chopped bananas? You can do that too! The light and fluffy texture, combined with the golden-brown edges, makes this dish not just a breakfast but a delightful experience. If you’ve got a busy morning ahead or a brunch gathering to prepare for, these Sheet Pan Pancakes are your secret weapon.
Essential Ingredients You’ll Need
To create the perfect batch of Sheet Pan Pancakes, you’ll need the following ingredients:
2 cups all-purpose flour
All-purpose flour serves as the backbone of the pancake batter. It provides structure and helps achieve that fluffy texture we all love.
1/4 cup granulated sugar
Sugar adds a touch of sweetness, balancing the flavors and enhancing the pancakes’ golden color as they bake.
1 tablespoon baking powder
This is the magic ingredient that makes your pancakes rise and become light and airy. Fresh baking powder is essential for the best results.
1/2 teaspoon salt
Salt is critical for enhancing the flavors in your pancakes. It helps to balance the sweetness and brings everything together beautifully.
2 large eggs
Eggs act as a binding agent in the batter, providing moisture and richness for a tender pancake.
2 cups milk
Milk hydrates the dry ingredients and contributes to the pancakes’ overall fluffiness. Whole milk works best, but feel free to use your preferred type.
1/4 cup melted butter
Melted butter adds flavor and moisture to the pancakes, ensuring they’re rich and satisfying.
1 teaspoon vanilla extract
Vanilla extract elevates the flavor profile, providing a warm, comforting aroma that makes your pancakes irresistible.
Step-by-Step Sheet Pan Pancakes Instructions
Preparing Your Sheet Pan Pancakes
Making these Sheet Pan Pancakes is a breeze! With a prep time of just 15 minutes and a cook time of 20 minutes, you’ll have a delicious breakfast ready in a total of 35 minutes. You’ll need a large mixing bowl, a whisk, and a rimmed baking sheet (approx. 18×13 inches) for this recipe.
1- Preheat your oven to 425°F (220°C). While the oven heats, prepare your baking sheet by greasing it generously with cooking spray or lining it with parchment paper. This ensures easy removal of the pancakes once they’re baked.
2- In a large mixing bowl, whisk together the dry ingredients: the flour, sugar, baking powder, and salt until well combined. This step is crucial for ensuring your pancakes rise evenly and have a consistent texture.
3- In a separate bowl, crack the eggs and beat them lightly. Then, add the milk, melted butter, and vanilla extract, whisking until everything is well incorporated. The combination of wet ingredients should be smooth and slightly frothy, which indicates they’re ready to combine with the dry ingredients.
4- Gradually pour the wet mixture into the bowl with the dry ingredients. Stir gently until just combined, being careful not to over-mix. A few lumps are fine; this will keep your pancakes light and fluffy.
5- Pour the batter onto the prepared sheet pan, spreading it evenly into the corners with a spatula. You should see a lovely, thick pancake batter covering the entire surface.
6- Bake in the preheated oven for about 20 minutes, or until the edges are slightly golden and a toothpick inserted in the center comes out clean. Let it cool for a few minutes before cutting it into squares. Serve warm with your choice of toppings.
Pro Tips for Success
To ensure your Sheet Pan Pancakes turn out perfectly every time, keep these pro tips in mind:
- Always measure your flour correctly. Use the spoon-and-level method to avoid dense pancakes. Spoon the flour into your measuring cup and level it off with a knife.
- Don’t skip preheating the oven! An adequately heated oven helps achieve that beautiful rise and golden color.
- Resist the urge to over-mix! A few lumps in your batter are perfectly fine. Over-mixing can lead to tough pancakes.
- Experiment with toppings! Fresh fruit, whipped cream, or nuts can add a wonderful twist to your pancakes. Let everyone customize their plates for a fun breakfast experience.
- If you want to make them ahead, prepare the batter the night before but store it in the fridge. Let it sit at room temperature for about 30 minutes before pouring it onto the sheet pan to bake.
Serving and Storing Your Sheet Pan Pancakes
Perfect Pairings for Sheet Pan Pancakes
These Sheet Pan Pancakes serve 12, making them ideal for family gatherings or brunch with friends. Serve them with a variety of toppings, such as maple syrup, fresh berries, whipped cream, or even yogurt. For a complete breakfast experience, consider pairing them with crispy bacon or sausages. Fresh fruit smoothies or a warm cup of coffee also complement this dish beautifully, making it an enjoyable morning treat.
Storage and Make-Ahead Tips
If you have leftovers (though it’s hard to imagine!), you can store your Sheet Pan Pancakes in an airtight container in the refrigerator for up to 3 days. To reheat, simply pop them in the microwave for about 30 seconds or until warmed through. If you want to freeze them, cut the pancakes into squares, place them in a single layer on a baking sheet to freeze for about 1 hour, then transfer them to freezer bags. They’ll last up to 2 months in the freezer. To reheat frozen pancakes, microwave them directly from the freezer for 1-2 minutes, or until heated through.
Variations and Dietary Adaptations for Sheet Pan Pancakes
Creative Sheet Pan Pancakes Variations
The beauty of Sheet Pan Pancakes lies in their versatility. Here are a few variations you might enjoy:
- Chocolate Chip Pancakes: Stir in 1 cup of chocolate chips into the batter for a sweet twist that chocolate lovers will adore.
- Berry Bliss Pancakes: Fold in a mix of fresh berries, like blueberries and strawberries, for a fruity flavor and vibrant color.
- Banana Nut Pancakes: Mash 1 ripe banana and mix it into the batter, adding chopped walnuts for a delicious twist.
- Cinnamon Swirl Pancakes: Create a cinnamon sugar mixture (1/4 cup sugar and 1 tablespoon cinnamon) and swirl it into the batter before baking for a delightful flavor.
Making Sheet Pan Pancakes Diet-Friendly
If you have dietary restrictions, fret not! Here are some substitutions to make your Sheet Pan Pancakes work for your needs:
- Gluten-Free: Substitute the all-purpose flour with a gluten-free flour blend. Ensure it contains xanthan gum for the best results.
- Vegan: Replace the eggs with flax eggs (1 tablespoon ground flaxseed mixed with 2.5 tablespoons water per egg) and use almond or oat milk instead of dairy. Swap melted butter for coconut oil or a plant-based butter.
- Low-Carb: Use almond flour or coconut flour instead of all-purpose flour. You can also replace sugar with a low-carb sweetener like erythritol.
- Dairy-Free: Opt for almond milk or soy milk in place of regular milk, and use a dairy-free butter substitute.
Frequently Asked Questions
Q: Can I substitute whole wheat flour for all-purpose flour?
A: Yes, you can use whole wheat flour, but the pancakes may turn out denser. You can also try a mix of both to retain some lightness.
Q: How do I know when my pancakes are done baking?
A: Your Sheet Pan Pancakes are ready when the edges are golden and a toothpick inserted into the center comes out clean. This typically takes about 20 minutes.
Q: Can I prepare the batter the night before?
A: Absolutely! You can prepare the batter and store it in the refrigerator overnight. Just remember to let it sit at room temperature for about 30 minutes before baking.
Q: How many servings does this recipe yield?
A: This recipe makes 12 servings, perfect for feeding a crowd or enjoying leftovers throughout the week.
Q: What should I do if my pancakes turn out too dense?
A: Dense pancakes may be the result of over-mixing or using too much flour. Be sure to measure accurately and mix gently until just combined.
Conclusion
If you’re looking for a quick and easy breakfast that the whole family will love, these Sheet Pan Pancakes are the perfect solution. With their fluffy texture, customizable toppings, and ease of preparation, you’ll want to make them time and time again. I encourage you to give this recipe a try and make it a staple in your home. Don’t forget to share your experiences in the comments below! Happy cooking!