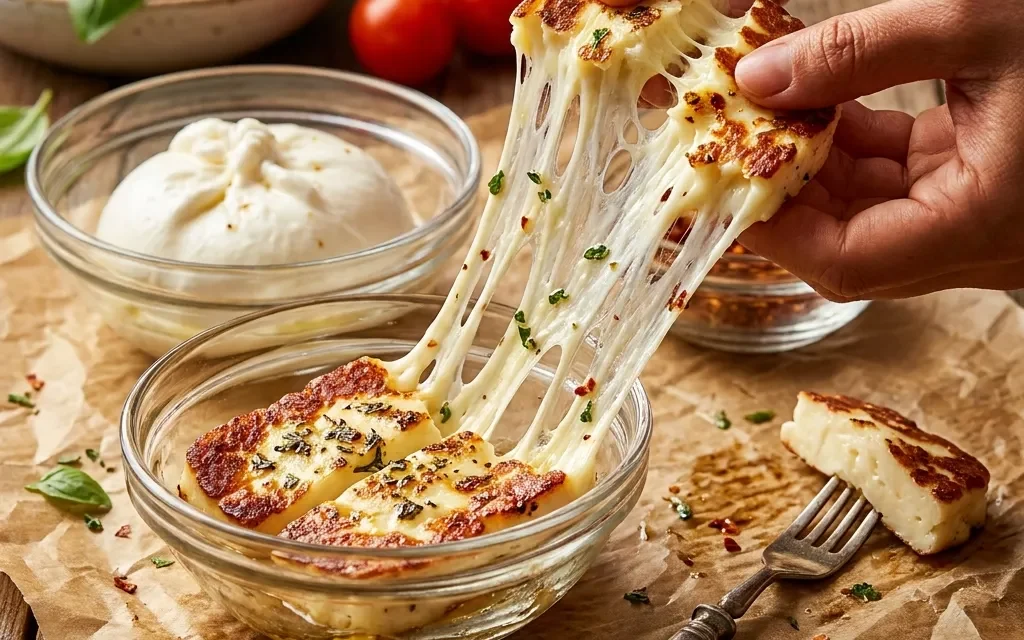
It was a warm summer evening, and I found myself at a quaint little café with friends, basking in the golden glow of the setting sun. As laughter and chatter enveloped us, a dish caught my eye at a nearby table—a vibrant Broiled Halloumi Burrata Salad. The sight of that beautifully arranged plate, with its grilled halloumi glistening under the light and the creamy burrata begging to be tasted, was irresistible. I could practically smell the fresh basil and ripe cherry tomatoes wafting through the air.
That moment lingered in my mind as I decided to recreate that stunning Broiled Halloumi Burrata Salad at home. I remember the first time I tried making it; I was nervous but excited. I gathered my ingredients, carefully choosing each element to coax out the best flavors. The first bite was a revelation—the saltiness of the halloumi paired perfectly with the creaminess of the burrata, and the freshness of the salad greens rounded it all out. It was a dish that not only satisfied my cravings but also made me feel light and refreshed.
Now, every time I whip up this Broiled Halloumi Burrata Salad, it takes me back to that sunlit café. It’s become a staple in my kitchen, especially for those warm evenings when I want something quick yet impressive. Whether I’m hosting friends or enjoying a quiet dinner for two, this salad always shines. Trust me, once you’ve experienced the delightful combination of flavors and textures in this salad, you’ll understand why it’s so special and why it’s become my go-to recipe.
Table of Contents
Why This Broiled Halloumi Burrata Salad Recipe Will Become Your Go-To
The Secret Behind Perfect Broiled Halloumi Burrata Salad
What makes this Broiled Halloumi Burrata Salad truly special is the delightful contrast of textures and flavors. The crispy, golden halloumi brings a savory crunch that pairs beautifully with the creamy, rich burrata. This isn’t just a salad; it’s an experience. The fresh salad greens and juicy cherry tomatoes add a refreshing element to the dish, making it a well-rounded meal.
The secret lies in the broiling technique—exposing the halloumi to high heat creates a beautiful crust while keeping the interior soft and slightly melty. Add in the aromatic basil and a drizzle of balsamic glaze, and you’ve got a dish that’s as visually stunning as it is delicious. It’s perfect for quick weeknight dinners or elegant gatherings. Once you’ve tasted this salad, you’ll find yourself coming back to it time and again.
Essential Ingredients You’ll Need
To create this mouthwatering Broiled Halloumi Burrata Salad, you’ll need the following ingredients:
8 ounces halloumi cheese
Halloumi is a semi-hard cheese that holds its shape during cooking. Its salty, savory flavor and crispy texture when broiled make it the star of this salad.
4 ounces burrata cheese
Burrata is a fresh Italian cheese that’s creamy inside and adds a luxurious richness to the salad. Its delicate flavor complements the saltiness of the halloumi beautifully.
2 cups mixed salad greens
A mix of greens not only adds color but also offers a variety of textures. Choose your favorites—spinach, arugula, and romaine all work well.
1 cup cherry tomatoes, halved
Cherry tomatoes provide a burst of sweetness and juiciness that balances the dish. Halving them allows their flavor to shine through.
1/4 cup fresh basil leaves
Fresh basil adds an aromatic note that brightens the entire salad. Its peppery flavor enhances the other ingredients and brings an herbal freshness.
1 tablespoon olive oil
A drizzle of olive oil is essential for enhancing the flavors of the salad. It also helps to keep the greens fresh and vibrant.
Salt and pepper to taste
These basic seasonings are vital for bringing out the flavors in each ingredient. Seasoning appropriately makes all the difference.
Balsamic glaze for drizzling (optional)
A drizzle of balsamic glaze adds a sweet-tart contrast that elevates the dish. It’s optional but highly recommended for that extra touch.
Step-by-Step Broiled Halloumi Burrata Salad Instructions
Preparing Your Broiled Halloumi Burrata Salad
This Broiled Halloumi Burrata Salad is quick and easy to prepare. With just 15 minutes of prep time and 5 minutes of cooking, you’ll have a delicious meal ready in a total of 20 minutes. You’ll need a broiler, a baking sheet, and a serving plate.
1- Start by preheating your broiler. This step is crucial because a hot broiler will give the halloumi that perfect golden crust. While the broiler heats, slice the halloumi into about 1/2-inch thick slices. This thickness ensures the cheese gets crispy on the outside while remaining soft inside.
2- Place the halloumi slices on a baking sheet lined with parchment paper. Drizzle a little olive oil over the cheese, and sprinkle salt and pepper to taste. Make sure each slice is evenly coated, allowing for a richer flavor when broiled.
3- Slide the baking sheet under the broiler and cook for about 3-5 minutes. Keep a close eye on it! The halloumi should turn golden brown and start to bubble. This is the moment you want to catch—the cheese should be crispy on the outside but still soft inside.
4- While the halloumi is broiling, prepare the salad. In a large bowl, combine the mixed salad greens, halved cherry tomatoes, and fresh basil leaves. Gently toss the ingredients together, allowing the basil to infuse its flavor throughout the salad.
5- Once the halloumi is perfectly broiled, remove it from the oven. It should be a beautiful golden brown with a crispy edge. Let it cool for a minute before adding it to the salad.
6- To serve, place the salad mixture on a plate and top it with the warm halloumi slices. Add the burrata cheese in the center, allowing it to be the star of the dish. Drizzle with balsamic glaze if desired, and enjoy this stunning salad while the halloumi is still warm.
Pro Tips for Success
- Cut the halloumi into even slices. This ensures they cook uniformly, giving you that perfect texture.
- Don’t walk away from the broiler! It can go from nicely toasted to burnt in a matter of seconds, so keep an eye on it.
- Use high-quality olive oil. A good oil enhances the flavors in the salad, making it taste gourmet.
- Feel free to customize the salad greens. Adding arugula or spinach can introduce new flavors and textures.
- Serve immediately. This salad is best enjoyed fresh, while the halloumi is warm and the burrata is creamy.
Serving and Storing Your Broiled Halloumi Burrata Salad
Perfect Pairings for Broiled Halloumi Burrata Salad
This Broiled Halloumi Burrata Salad serves 2, making it ideal for a light lunch or a romantic dinner. Pair it with crusty bread or a light appetizer like bruschetta for a complete meal. A crisp white wine, such as Sauvignon Blanc, complements the richness of the cheese beautifully.
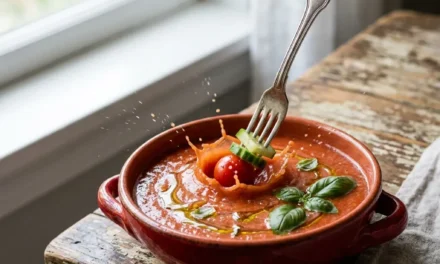
If you’re looking for side dishes, consider serving it alongside a light soup, such as a chilled gazpacho, or a refreshing fruit salad. These additions will round out your meal perfectly and keep the focus on the fresh, vibrant flavors of the salad.
Storage and Make-Ahead Tips
If you have leftovers, store the salad in an airtight container in the refrigerator. It’s best enjoyed fresh, but it will keep for up to 2 days. The halloumi may lose its crispiness, so you might want to broil it again before serving.
For make-ahead options, you can prepare the salad greens and tomatoes in advance. Just keep them separate from the halloumi and burrata. When you’re ready to eat, broil the halloumi, assemble the salad, and enjoy. This way, you can have a quick meal ready in no time.
Variations and Dietary Adaptations for Broiled Halloumi Burrata Salad
Creative Broiled Halloumi Burrata Salad Variations
This Broiled Halloumi Burrata Salad is wonderfully adaptable. Here are a few variations to try:
- Mediterranean Twist: Add olives and cucumbers for a Mediterranean flair. These ingredients bring an additional layer of flavor and texture.
- Seasonal Spin: In the fall, toss in roasted butternut squash or pumpkin for a hearty, seasonal variation that’s perfect for cooler days.
- Spicy Kick: Add sliced jalapeños or a sprinkle of red pepper flakes for a spicy kick that complements the creamy burrata.
- Grain Bowl: For a more substantial meal, serve the salad over a bed of cooked quinoa or farro, adding a nutritious element to your dish.
Making Broiled Halloumi Burrata Salad Diet-Friendly
If you have dietary restrictions, there are several ways to adapt this Broiled Halloumi Burrata Salad:
- Gluten-Free: This recipe is naturally gluten-free, so you can enjoy it without worry.
- Vegan: Swap the halloumi and burrata for plant-based cheese alternatives. Many brands offer delicious vegan cheeses that melt and taste great.
- Low-Carb: Skip the cheese and increase the amount of mixed greens and tomatoes. You can even add other low-carb vegetables like bell peppers or zucchini.
- Dairy-Free: Use cashew cream instead of burrata for a creamy, dairy-free option that still provides that luscious texture.
Frequently Asked Questions
Q: Can I substitute the halloumi with another cheese?
A: Yes, you can use cheeses like feta or paneer, but they’ll provide a different flavor and texture. Halloumi offers a unique crispy quality when broiled.
Q: How long does it take to prepare this salad?
A: The total time for this Broiled Halloumi Burrata Salad is 20 minutes—15 minutes for prep and 5 minutes for cooking under the broiler.
Q: Can I make this salad ahead of time?
A: You can prepare the salad ingredients ahead of time, but it’s best to broil the halloumi just before serving to maintain its texture.
Q: How many servings does this recipe yield?
A: This Broiled Halloumi Burrata Salad serves 2, making it perfect for a light meal or sharing.
Q: What should I do if my halloumi is too salty?
A: If your halloumi is overly salty, you can soak it in water for 30 minutes before cooking. This can help reduce the saltiness while retaining its unique flavor.
Conclusion
I hope you’re as excited to try this Broiled Halloumi Burrata Salad as I am! It’s a delightful dish that brings together fresh ingredients, rich flavors, and a touch of elegance. Whether you’re enjoying it for lunch, dinner, or a special occasion, this salad is sure to impress. Don’t forget to share your experience in the comments and let me know how your version turned out. Happy cooking!