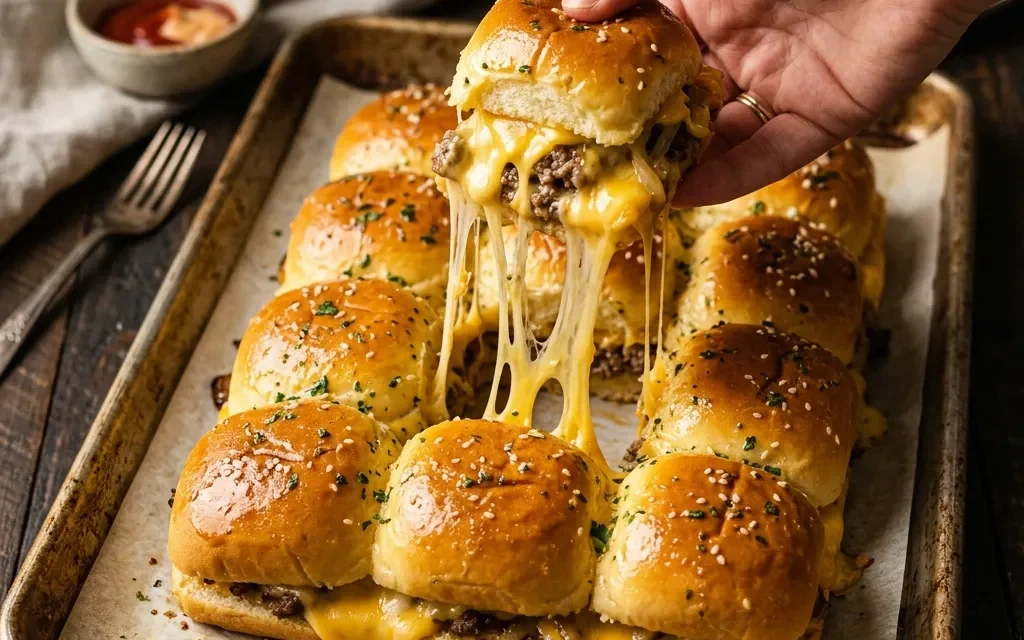
I still remember the first time I made Cheeseburger Sliders for a family gathering. It was a warm summer evening, and my cousins were visiting after a long time. I wanted something quick yet delicious to impress them. I thought, why not whip up some Cheeseburger Sliders? They’re bite-sized, packed with flavor, and always a crowd-pleaser. I gathered the ingredients and got to work, the aroma of sizzling beef filling the kitchen.
As I formed the patties, I remembered my mom’s advice: “Don’t overwork the meat; just shape it gently.” I was excited to see their faces light up when I served the sliders with all the toppings—fresh lettuce, juicy tomatoes, and crunchy pickles. We all gathered around the dining table, laughter echoing as we piled our plates high with these mini burgers.
The best part? Cheeseburger Sliders are perfect for any occasion, from game days to casual family dinners. Everyone could customize them to their liking, making each bite unique. I couldn’t help but feel proud as I watched my cousins devour them with glee, asking for seconds and thirds. That evening turned into a cherished memory, and from that day on, Cheeseburger Sliders became a staple at our family get-togethers. They’re not just food; they’re a catalyst for connection, laughter, and shared moments. So, if you’re looking for an easy and fun recipe that’s sure to impress, you’ve just found it!
Table of Contents
Why This Cheeseburger Sliders Recipe Will Become Your Go-To
The Secret Behind Perfect Cheeseburger Sliders
What sets this Cheeseburger Sliders recipe apart is its simplicity and flavor. Using just a handful of ingredients, you can create sliders that are juicy and tender, with a savory punch. The blend of salt, black pepper, garlic powder, and onion powder enhances the beef’s natural flavor without overpowering it. Plus, the use of cheddar cheese adds a creamy, melty texture that’s irresistible.
The real magic happens when you grill or pan-sear these sliders, giving them that beautiful caramelized crust. It’s all about balancing the flavors and textures, making each slider a delightful experience. You can easily customize them with your favorite toppings, allowing everyone to build their perfect bite. This recipe not only delivers on taste but also brings a sense of nostalgia and comfort. You’ll find yourself reaching for this recipe time and again, whether it’s a simple weeknight dinner or a lively backyard barbecue.
Essential Ingredients You’ll Need
To craft these mouthwatering Cheeseburger Sliders, you’ll need the following ingredients:
1 pound ground beef
The star of the show! Use high-quality ground beef with a fat content of about 80/20 for optimal juiciness.
1 teaspoon salt
Salt enhances the flavors of the beef, ensuring each slider is seasoned perfectly.
1/2 teaspoon black pepper
A touch of black pepper adds a hint of spice and depth to the flavor profile.
1 tablespoon garlic powder
Garlic powder contributes a savory aroma and taste, elevating the overall flavor experience.
1 tablespoon onion powder
Onion powder offers a subtle sweetness and complexity to the beef, balancing the savory notes.
12 slider buns
Soft, fluffy slider buns are essential for holding all the delicious fillings together. They should be small enough to fit comfortably in your hand.
6 slices cheddar cheese, halved
Cheddar cheese melts beautifully, creating a creamy layer that complements the savory beef perfectly.
Lettuce, tomato, and pickles for toppings
These fresh toppings provide crunch, acidity, and color, making your Cheeseburger Sliders not just tasty but visually appealing.
Step-by-Step Cheeseburger Sliders Instructions
Preparing Your Cheeseburger Sliders
Get ready to dive into making these Cheeseburger Sliders! The prep time is just 15 minutes, and with a cook time of 30 minutes, you can have your sliders ready in a total of 45 minutes. You’ll need a large mixing bowl, a skillet or grill, and a spatula for flipping.
1- Start by preheating your skillet or grill over medium-high heat. While it heats up, place the ground beef in a large mixing bowl. Add the salt, black pepper, garlic powder, and onion powder. Gently combine the ingredients with your hands, being careful not to overmix, which can lead to tough sliders.
2- Once the meat mixture is ready, form it into small patties, about 2 ounces each. Aim for 12 equal-sized patties. Make a small indentation in the center of each patty; this helps them cook evenly and prevents puffing.
3- Place the patties in the hot skillet or on the grill. Cook for about 3-4 minutes on one side until they develop a nice brown crust. As they cook, you’ll notice the sizzling sound and an irresistible aroma wafting through the air.
4- Flip the patties carefully and cook for another 3-4 minutes. At this point, place a half slice of cheddar cheese on each slider. Cover the pan or grill to help the cheese melt, which should take about 1-2 minutes.
5- While the cheese melts, prepare the slider buns by slicing them in half. You can toast them lightly on the skillet or grill if you prefer a bit of crunch.
6- Once the cheese is melted and the patties are cooked to your desired doneness, assemble the sliders. Place each patty on the bottom half of a bun, then add lettuce, tomato, and pickles. Top with the other half of the bun, and serve immediately for a delightful experience.
Pro Tips for Success
To ensure your Cheeseburger Sliders turn out perfectly, keep these tips in mind:
- Don’t overwork the meat when mixing in the spices; this can lead to dense sliders. Gently combine until just mixed.
- Use a meat thermometer to check the doneness of the sliders. Aim for an internal temperature of 160°F for perfectly cooked beef.
- Customize your toppings! Experiment with different cheeses, sauces, or even caramelized onions for extra flavor.
- If using a grill, ensure it’s preheated to prevent sticking. Lightly oil the grates for easy flipping.
- For a fun twist, try adding some barbecue sauce or jalapeños for a kick!
Serving and Storing Your Cheeseburger Sliders
Perfect Pairings for Cheeseburger Sliders
These Cheeseburger Sliders are incredibly versatile and pair well with a variety of sides and beverages. For a classic combo, serve them with crispy French fries or sweet potato fries. You could also opt for a refreshing coleslaw or a simple green salad for a lighter option.
For drinks, consider serving iced tea or lemonade for a refreshing complement. If you’re hosting a gathering, a selection of craft beers pairs beautifully with the savory flavor of the sliders. Given that this recipe yields 12 sliders, it’s perfect for game days or casual get-togethers, where everyone can help themselves and customize their sliders.
Storage and Make-Ahead Tips
If you have leftovers (though they’re unlikely!), you can store your Cheeseburger Sliders in an airtight container in the refrigerator for up to 3 days. To reheat, simply place them in the microwave for about 30-45 seconds or in the oven at 350°F for about 10 minutes until warmed through.
For meal prep, you can form the patties ahead of time and keep them in the fridge for up to 24 hours before cooking. Just remember to separate them with parchment paper to prevent sticking. You can also freeze the uncooked patties for up to 3 months. Thaw them overnight in the fridge before cooking for the best results.
Variations and Dietary Adaptations for Cheeseburger Sliders
Creative Cheeseburger Sliders Variations
Don’t hesitate to get creative with your Cheeseburger Sliders! Here are a few variations to try:
- Buffalo Chicken Sliders: Substitute ground chicken for the beef and mix in buffalo sauce for a spicy kick.
- Mushroom Swiss Sliders: Add sautéed mushrooms and Swiss cheese for an earthy, savory twist.
- BBQ Sliders: Mix barbecue sauce into the ground beef and top with coleslaw for a sweet and tangy flavor.
- Tex-Mex Sliders: Incorporate taco seasoning into the meat and top with guacamole and salsa for a fun fusion.
Making Cheeseburger Sliders Diet-Friendly
If you’re looking to adapt this recipe for dietary restrictions, here are some options:
- Gluten-Free: Use gluten-free slider buns or lettuce wraps instead of traditional buns for a lighter option.
- Vegan: Substitute the ground beef with a plant-based meat alternative and use vegan cheese to keep it dairy-free.
- Low-Carb: Skip the buns altogether and serve the sliders over a bed of greens or in lettuce wraps for a keto-friendly meal.
- Paleo: Use grass-fed ground beef and serve with avocado and fresh veggies instead of traditional toppings.
Frequently Asked Questions
Q: Can I substitute the ground beef for turkey or chicken?
A: Absolutely! You can use ground turkey or chicken, but be aware that they may require a bit more seasoning, as they have a milder flavor compared to beef.
Q: How can I ensure my sliders are cooked properly in 45 minutes?
A: By prepping the ingredients in advance and using a preheated grill or skillet, you’ll maximize your cooking efficiency. The total time includes both prep and cooking.
Q: Can I make these sliders ahead of time?
A: Yes! You can prepare the patties a day in advance and store them in the fridge. They can also be frozen for later use.
Q: How many sliders does this recipe make?
A: This recipe yields 12 sliders, making it perfect for sharing at gatherings or meal prepping for the week.
Q: What should I do if my sliders are dry?
A: Ensure you’re using ground beef with enough fat content, ideally 80/20. Avoid overcooking and consider adding a sauce or topping to enhance moisture.
Conclusion
I hope you’re as excited to try these Cheeseburger Sliders as I was when I first made them. They’re a simple yet delicious recipe that brings people together, making them perfect for any occasion. Whether you’re hosting a party or just enjoying a cozy night at home, these sliders are sure to impress. Don’t forget to share your experiences and any variations you try in the comments below! Happy cooking!